How To Create Professional Studio Portrait Photography Lighting Setups
The silver reflective umbrella is almost always overlooked by photographers, and when it is used it's usually only to light up a background. Most believe the beauty dish is superior but I respectfully disagree. No, the silver reflective umbrella when used appropriately is the ultimate beauty light.
Decaf Journal is reader-supported. When you buy links through our site, we may earn an affiliate commission.
Growing up I had always associated portrait photography with school yearbook photos, stuffy Sears portraits, or just plain uninspiring cliches. It wasn't until nearing the end of my time in photography school that I first became aware of what studio portrait photography could actually be. This was the first time that I was exposed to the work of Norman Jean Roy and Annie Leibovitz.
Month after month, their work graced the pages of highly regarded magazines such as Vanity Fair, Allure, Details, and a handful of other Conde Nast publications. I would watch every behind the scenes video from any shoot that I could get my hands on, playing the clips in slow motion and trying to reverse engineer what it was that made their portraits so magical.
It took a couple of years of consistently paying close attention to their work to finally grasp a hint of their techniques, but eventually it started to come together in my mind and lighting for effective studio portraits become substantially easier. It mainly comes down to the choice of lighting modifier, its distance / height in relation to the subject being photographed, and a very specific balance between the key light (main light) and a secondary fill light.
If it sounds simple, well that's because it actually is. So let's dive into specifically what's needed, and how to achieve repeatable professional studio portrait lighting.
© Nicklaus Walter | Camera: Canon 6D | Lens: Canon EF 85mm f/1.4L IS USM
Equipment Needed
Aside from a camera and a lens, there are several key pieces of equipment that are needed to produce a similar output to the images that are included in this article. I've listed what's needed below along with what I personally use in case you're looking for a recommendation.
- Studio strobes: Godox SK400II-V
- Light Meter: Sekonic LiteMaster Pro L-478D-U Light Meter
- Radio Triggers: PocketWizard PlusX Transceivers
- Light Stands: Manfrotto 1052BAC Compact Stand
- Large Octabanks: 60 inch Photek Softlighter ii
- Large Silver Reflective Umbrellas: 60 inch Photek Softlighter ii
- Large Strip Boxes: 60 inch Godox Strip Boxes
- Umbrella Reflectors: Godox Reflector
You'll notice I mentioned the 60 inch Photek Softlighter ii as both an octabank and a silver reflective umbrella. That's because it can easily be converted from one to the other on the fly, and that's what makes the best value in lighting modifiers today. It's worth mentioning that studio lighting equipment can be astronomically expensive, but it doesn't need to be. Photography studio lighting is now more affordable than ever, and we can mainly thank the lighting brand Godox for that.
A professional and reliable light meter is crucial to determine the lighting ratios that we'll get into in a moment. Essentially, the light meter will allow you to accurately measure difference between the highlight side of your subject and the shadow side in f-stops (for example, f11 vs f5.6).
You often can't trust what you see on the back of the LCD screen on the camera, so a light meter is absolutely necessary when using multiple flashes. I can't count how many times I've trusted the LCD on my camera, and then was bitterly disappointed when I viewed the images on the computer because the lighting effect that I thought I had achieved wasn't dialed in.
I'd also recommend to try to keep your studio lighting equipment as brand agnostic as possible. Don't buy proprietary gear for any system if possible so that you can mix, match, and upgrade as needed. That's why I choose Pocket Wizard for radio transceivers, and Photek as my primary lighting modifiers. They just work with everything.
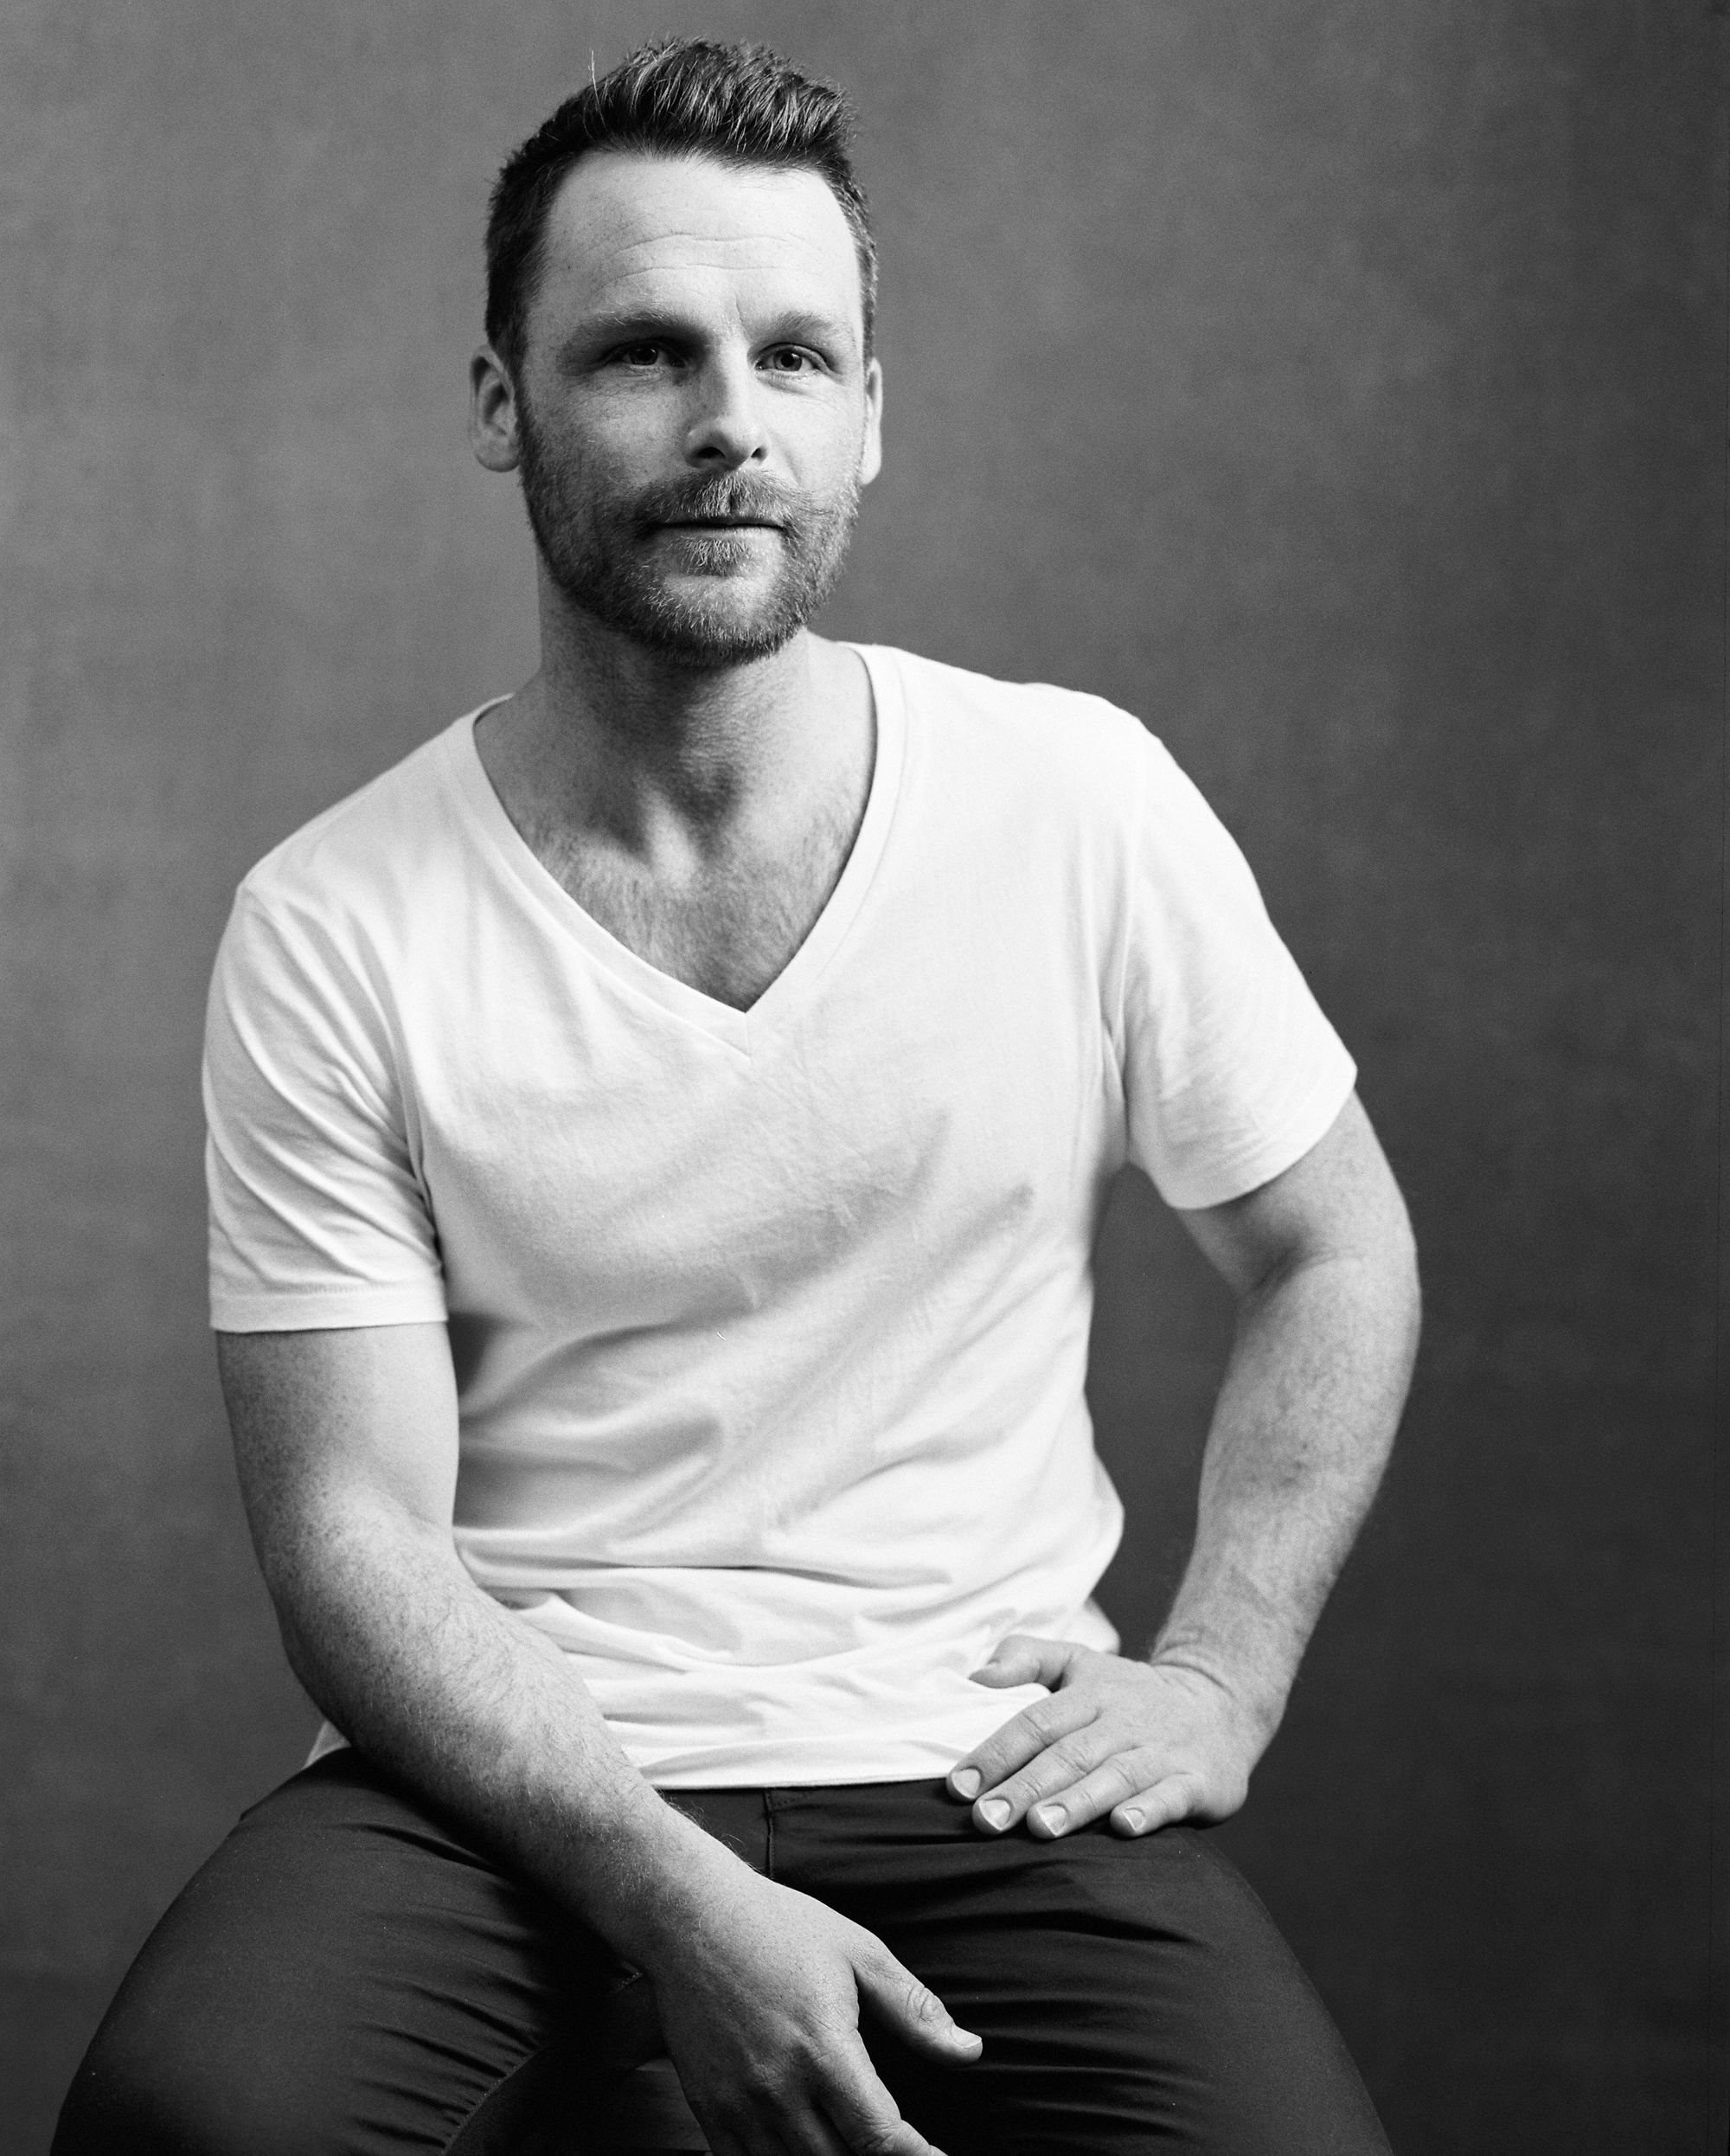
© Nicklaus Walter | Film: Kodak Tri-X 400 | Camera: Mamiya RZ67 Pro ii, 140mm Macro Lens
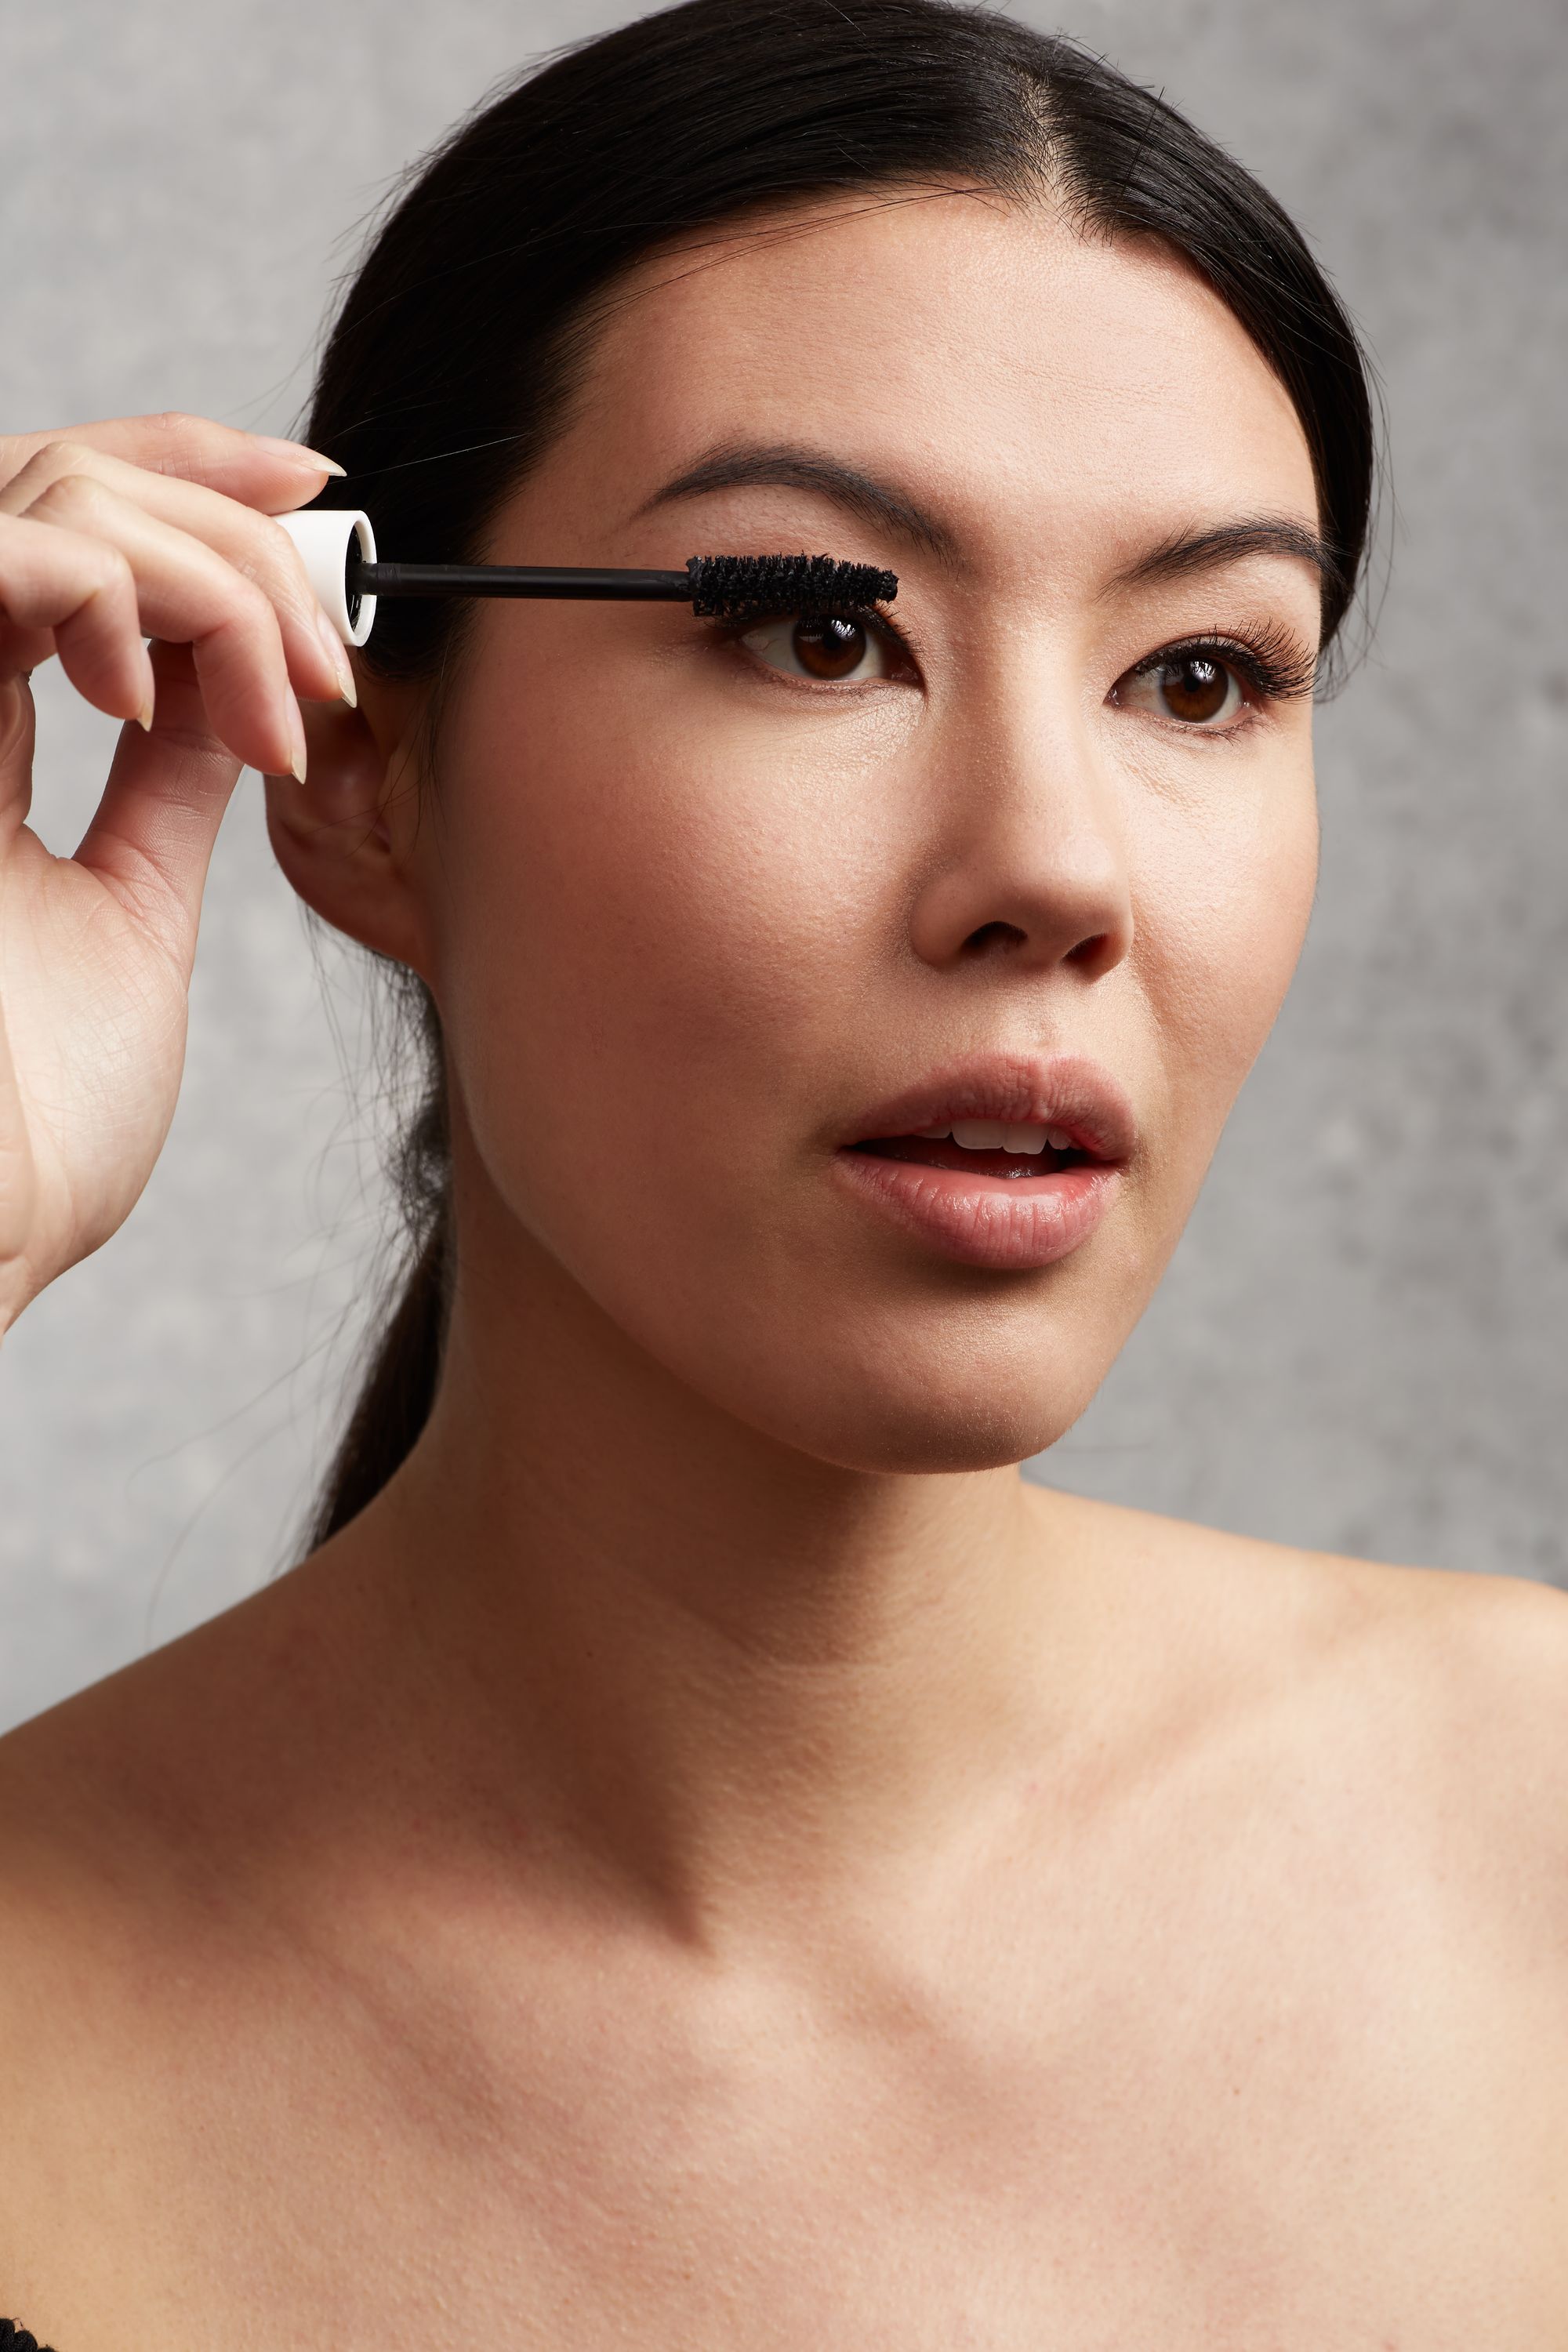
3 Stop Lighting Ratio
First up is the 3 stop lighting ratio. This is one of the most flattering lighting setups, and looks good on almost everybody.
Lighting Modifiers: Two 60 inch octabanks.
- Step 1: Place the key light on a 45 degree offset from the subject and bring the light in as close as physically possible to the subject without the octabank showing in the image. The 45 degree offset will ensure that the light spills over onto the cheek furthest from the light source into a triangle shape for classic Rembrandt style lighting.
- Step 2: On the opposite side of you from where the key light is, place the fill light slightly in front of, and above you the photographer, and just off camera so as to not creep into the frame. Think over your shoulder, but in front of you and not behind you.
- Step 3: Ensure that the bottom of the octabanks are placed just above shoulder level to the subject that you're photographing.
- Step 4: Set the key light (main light) exactly 3 stops brighter than the fill light. For example, if the key light is set to f11, then the fill light is set to f4.
- Step 5: It bears repeating, keep both modifiers as close to the subject as possible without getting into the frame. A light that's too far away from the subject will lead to an unremarkable image.
Here is what a 3 stop lighting ratio looks like in action
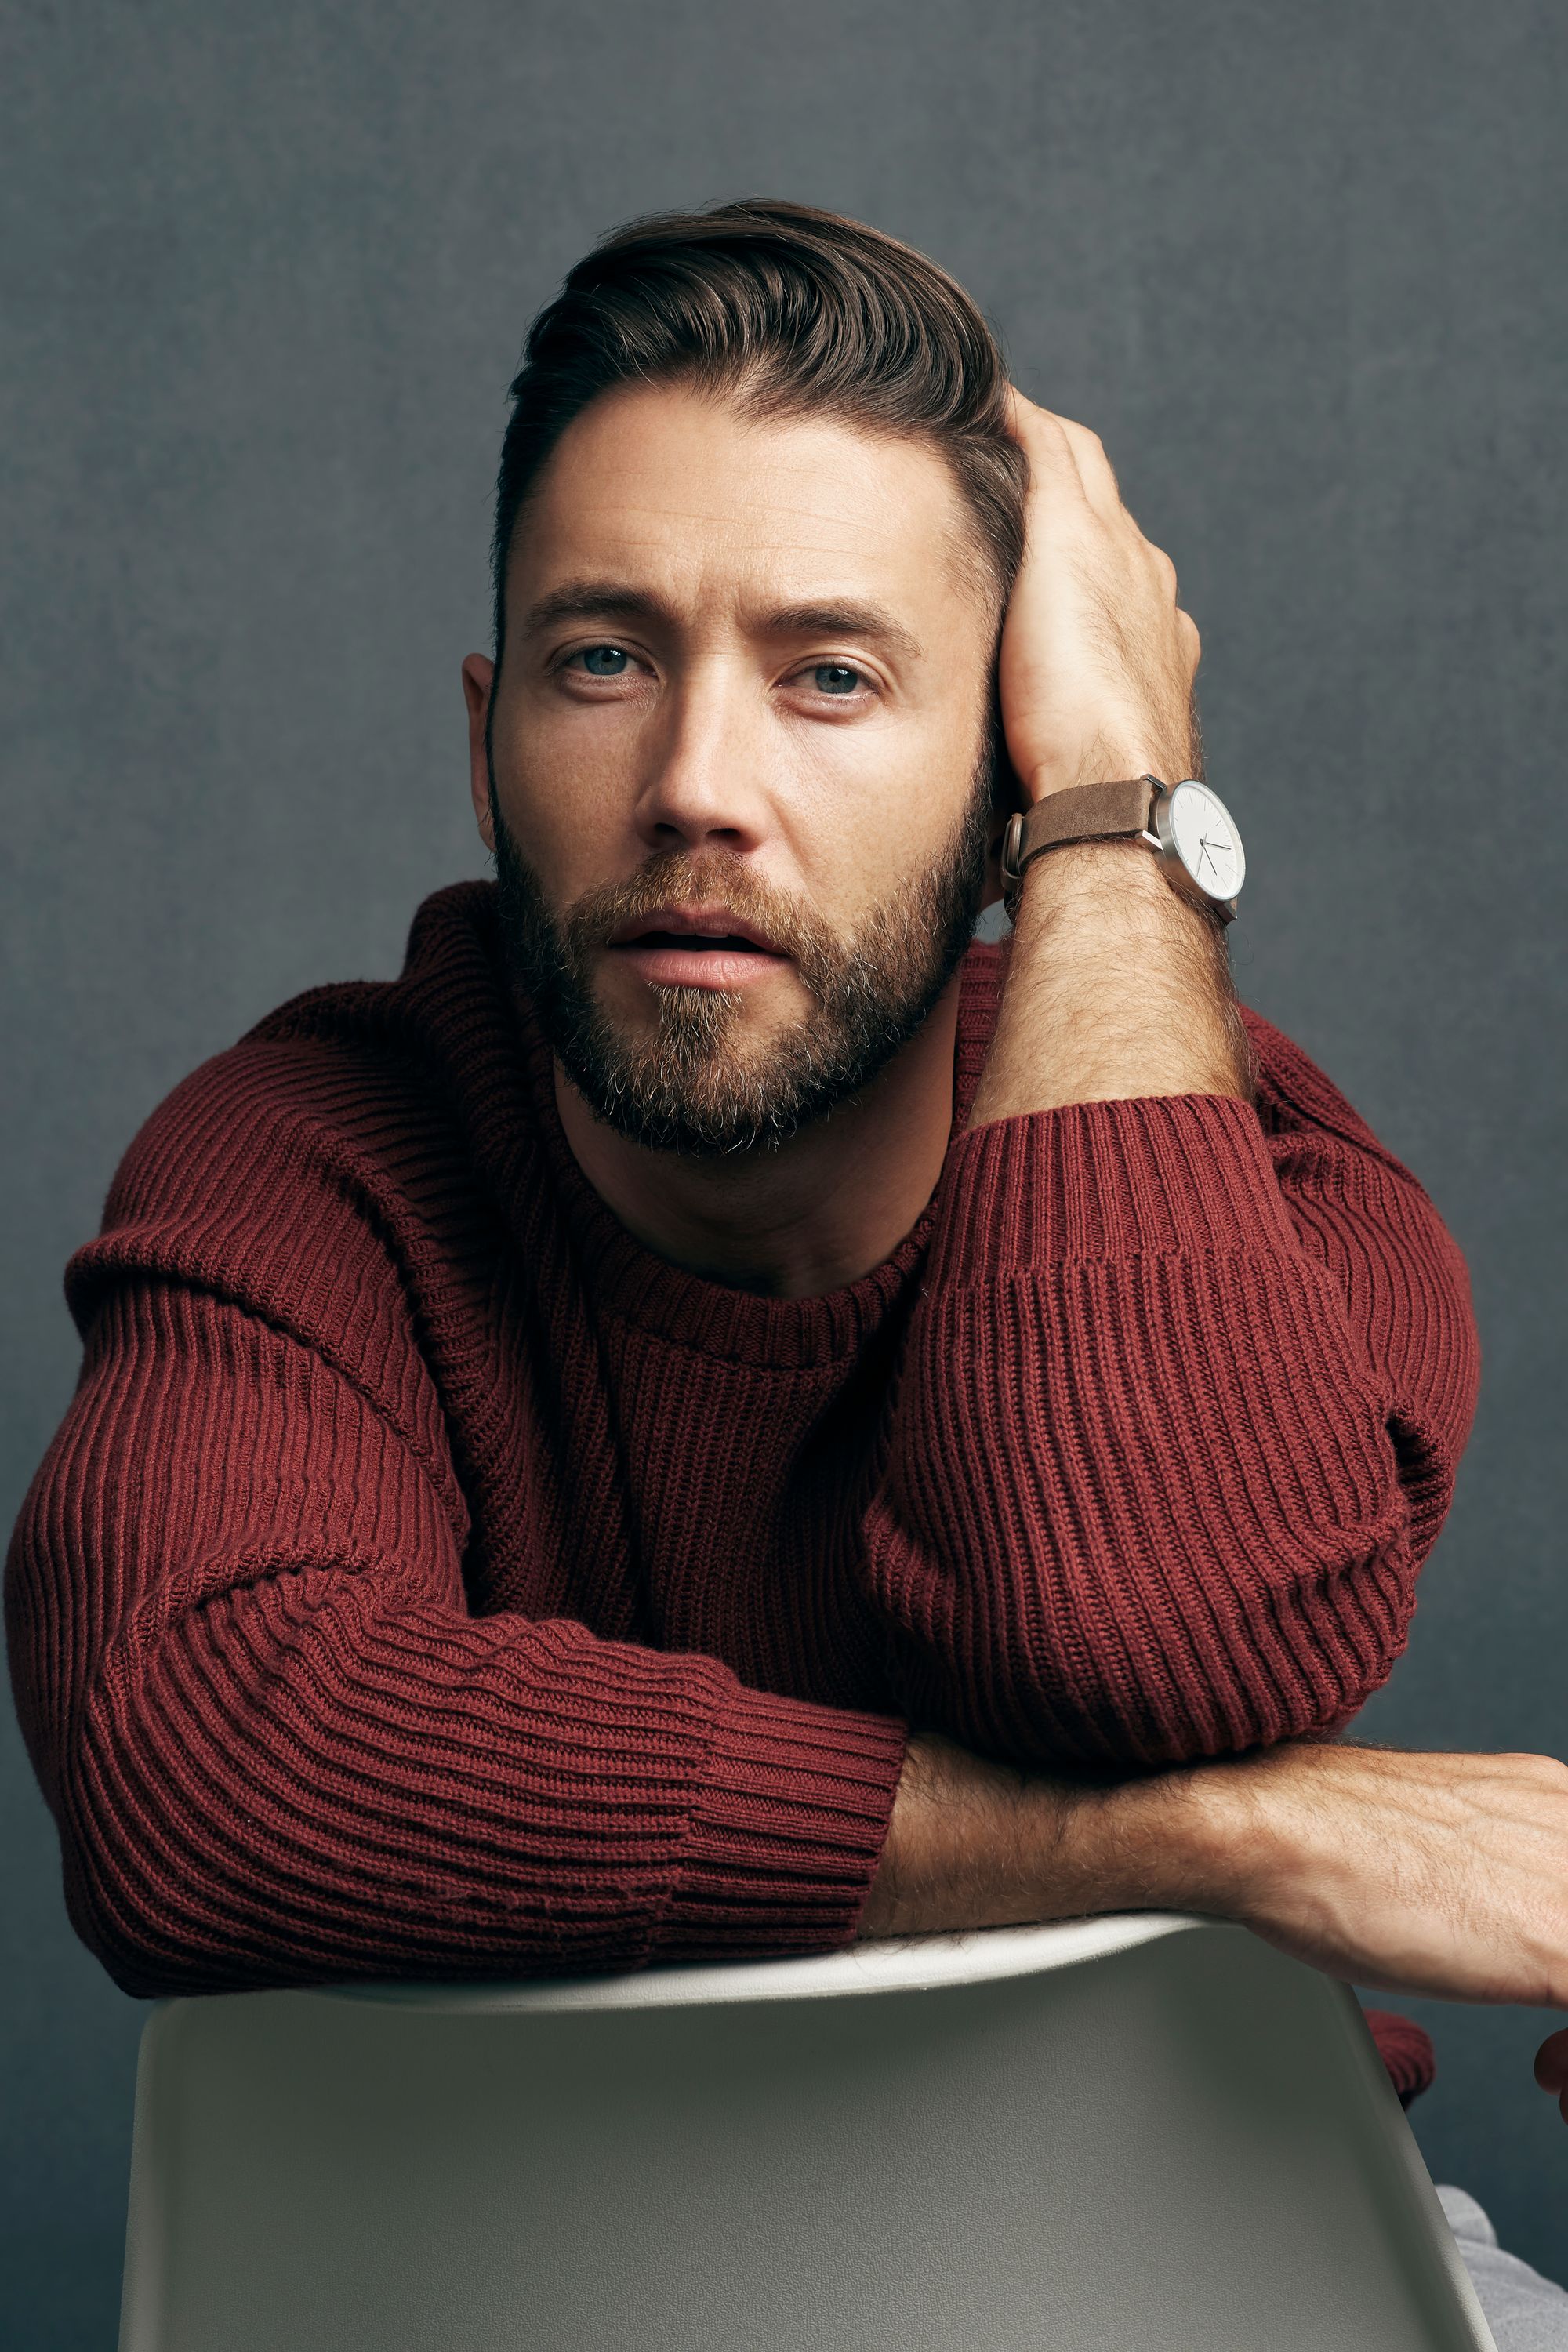
© Nicklaus Walter | Camera: Canon 6D | Lens: Canon EF 85mm f/1.4L IS USM
Tips
- You'll know the lighting is in the right ballpark when the catchlight of the main light in the subjects eye's appears as a half moon shape. If you can see the entire circle of the modifier, either the subject has very large eyes, or more likely the octabank isn't high enough which will lead to subpar results.
- If the fill light is too obvious in the subject's eyes, feel free to raise the light a bit higher until it isn't distracting as a competing catchlight in their eyes.
- If you go darker than 3 stops, you will begin to lose detail in the shadows which makes the portrait look less professional and gives you fewer options in post production.
- The lighting style will naturally change depending on the direction that your subject is facing. For example, the lighting can change from Rembrandt, to butterfly, to split lighting by simply directing the subject to face a certain direction.
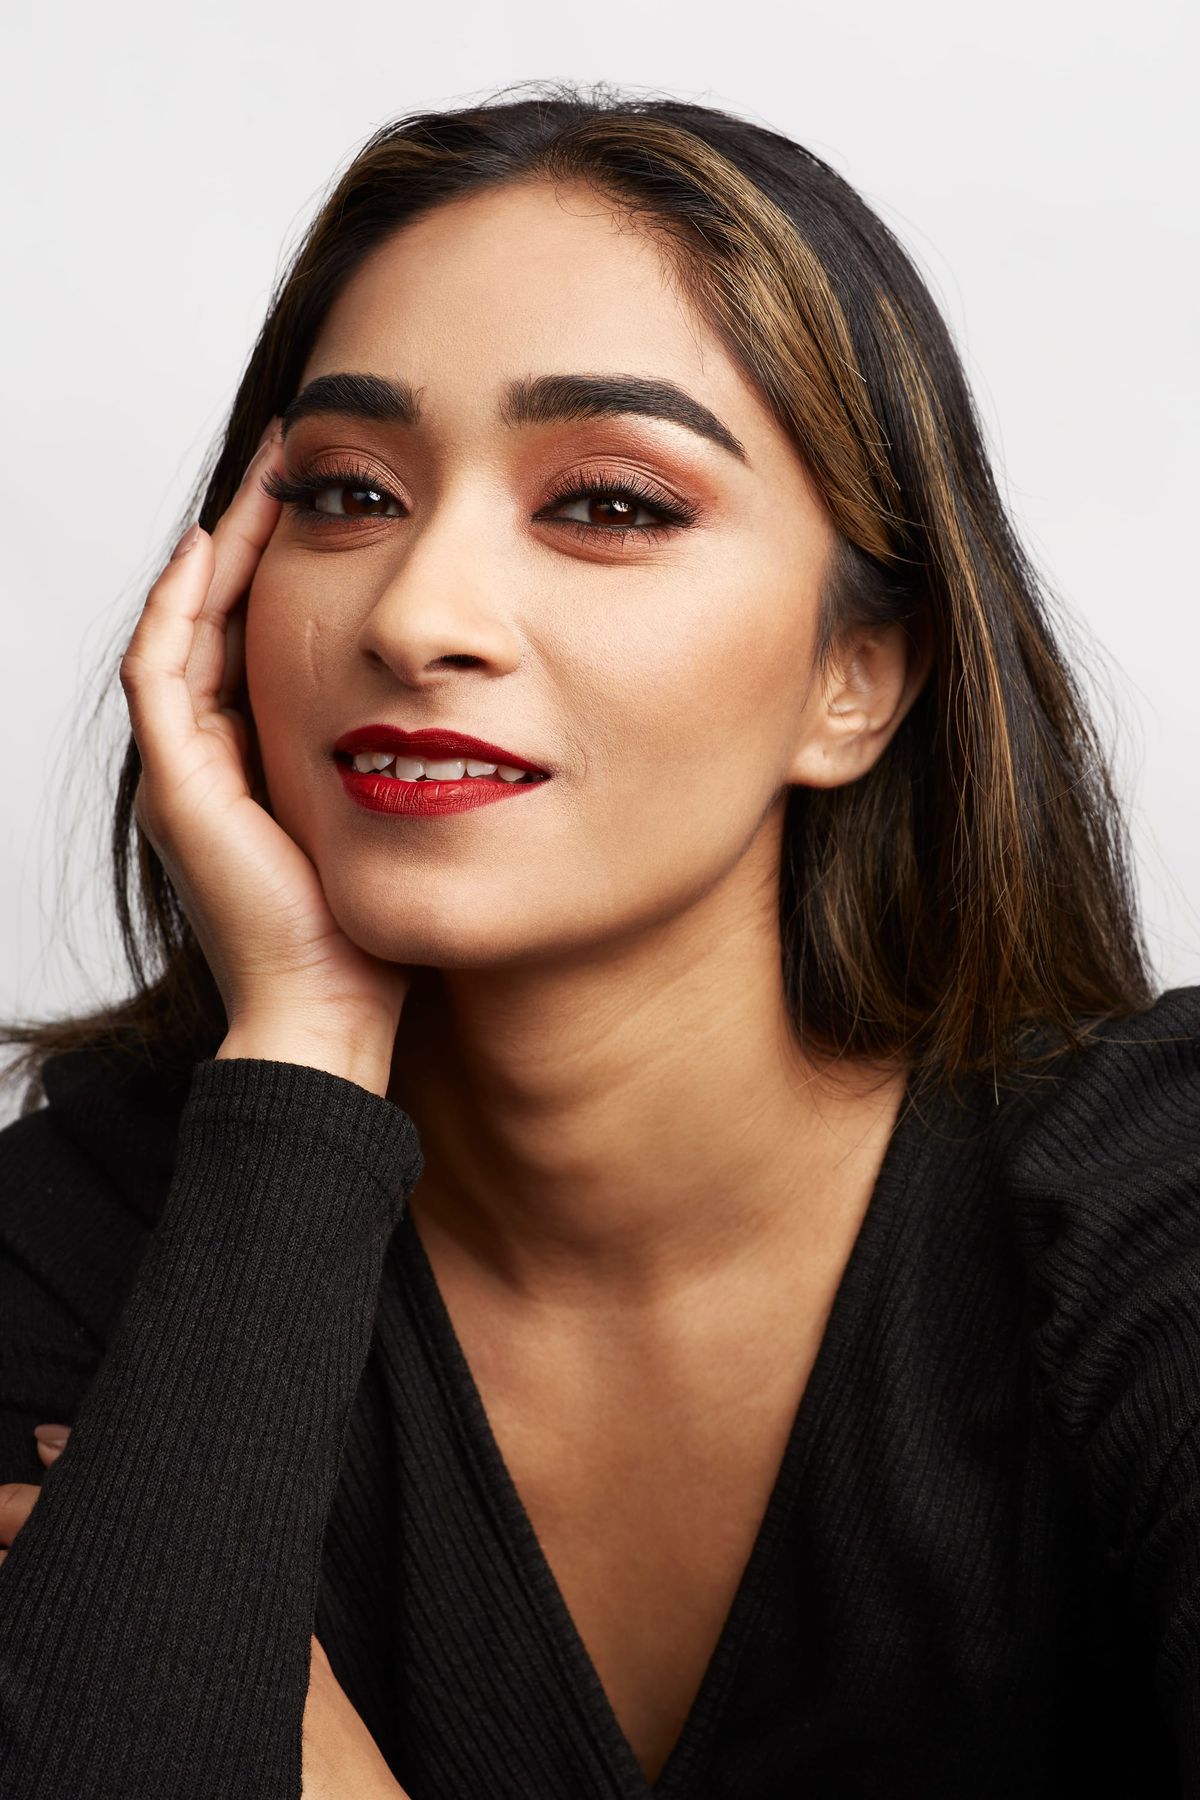
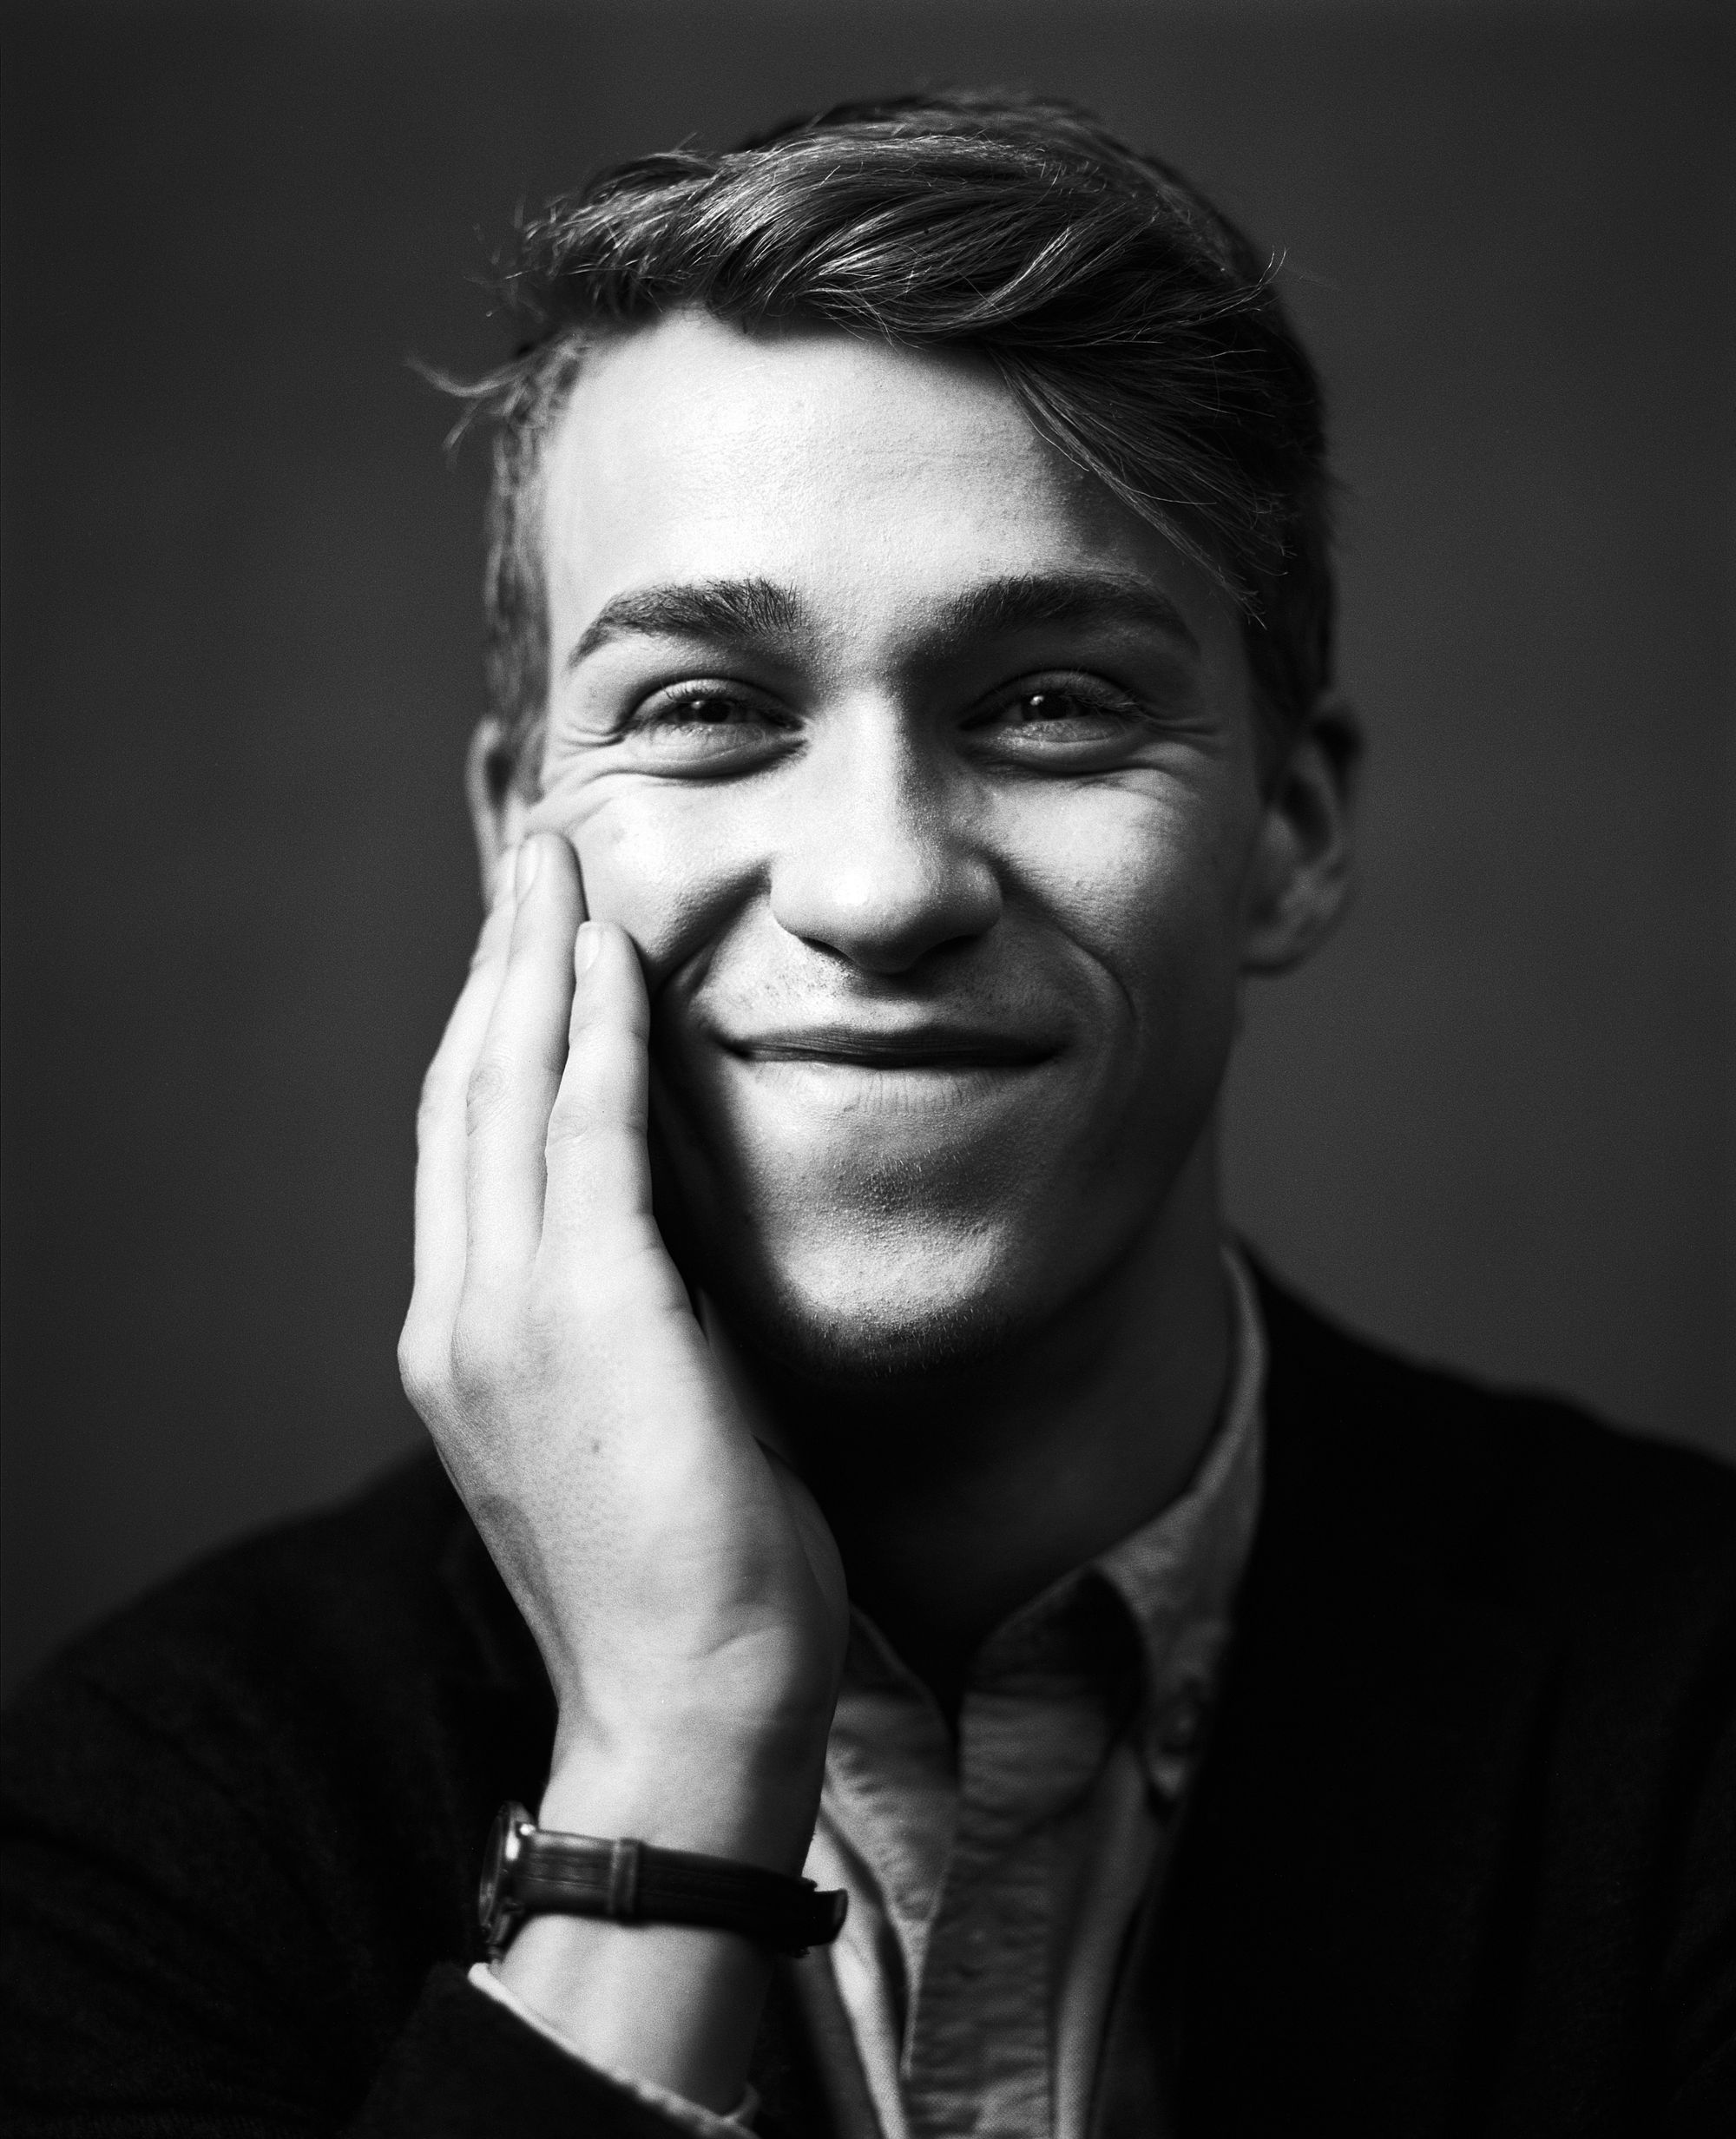
2 Stop Lighting Ratio
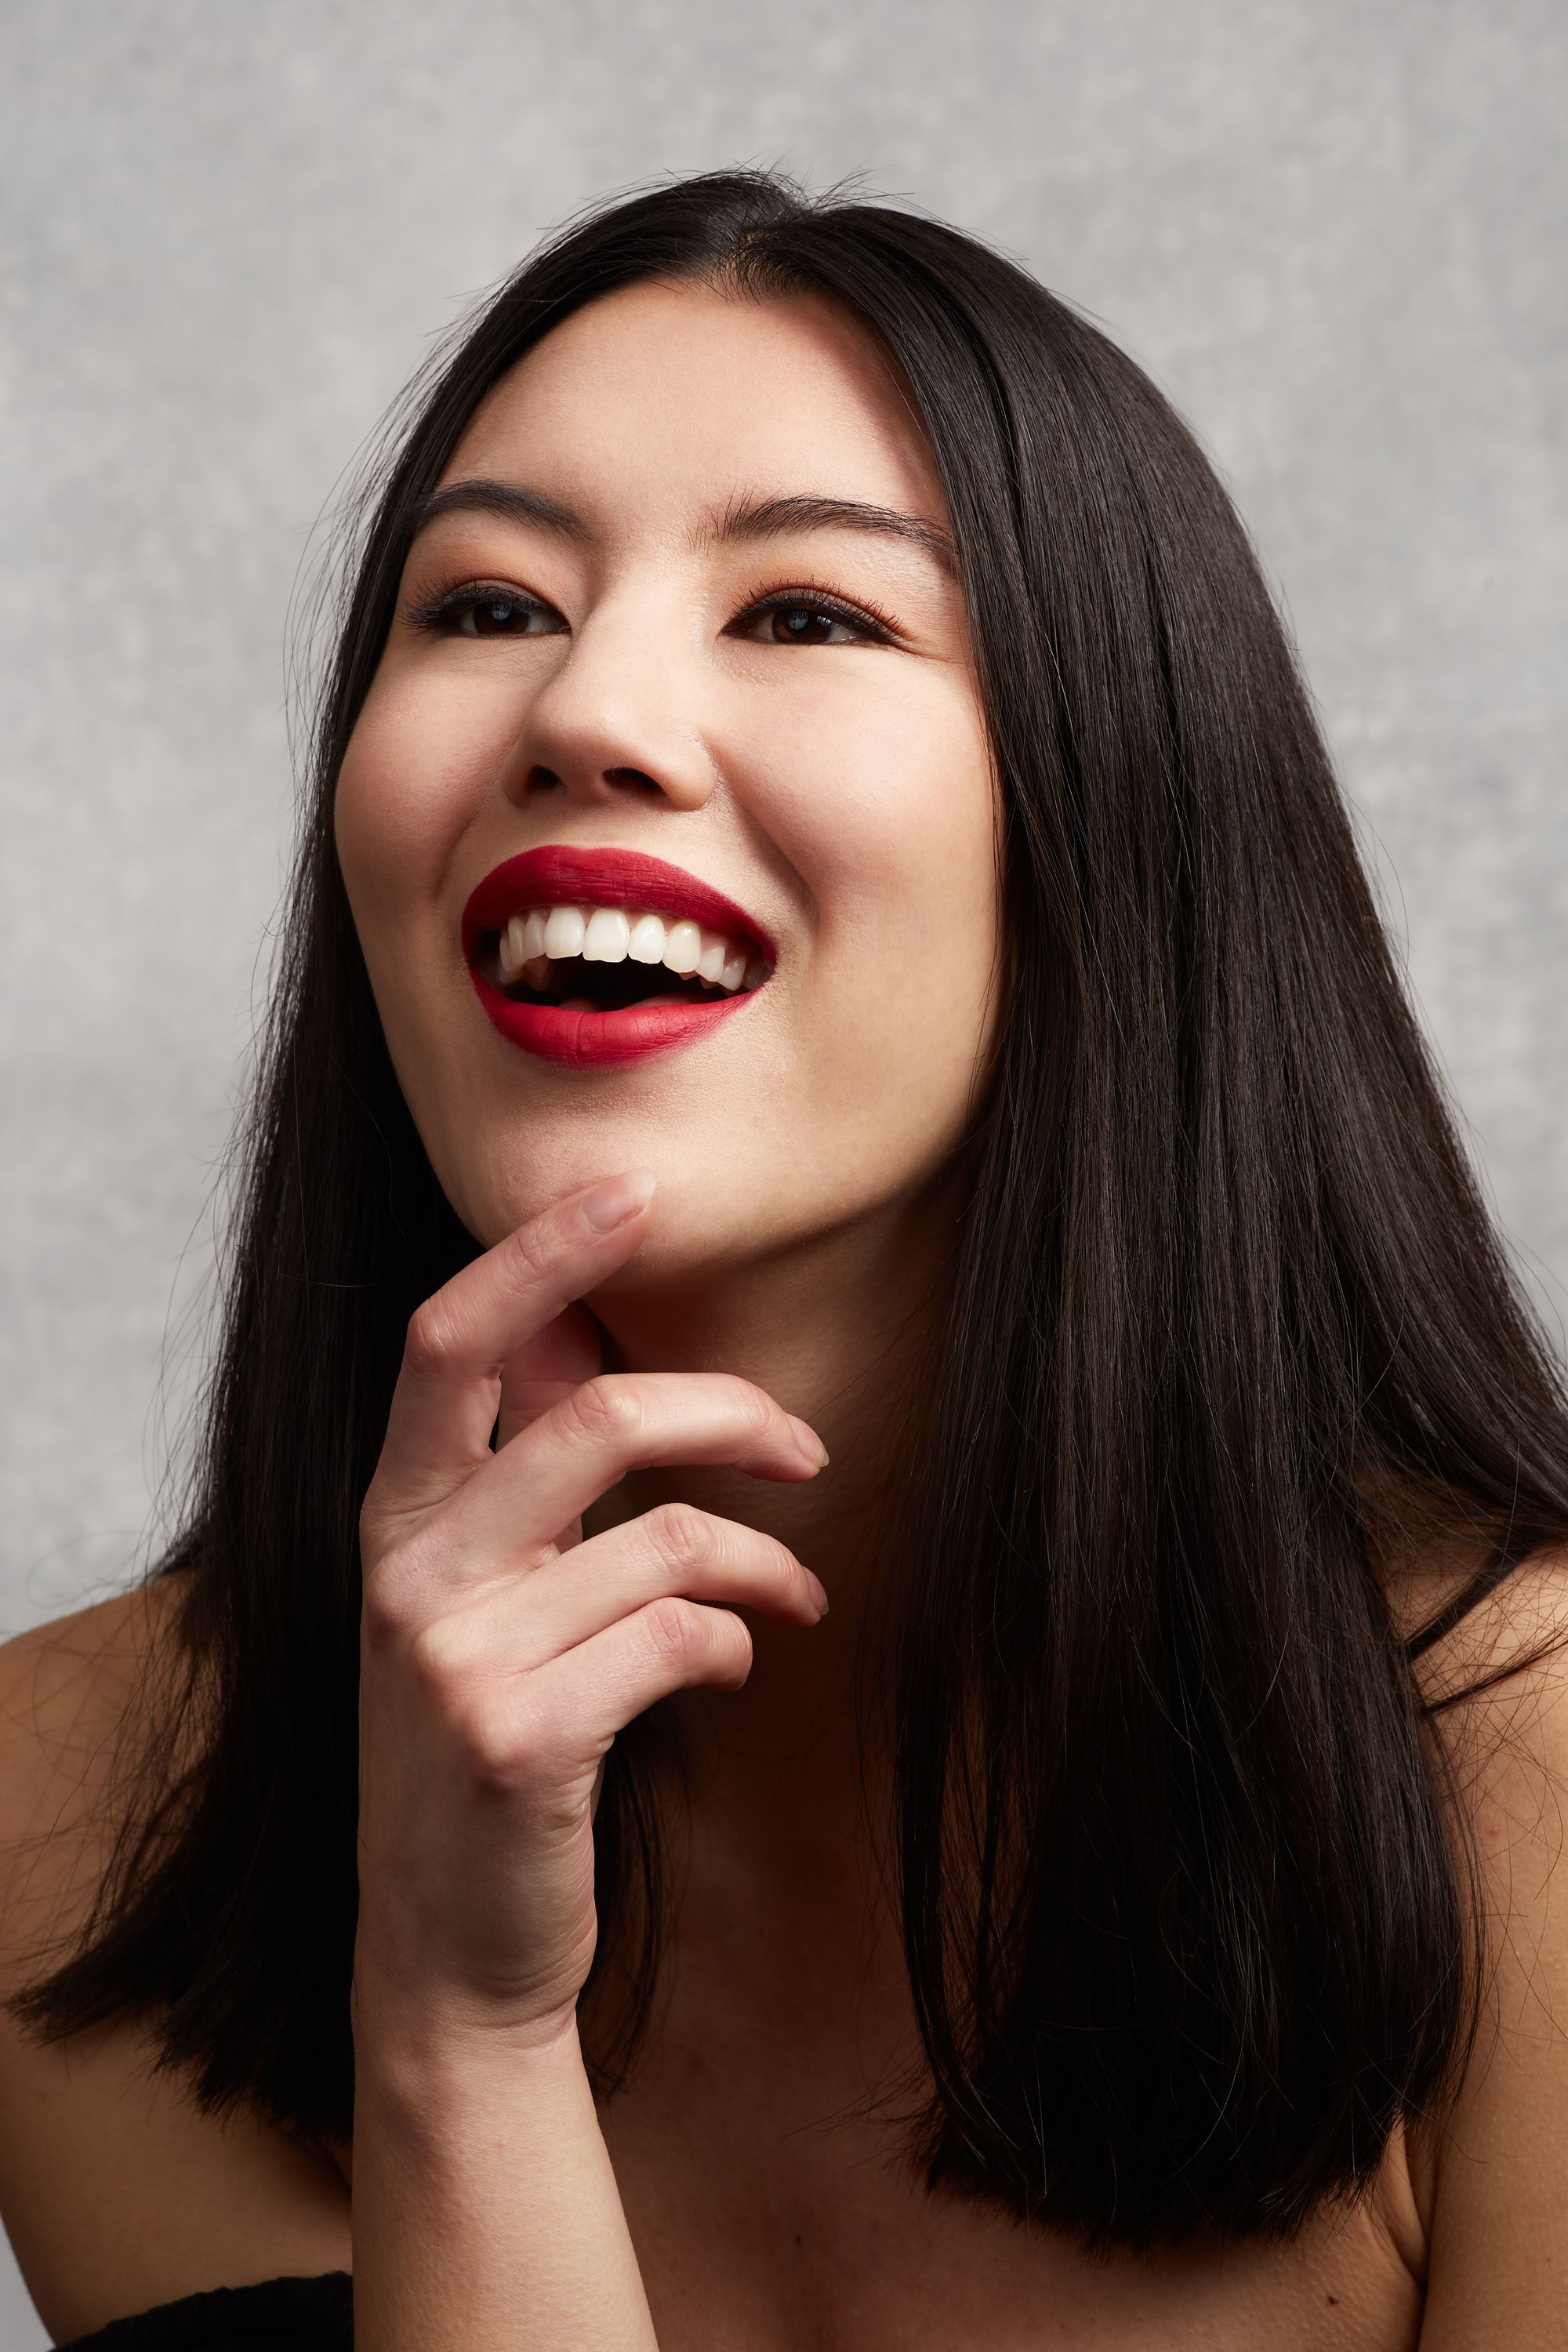
Next is the 2 stop lighting ratio. This is the perfect setup for beauty and fashion portraits, which is why Norman Jean Roy used it so much for his cover work with Allure and Glamour magazines. That being said, I know from experience that it isn't ideal for people with rough, blemished, or heavily wrinkled skin as it will make texture more pronounced.
Lighting Modifiers: One 60 inch silver reflective umbrella, one umbrella reflector, and one 60 inch octabank.
- Step 1: Ensure that the studio strobe with the silver reflective umbrella also has an umbrella reflector on it.
- Step 2: Repeat all of the light placement instructions from the 3 stop lighting ratio guide above, but use the silver reflective umbrella as the key light (main light) instead of an octabank. The octabank will be used only as the fill light in this case.
- Step 3: Set the key light (main light) exactly 2 stops brighter than the fill light. For example, if the key light is set to f11, then the fill light is set to f5.6.
To recap, the same general rules apply here as the previous lighting setup, however the key light is a 60 inch silver reflective umbrella and it is only 2 stops brighter than the octabank fill light.
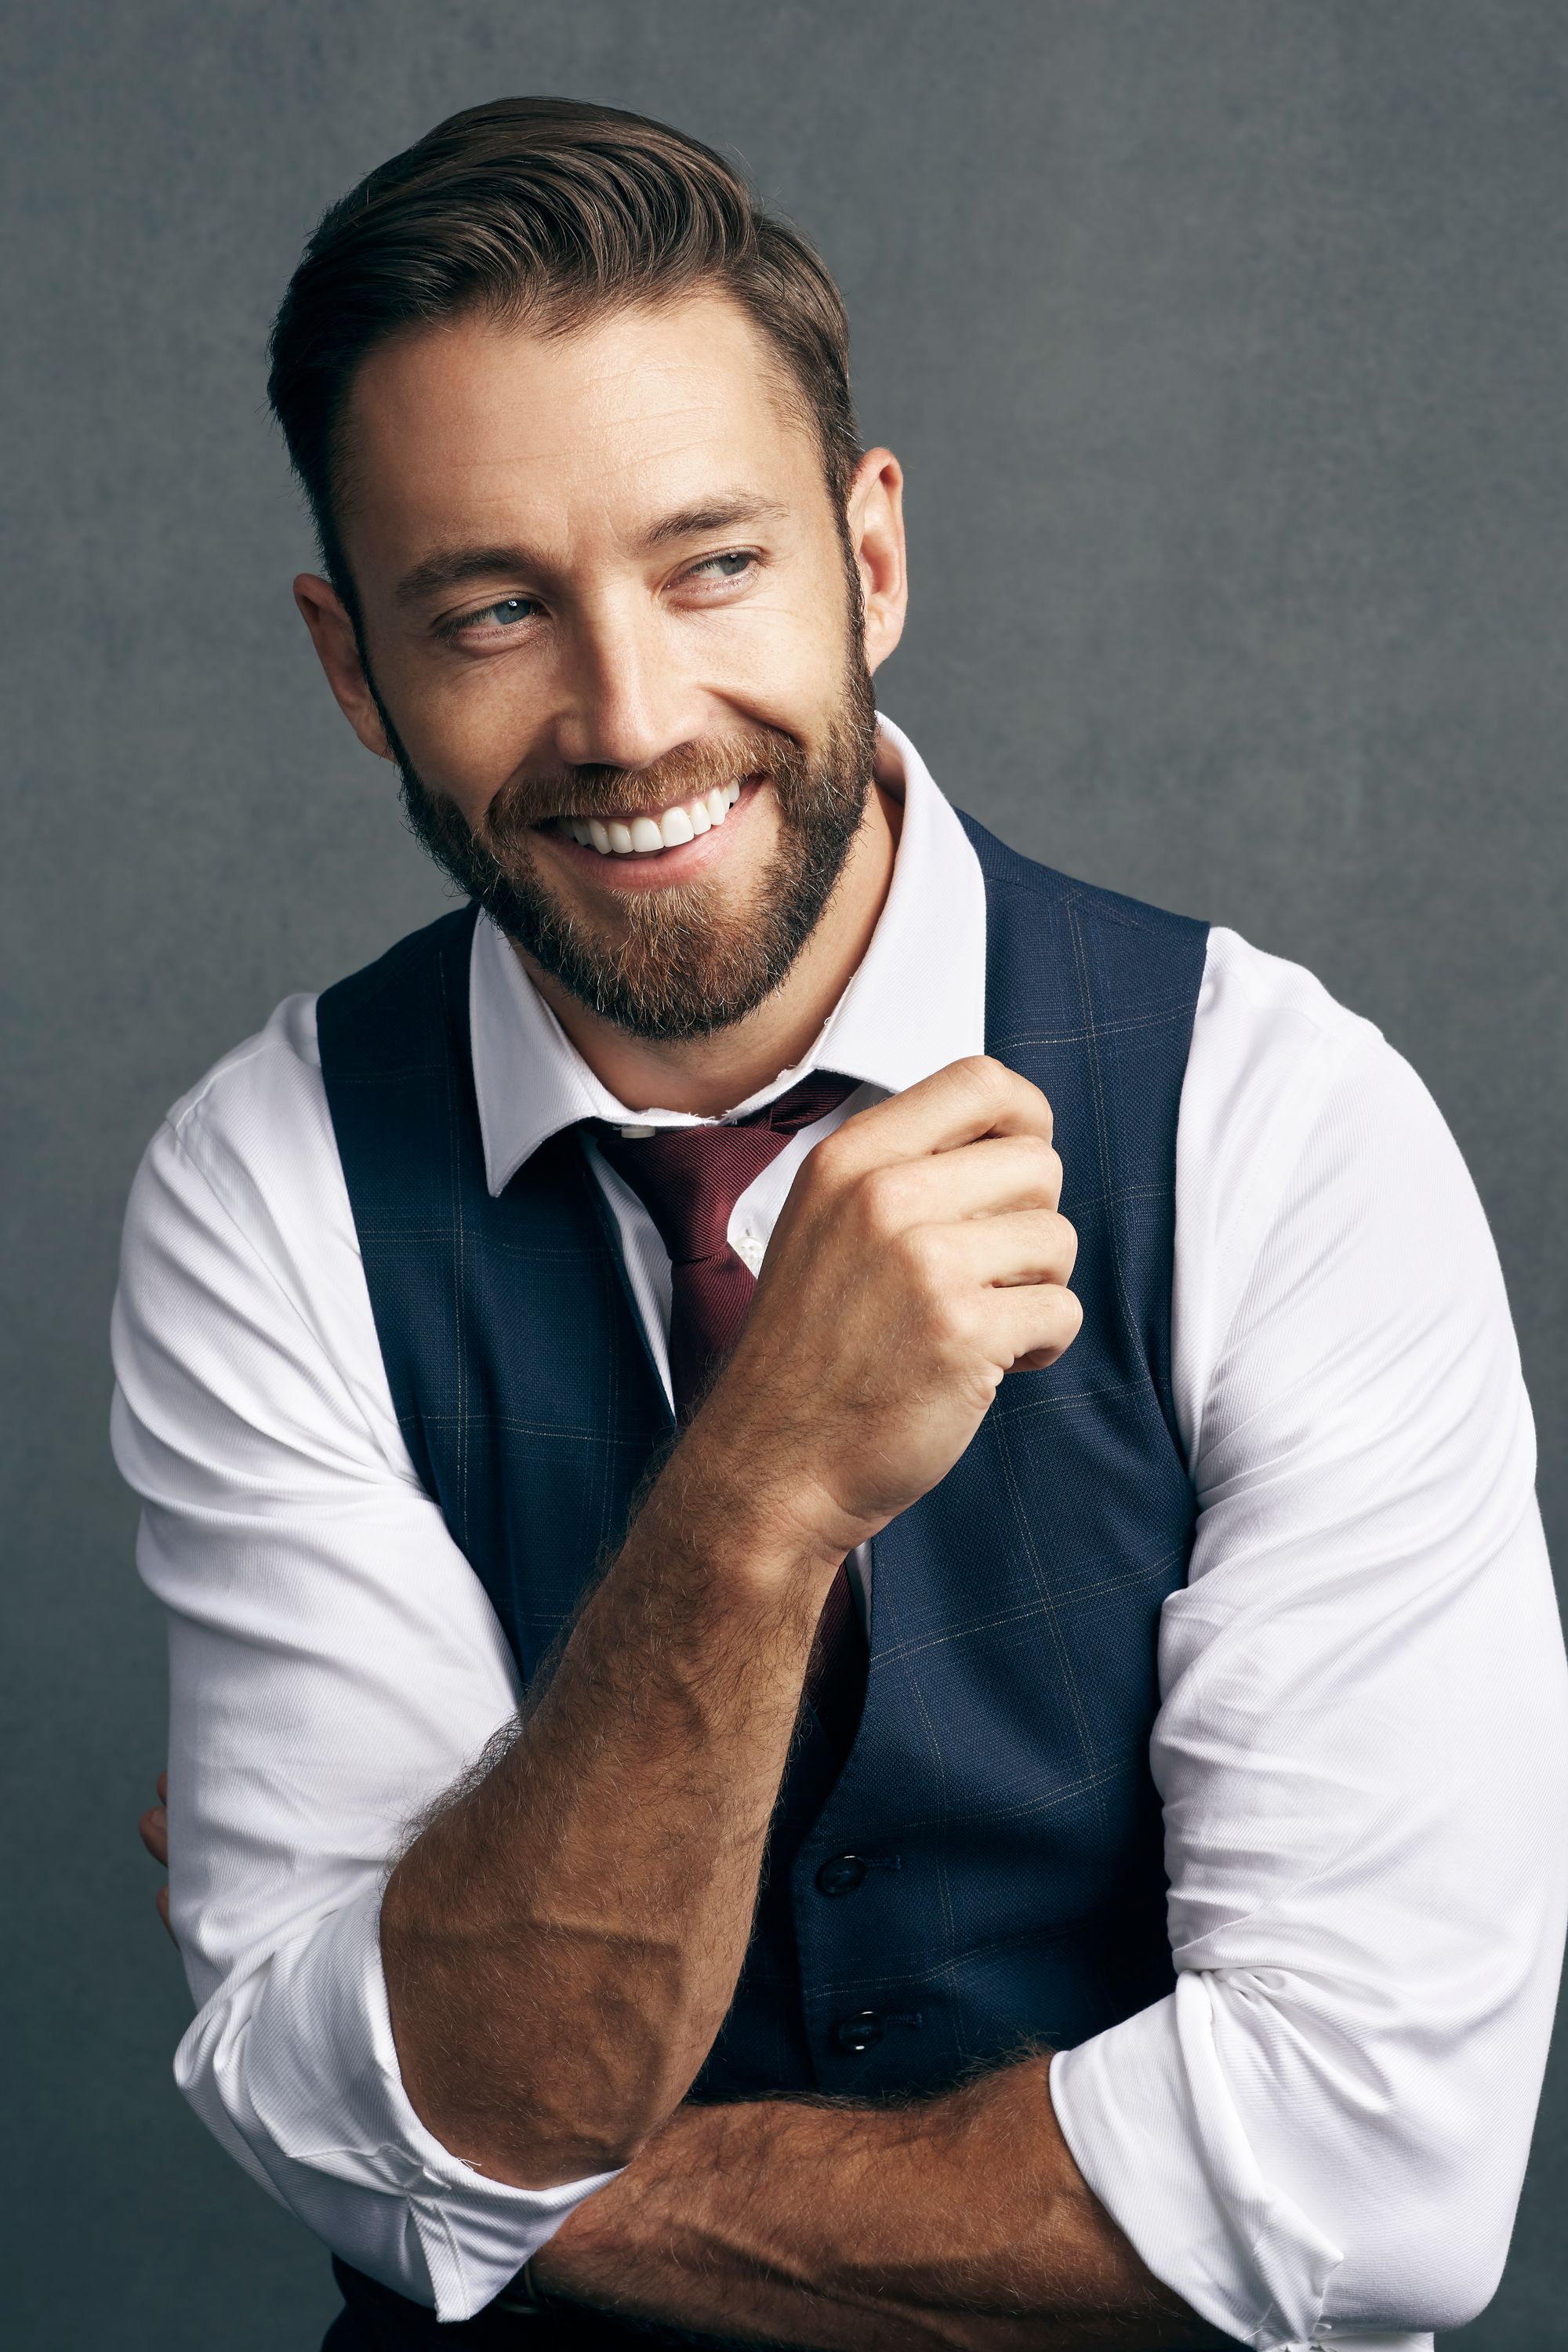
Here is what a 2 stop lighting ratio looks like in action
© Nicklaus Walter | Camera: Canon 6D | Lens: Canon EF 85mm f/1.4L IS USM
The silver reflective umbrella is almost always overlooked by photographers, and when it is used it's usually only to light up a background. Most believe the beauty dish is superior but I respectfully disagree. No, the silver reflective umbrella when used appropriately is the ultimate beauty light. The greatest aspect of it is that it's still very soft, but with some bite and a strong directional shape to the quality of light it produces.
The silver reflective umbrella provides a slightly sharper edge to the shadows than an octabank, while the 2 stop lighting ratio mentioned above allows the shadows to retain full detail. This is the secret to the beauty look found in established magazines that many photographers aspire to.
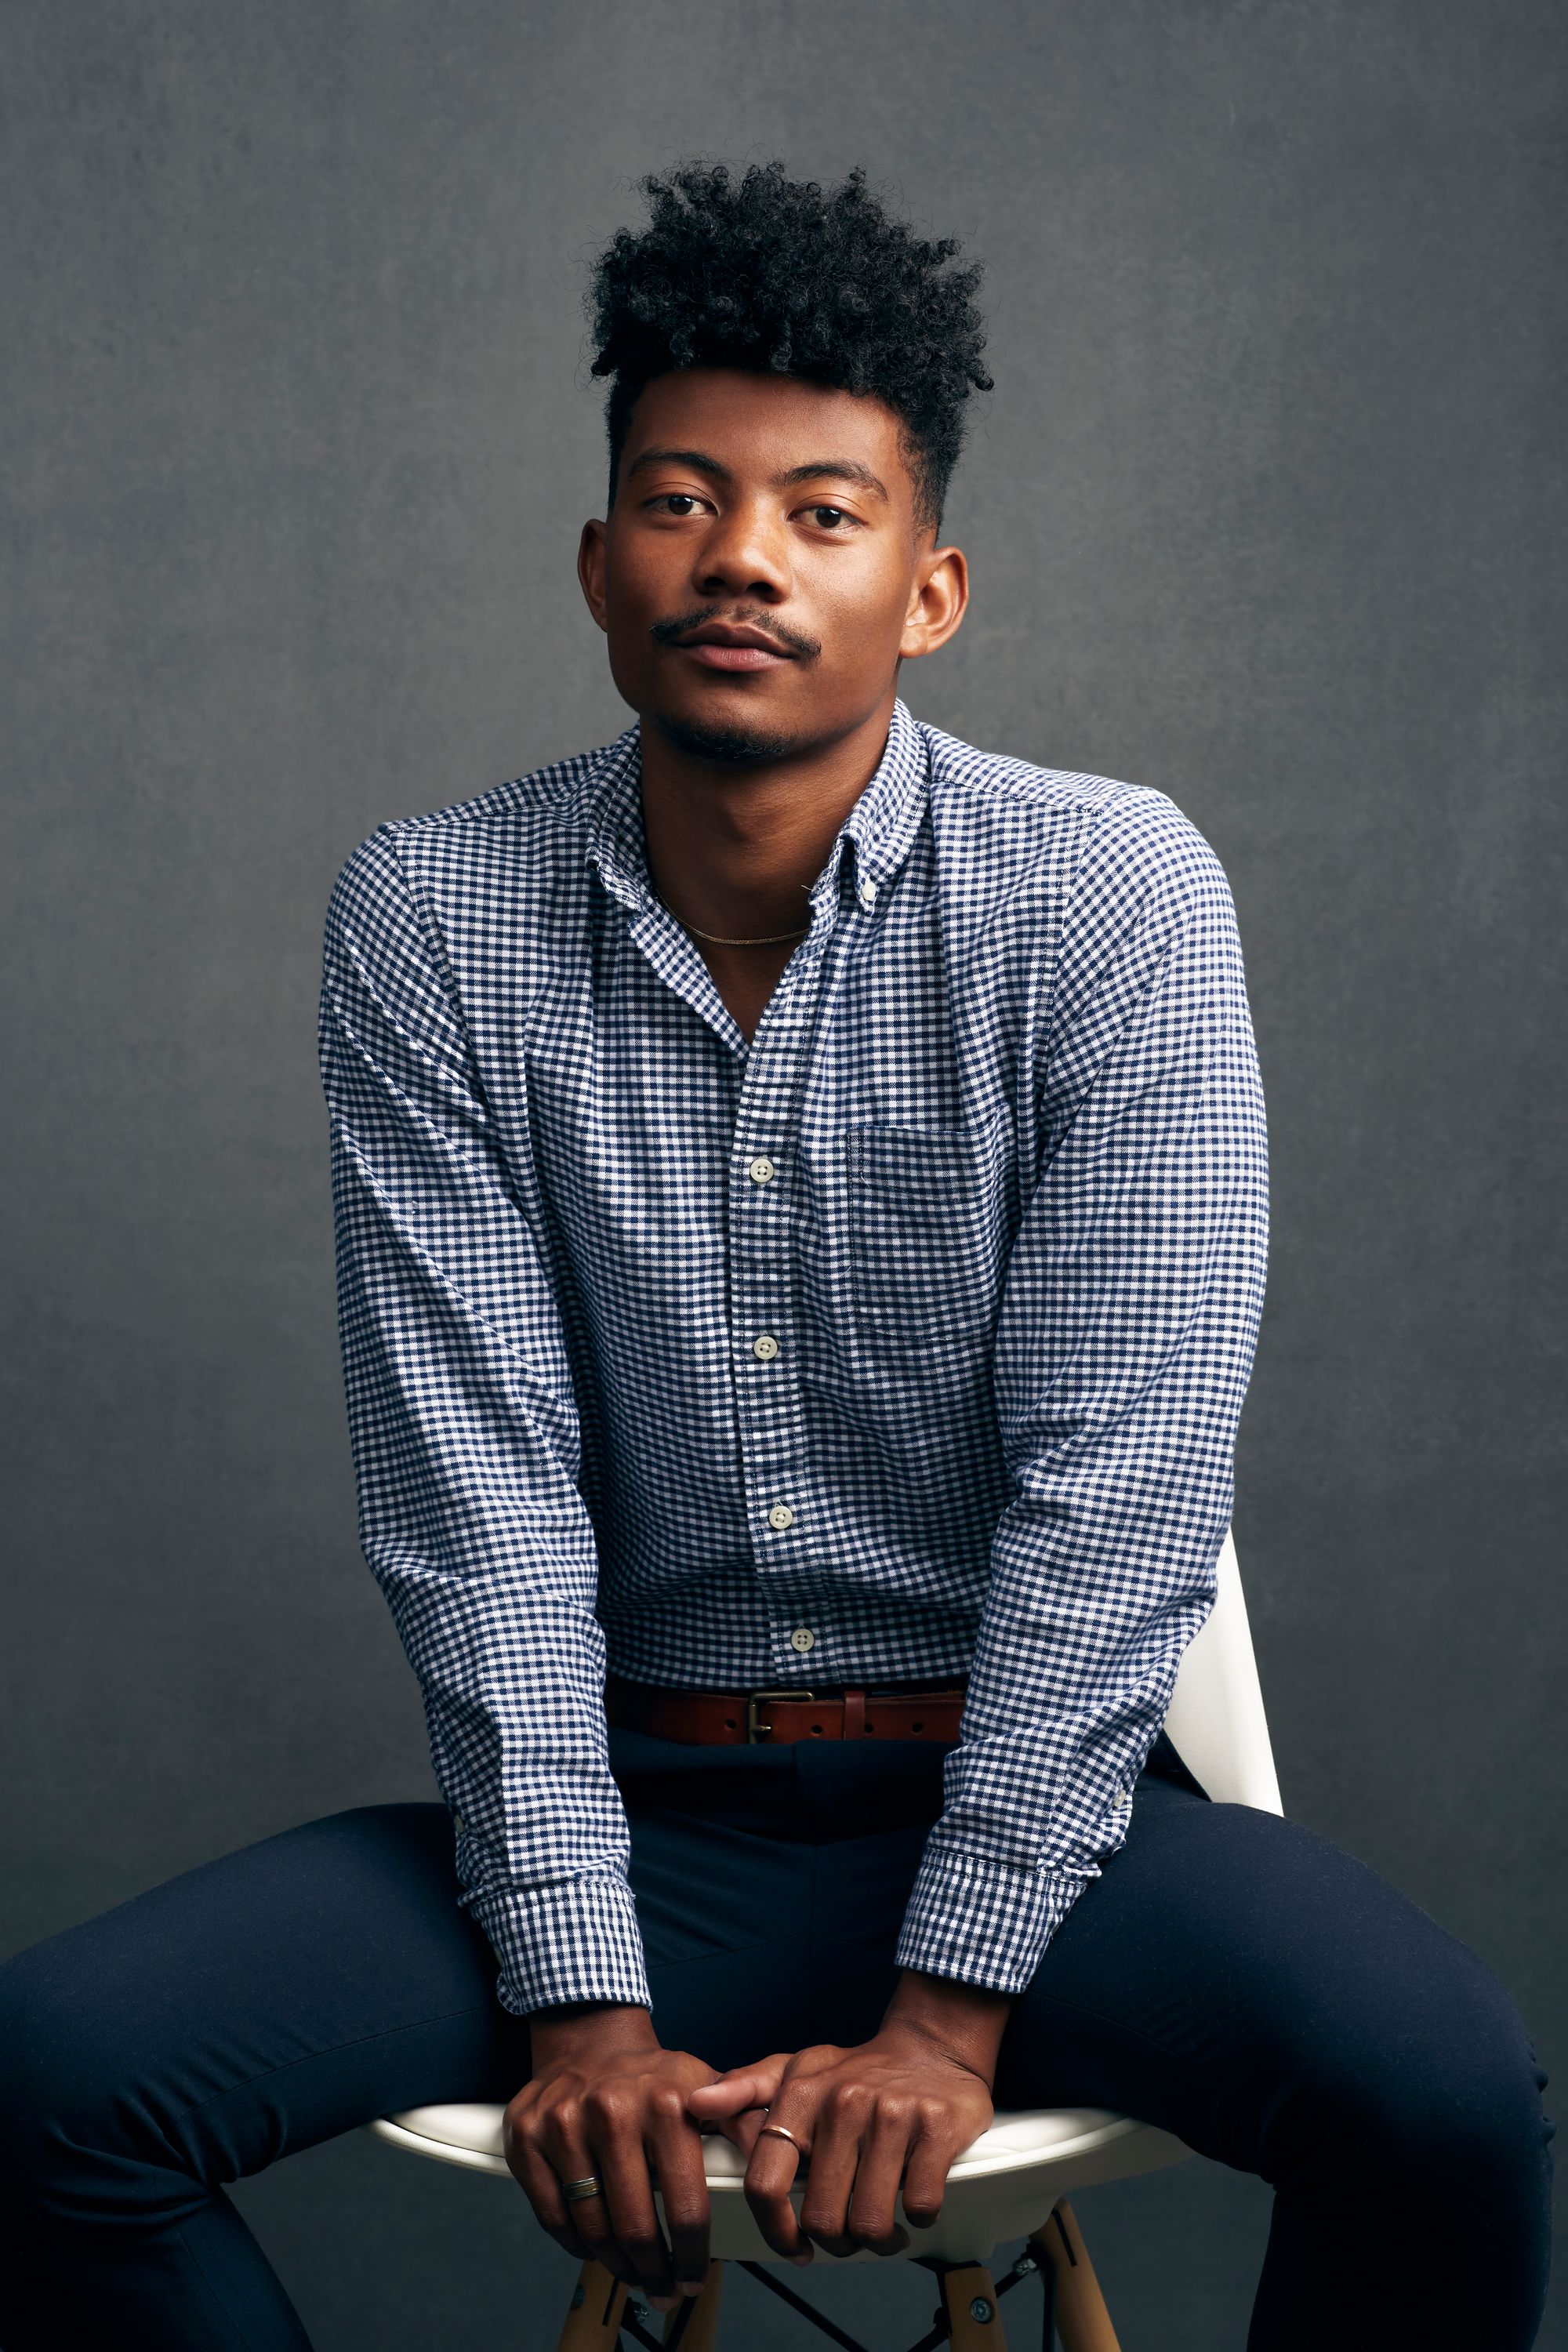
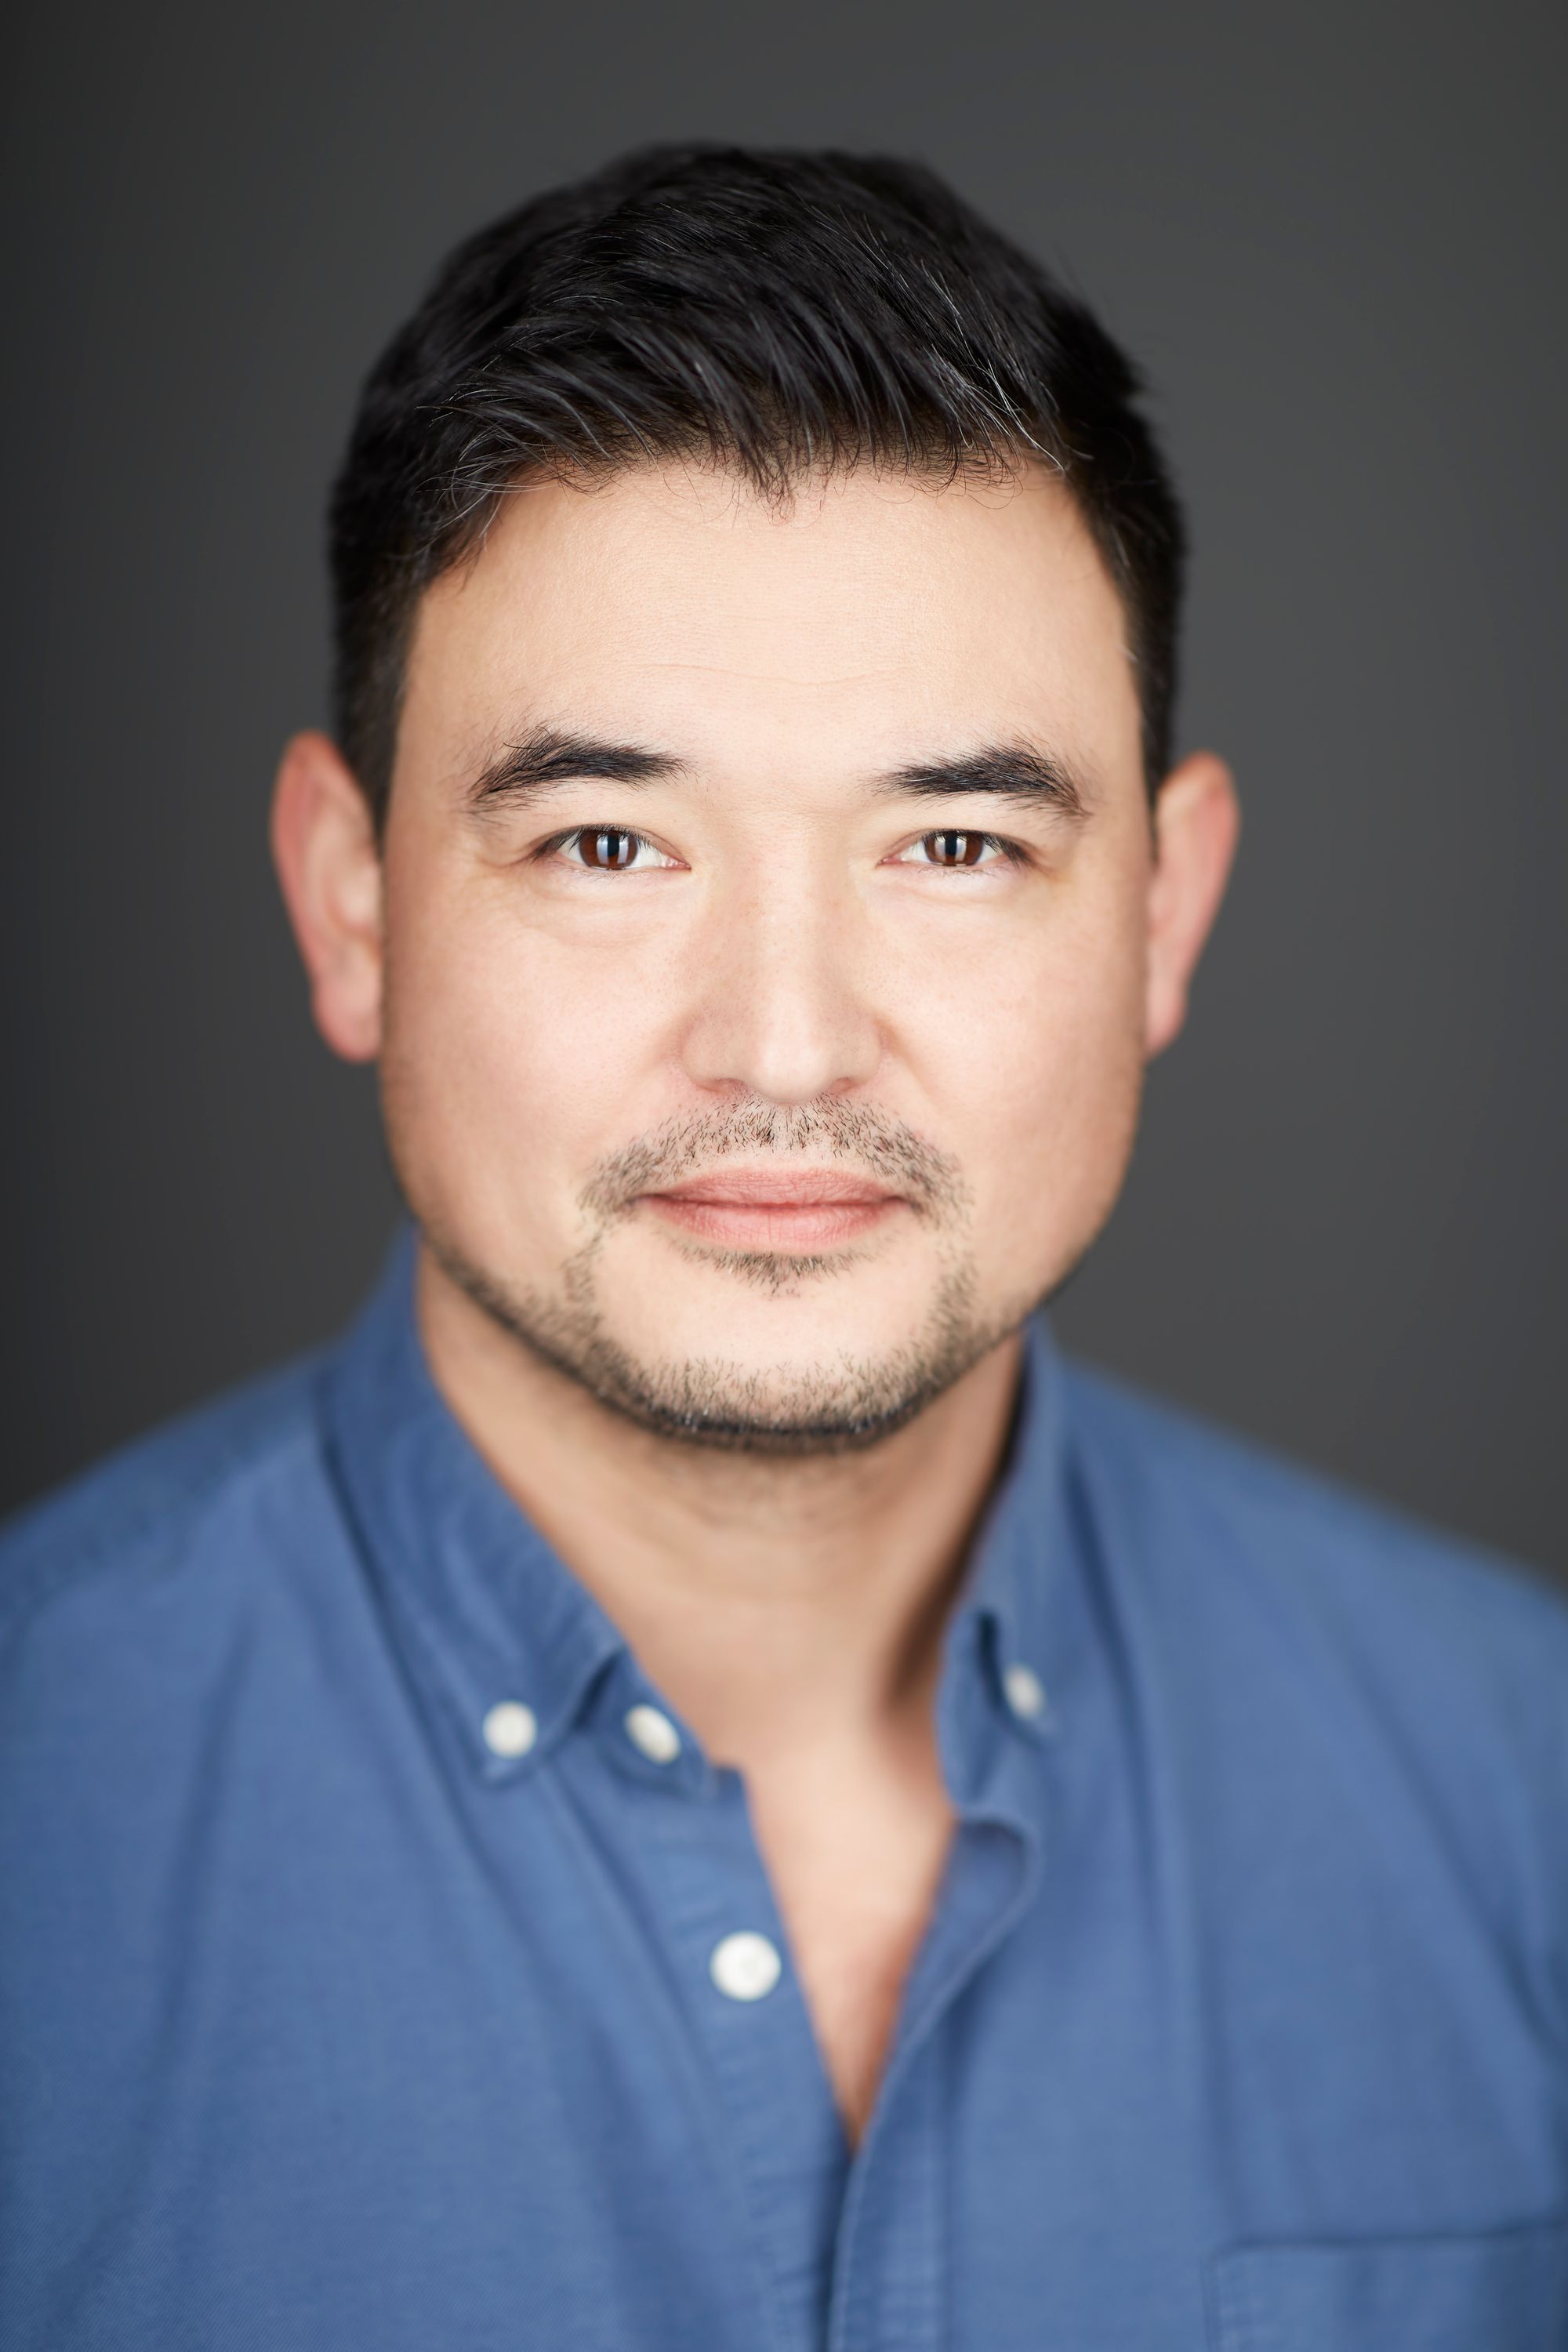
Classic Headshot Lighting
Lastly, here is a crowd pleasing classic headshot lighting setup. When an actor asks for a headshot, this is more than likely what their agent is looking for.
Lighting Modifiers: Two 60 inch strip boxes, one neutral density filter for the camera lens (usually 3 stops).
- Step 1: Place the two strip boxes as close to your subject as possible while still allowing you to take their photo. Get the lights in real close!
- Step 2: Ensure that the studio strobe itself is at eye level to the subject. In other words, the middle of the strip boxes should at their eye level.
- Step 3: Position yourself slightly behind and in between the two strip boxes, shooting through them like a window.
- Step 4: Attach a 3 stop ND filter to your lens and shoot at the lowest power setting that your strobe allows. This combination allows me to shoot at f2, which produces a nice subtle shallow depth of field to separate the subject from the background.
© Nicklaus Walter | Camera: Canon 6D | Lens: Canon EF 85mm f/1.4L IS USM
The great thing about this headshot lighting is that it is super easy to set up, and it's guaranteed to look good on absolutely everyone. Not only that, but you won't need to make any major adjustments to the light since it's front facing. For that reason, I like to use this lighting setup first in order to freely chat with the person I'm photographing and get them comfortable without having to direct them too much.
I hope this guide has been useful, but if you have any questions at all please let me know in the comments section and I'll be sure to answer you.