A Review Of Skylum Luminar Neo Photo Editing Software
Even upon close inspection, the GenErase tool did an outstanding job of keeping the image looking clean and without any unwanted artifacts after the objects have been removed. Color me impressed.
Decaf Journal is reader-supported. When you buy links through our site, we may earn an affiliate commission.
When it comes to digital photography, we currently live in the golden age for image quality. There are no bad cameras nowadays, and the latest phones now rival flagship DSLRs from a generation ago. And thanks to advancements in software, even RAW files from cameras produced 20 years ago can be drastically improved and essentially have new life breathed into them.
As I experienced firsthand when switching from Adobe Lightroom to Capture One a few years ago, when paired with the right software, your existing digital camera's output can level up and reach new heights of quality that were simply out of reach before. While the Adobe Creative Suite and Capture One are the gold standard of image editing software in the professional photography space, in recent times we've seen other formidable competitors pop up; one of which is Skylum's Luminar Neo. Skylum reached out to me just over a month ago to see if I'd be interested in doing a review of their image editor, and I was intrigued because there are still a few gaps in my existing workflow that I've long wanted to improve upon.
That said, I also had my reservations about using AI branded software, as I'm generally wary about incorporating any form of generative artificial intelligence into my life. I want AI to automate the non-creative and laborious tasks in my work rather than remove my creativity from the equation entirely, so this was top of mind as I began to experiment with Luminar Neo.
What I will say upfront is that although you will indeed find some generative AI features in the software that won't appeal to photography purists like myself, I was also surprised at the number of tools available that streamline the otherwise tedious specialized processes that I've come to loathe such focus stacking and panorama stitching. So while Luminar Neo includes an exhaustive laundry list of features, I've chosen to focus only on the tools that I feel are potentially most valuable for professional photographers and serious enthusiasts alike.
Upon first opening Luminar Neo, it's clear that the user interface has been designed to simplify the image editing workflow, and the learning curve for beginners is drastically reduced when compared to legacy applications such as Adobe Photoshop. With there being so many different features available, I've found it easiest to use by first collapsing all of the tabs by default, and subsequently opening them one at a time so not to become overwhelmed.
The first impressive aspect of Luminar Neo that I encountered is that it includes several one click actions that are not only useful, but make meaningful aesthetic enhancements too. For starters, the Preset tool offers a plethora of different looks to choose from and it doesn't take long to find one that instantly improves an image's color, contrast, and overall mood with very little effort. The presets are also handy in that you can use them as a starting point and build on them further with edits using the other available tools. Some edits go too far rendering the image in an unrealistic way at full strength, but the sliders allow for a wide margin of experimentation so that you can dial in the exact amount of a specific effect without overpowering the image.
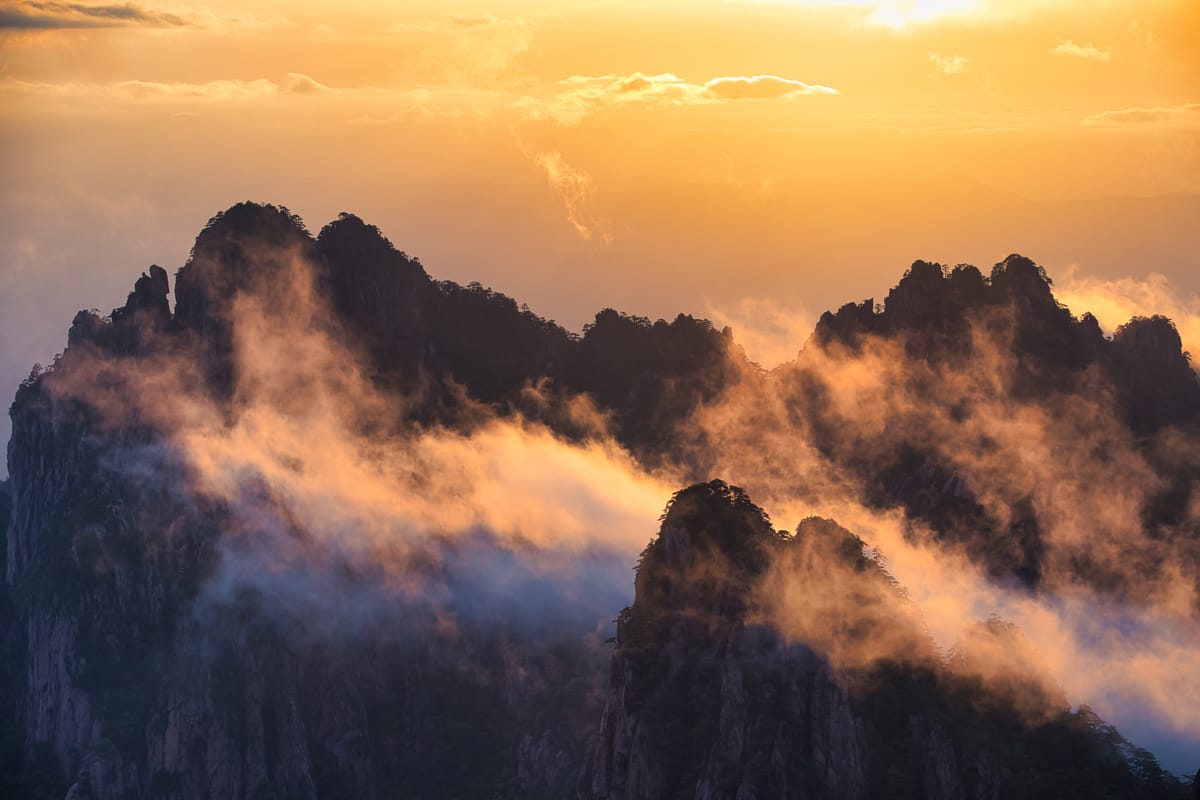
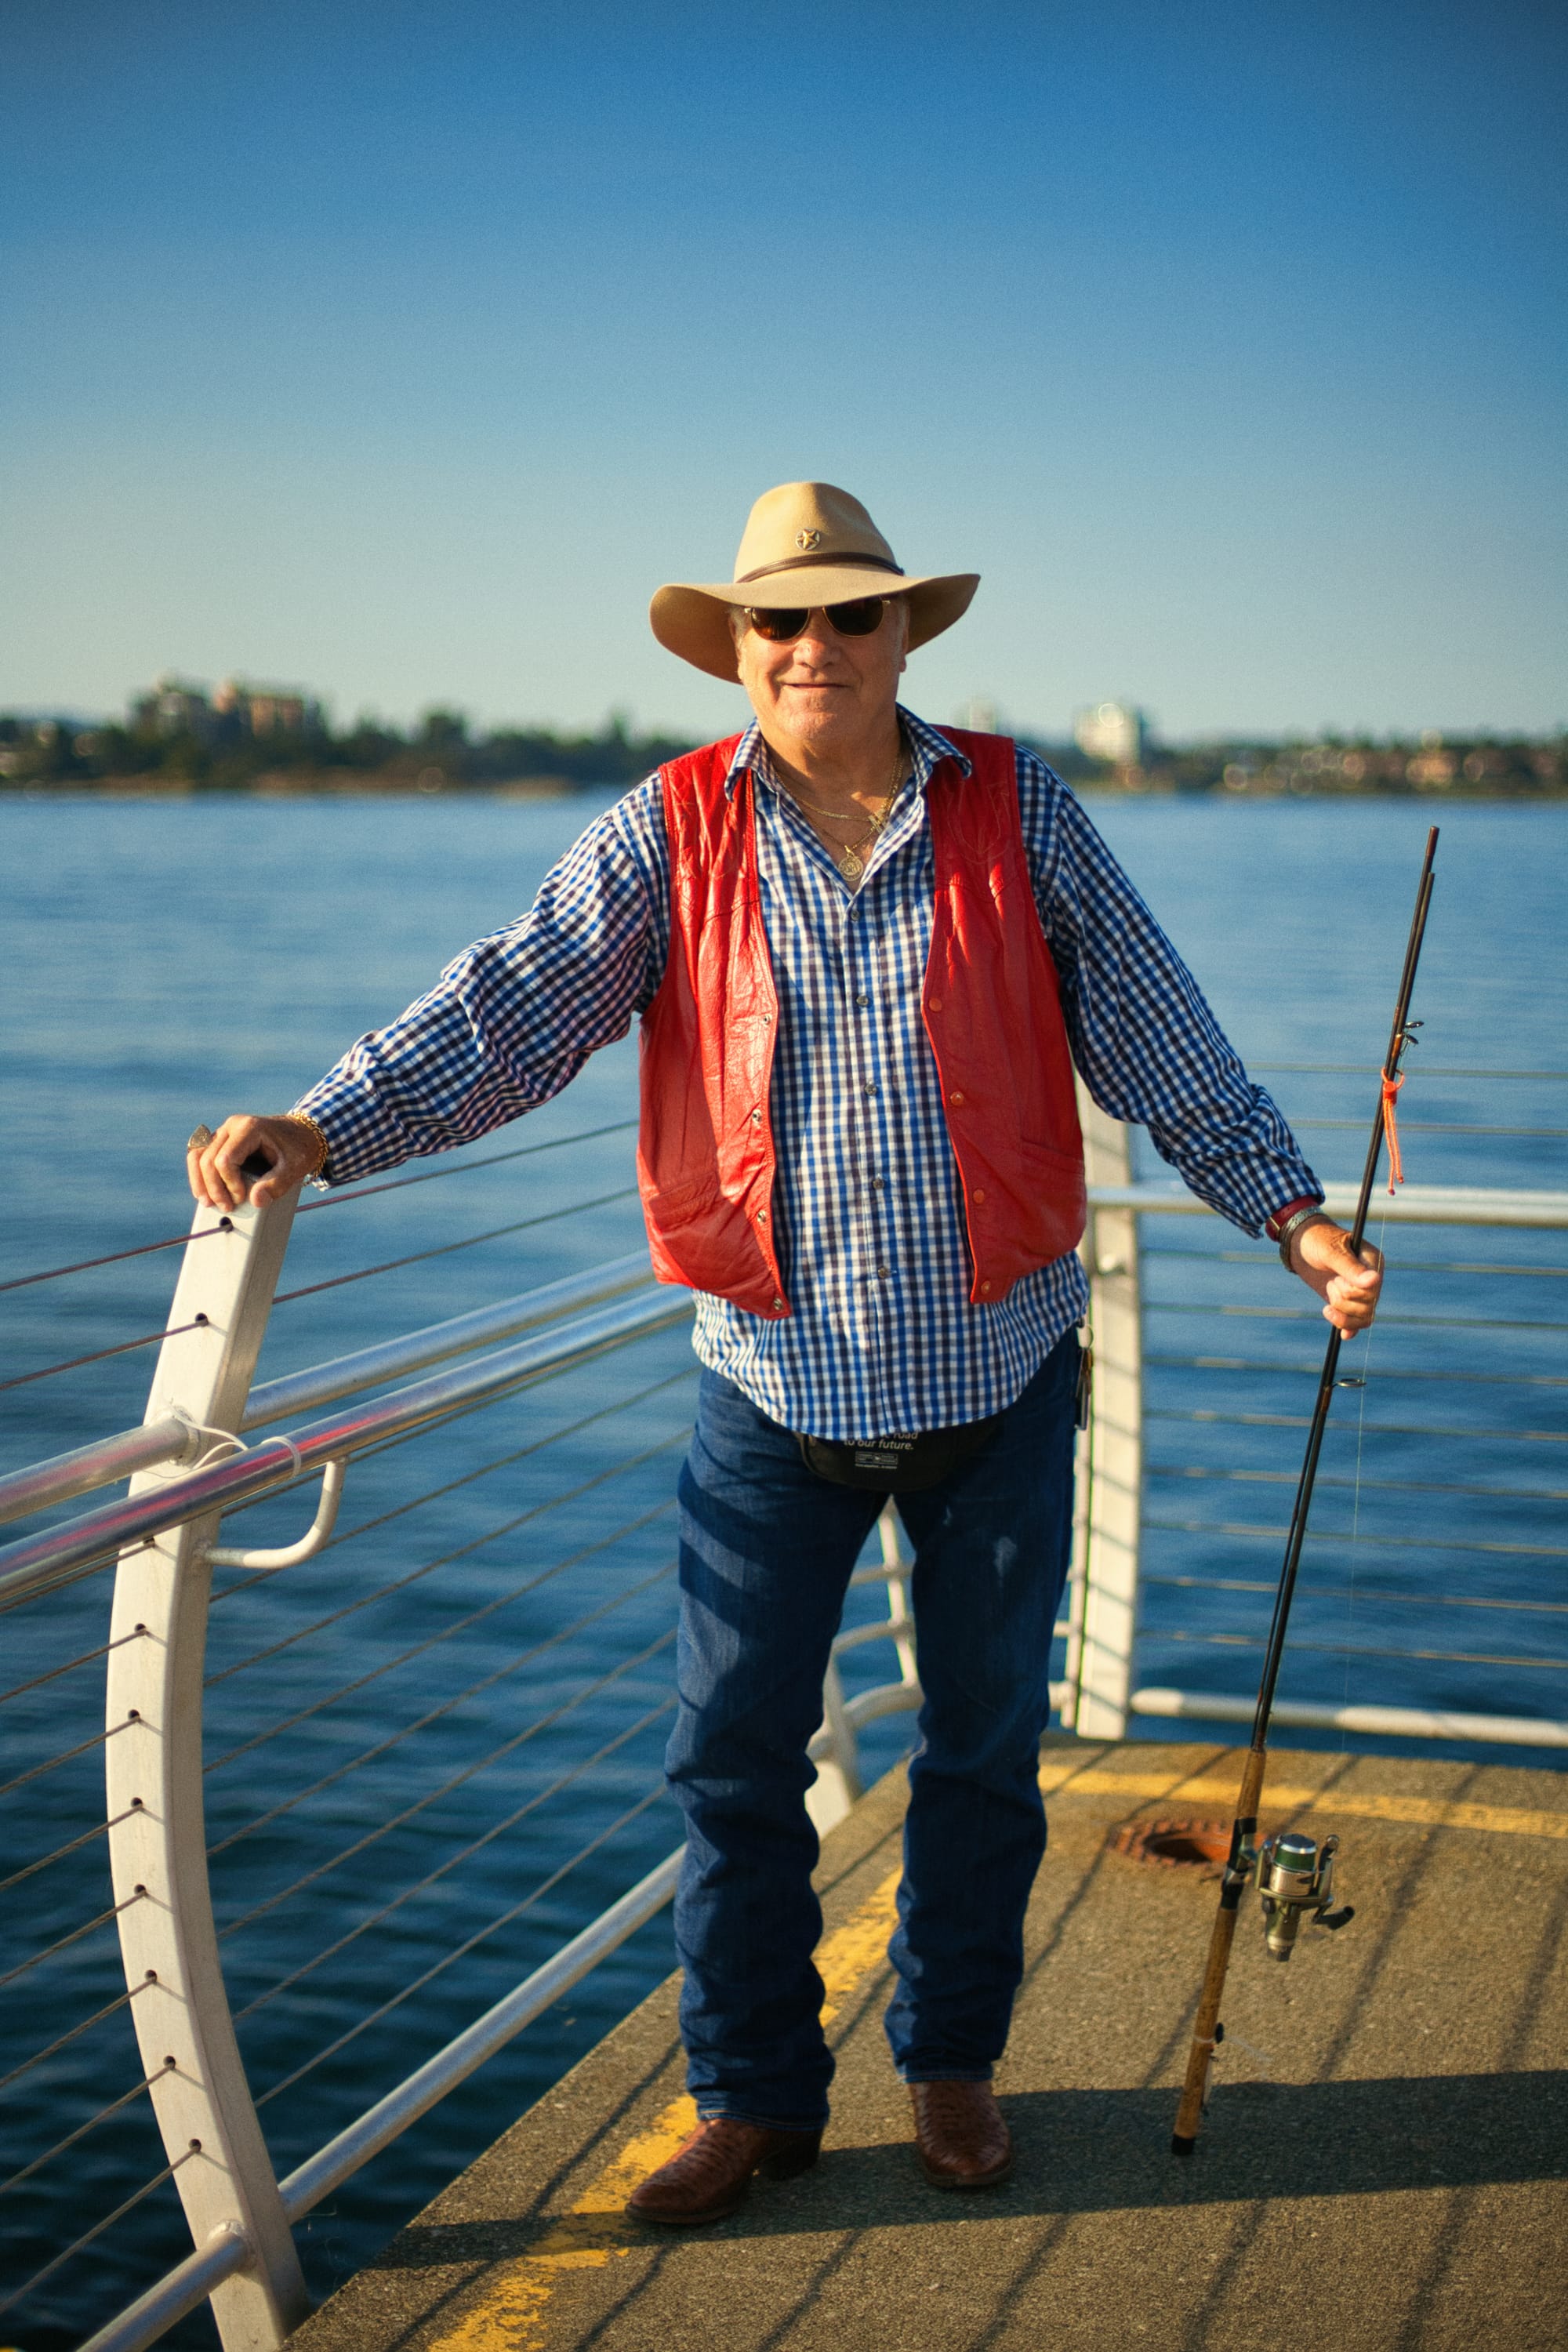
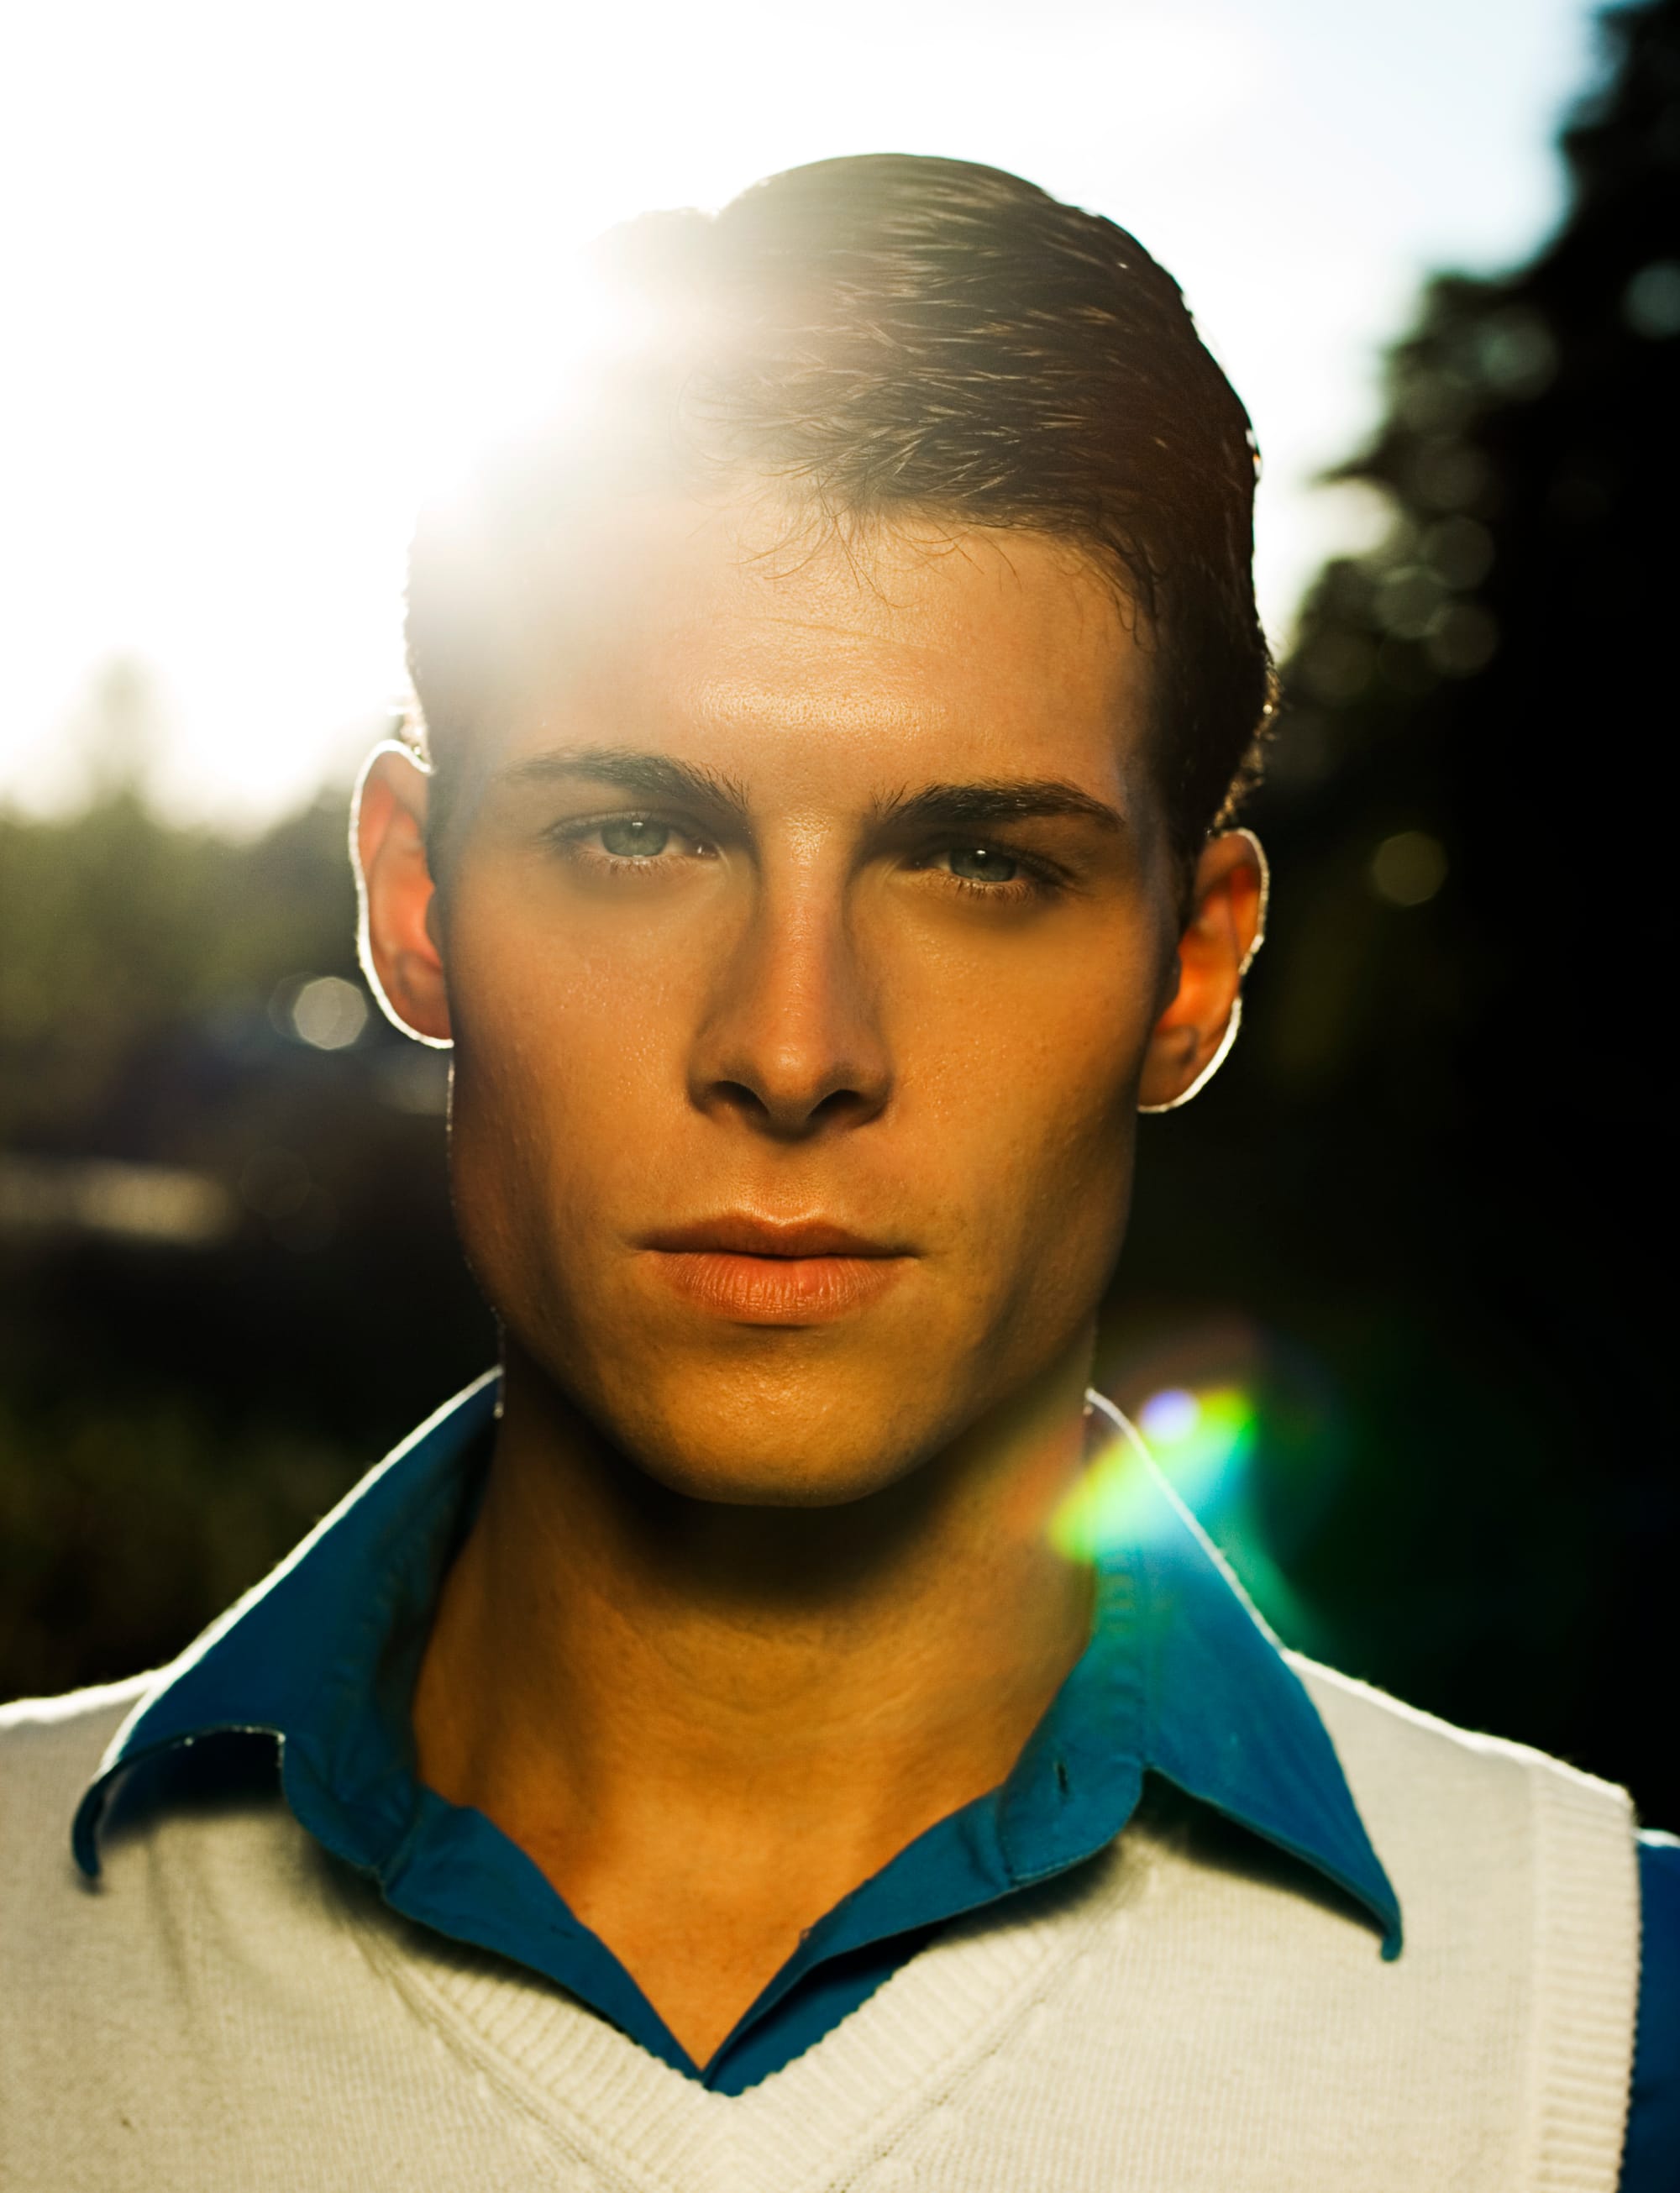
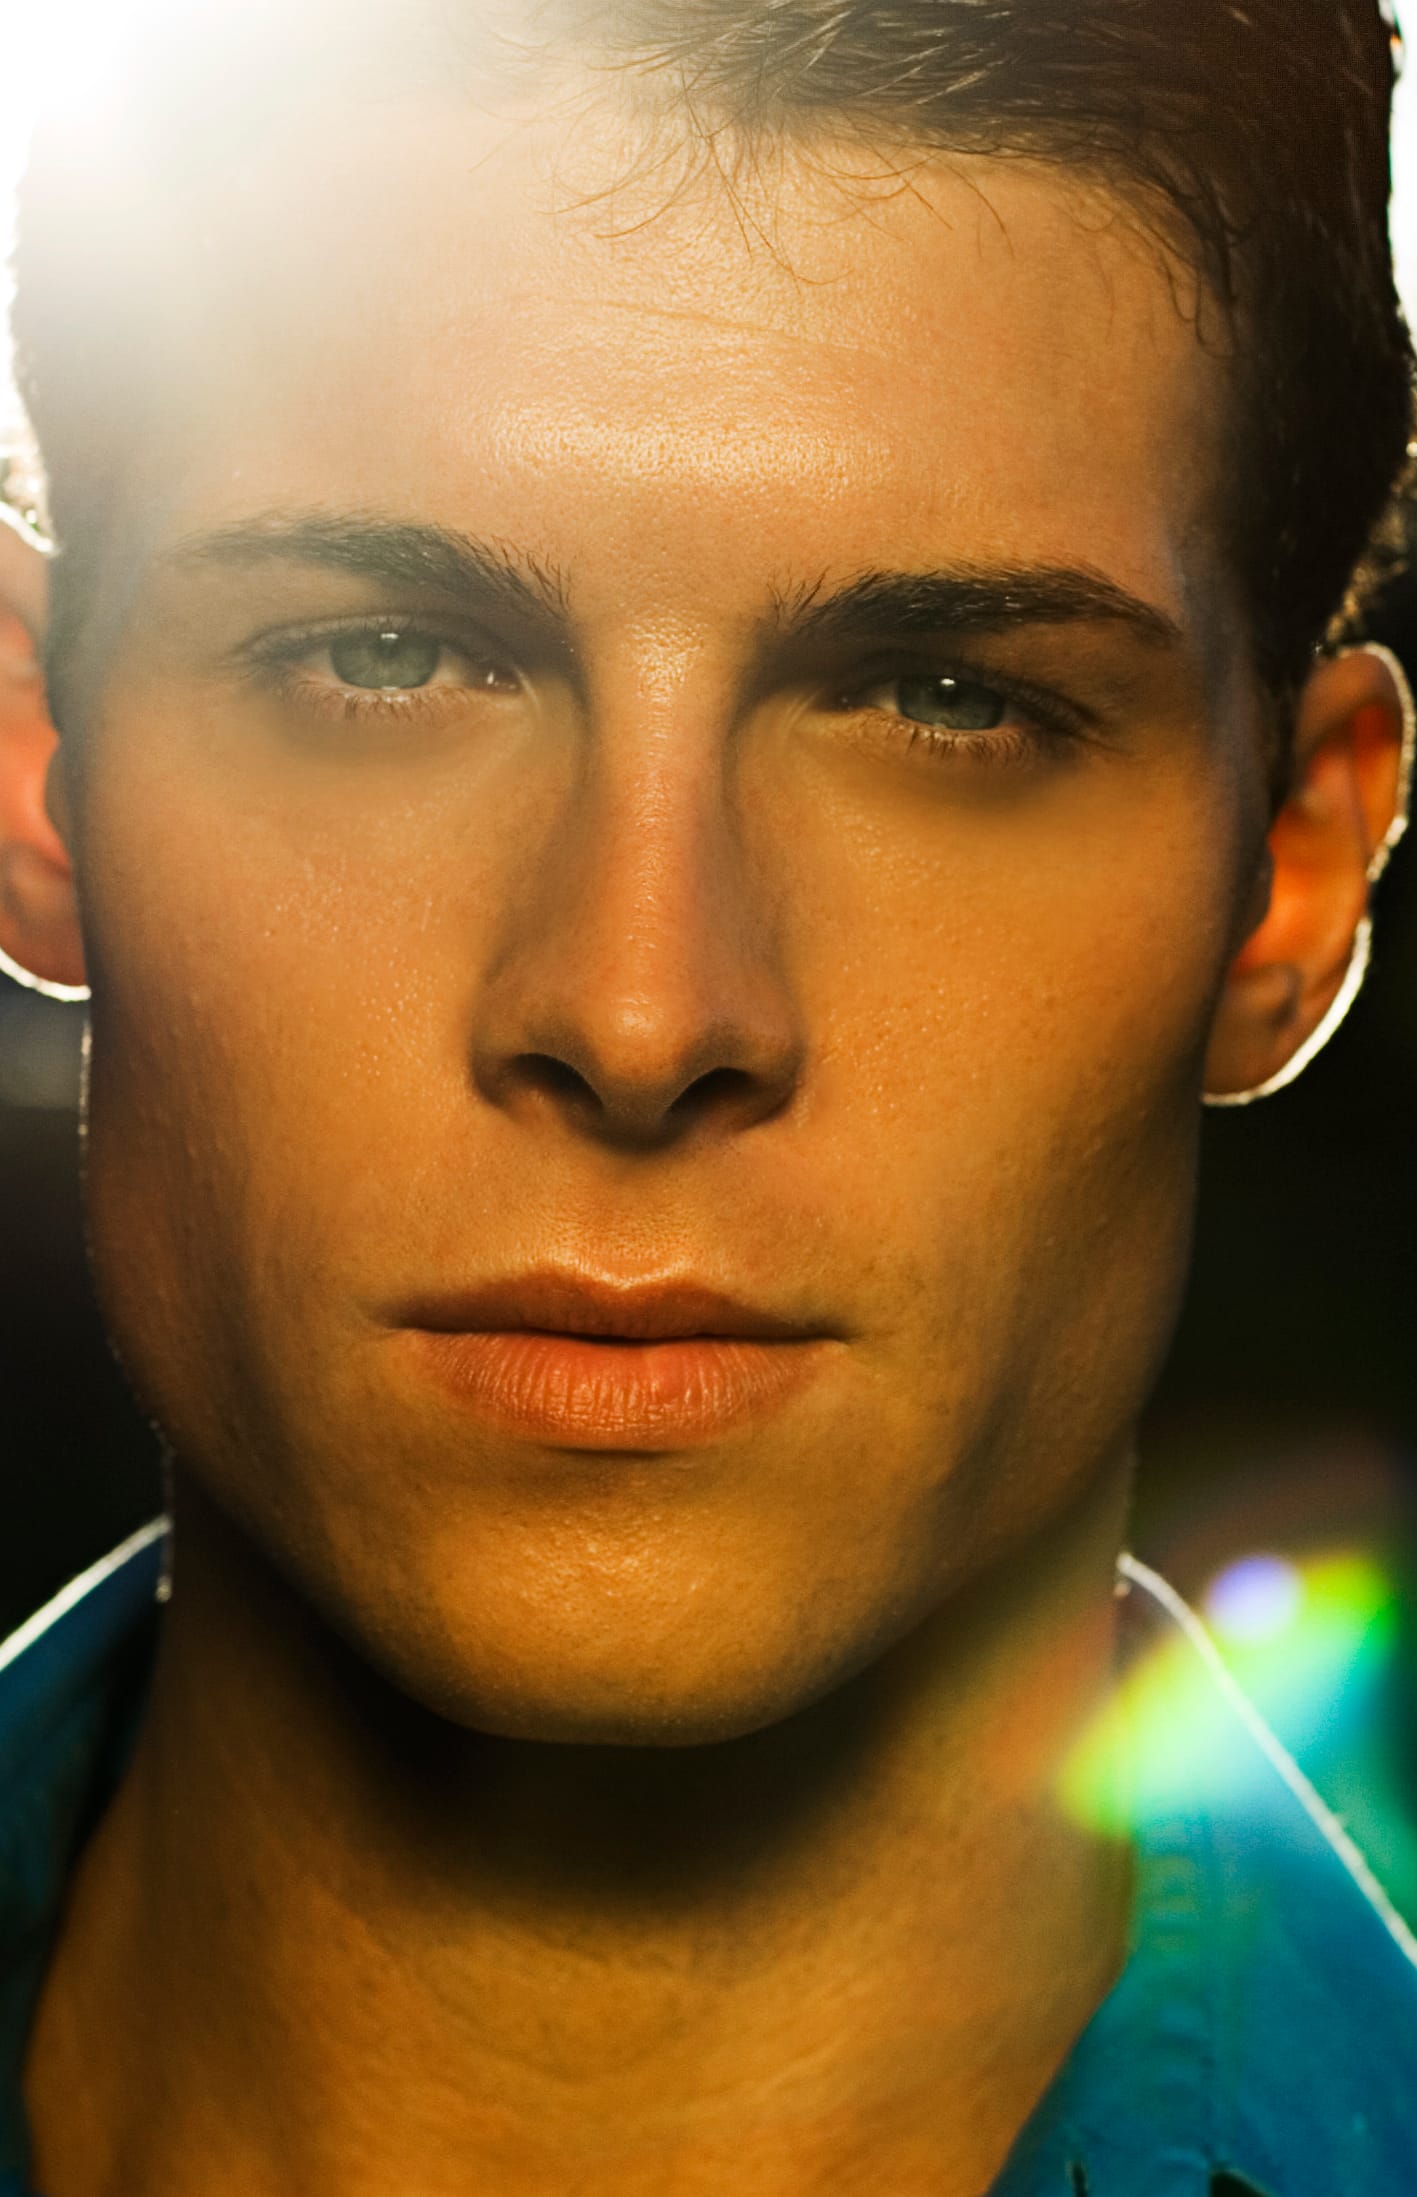
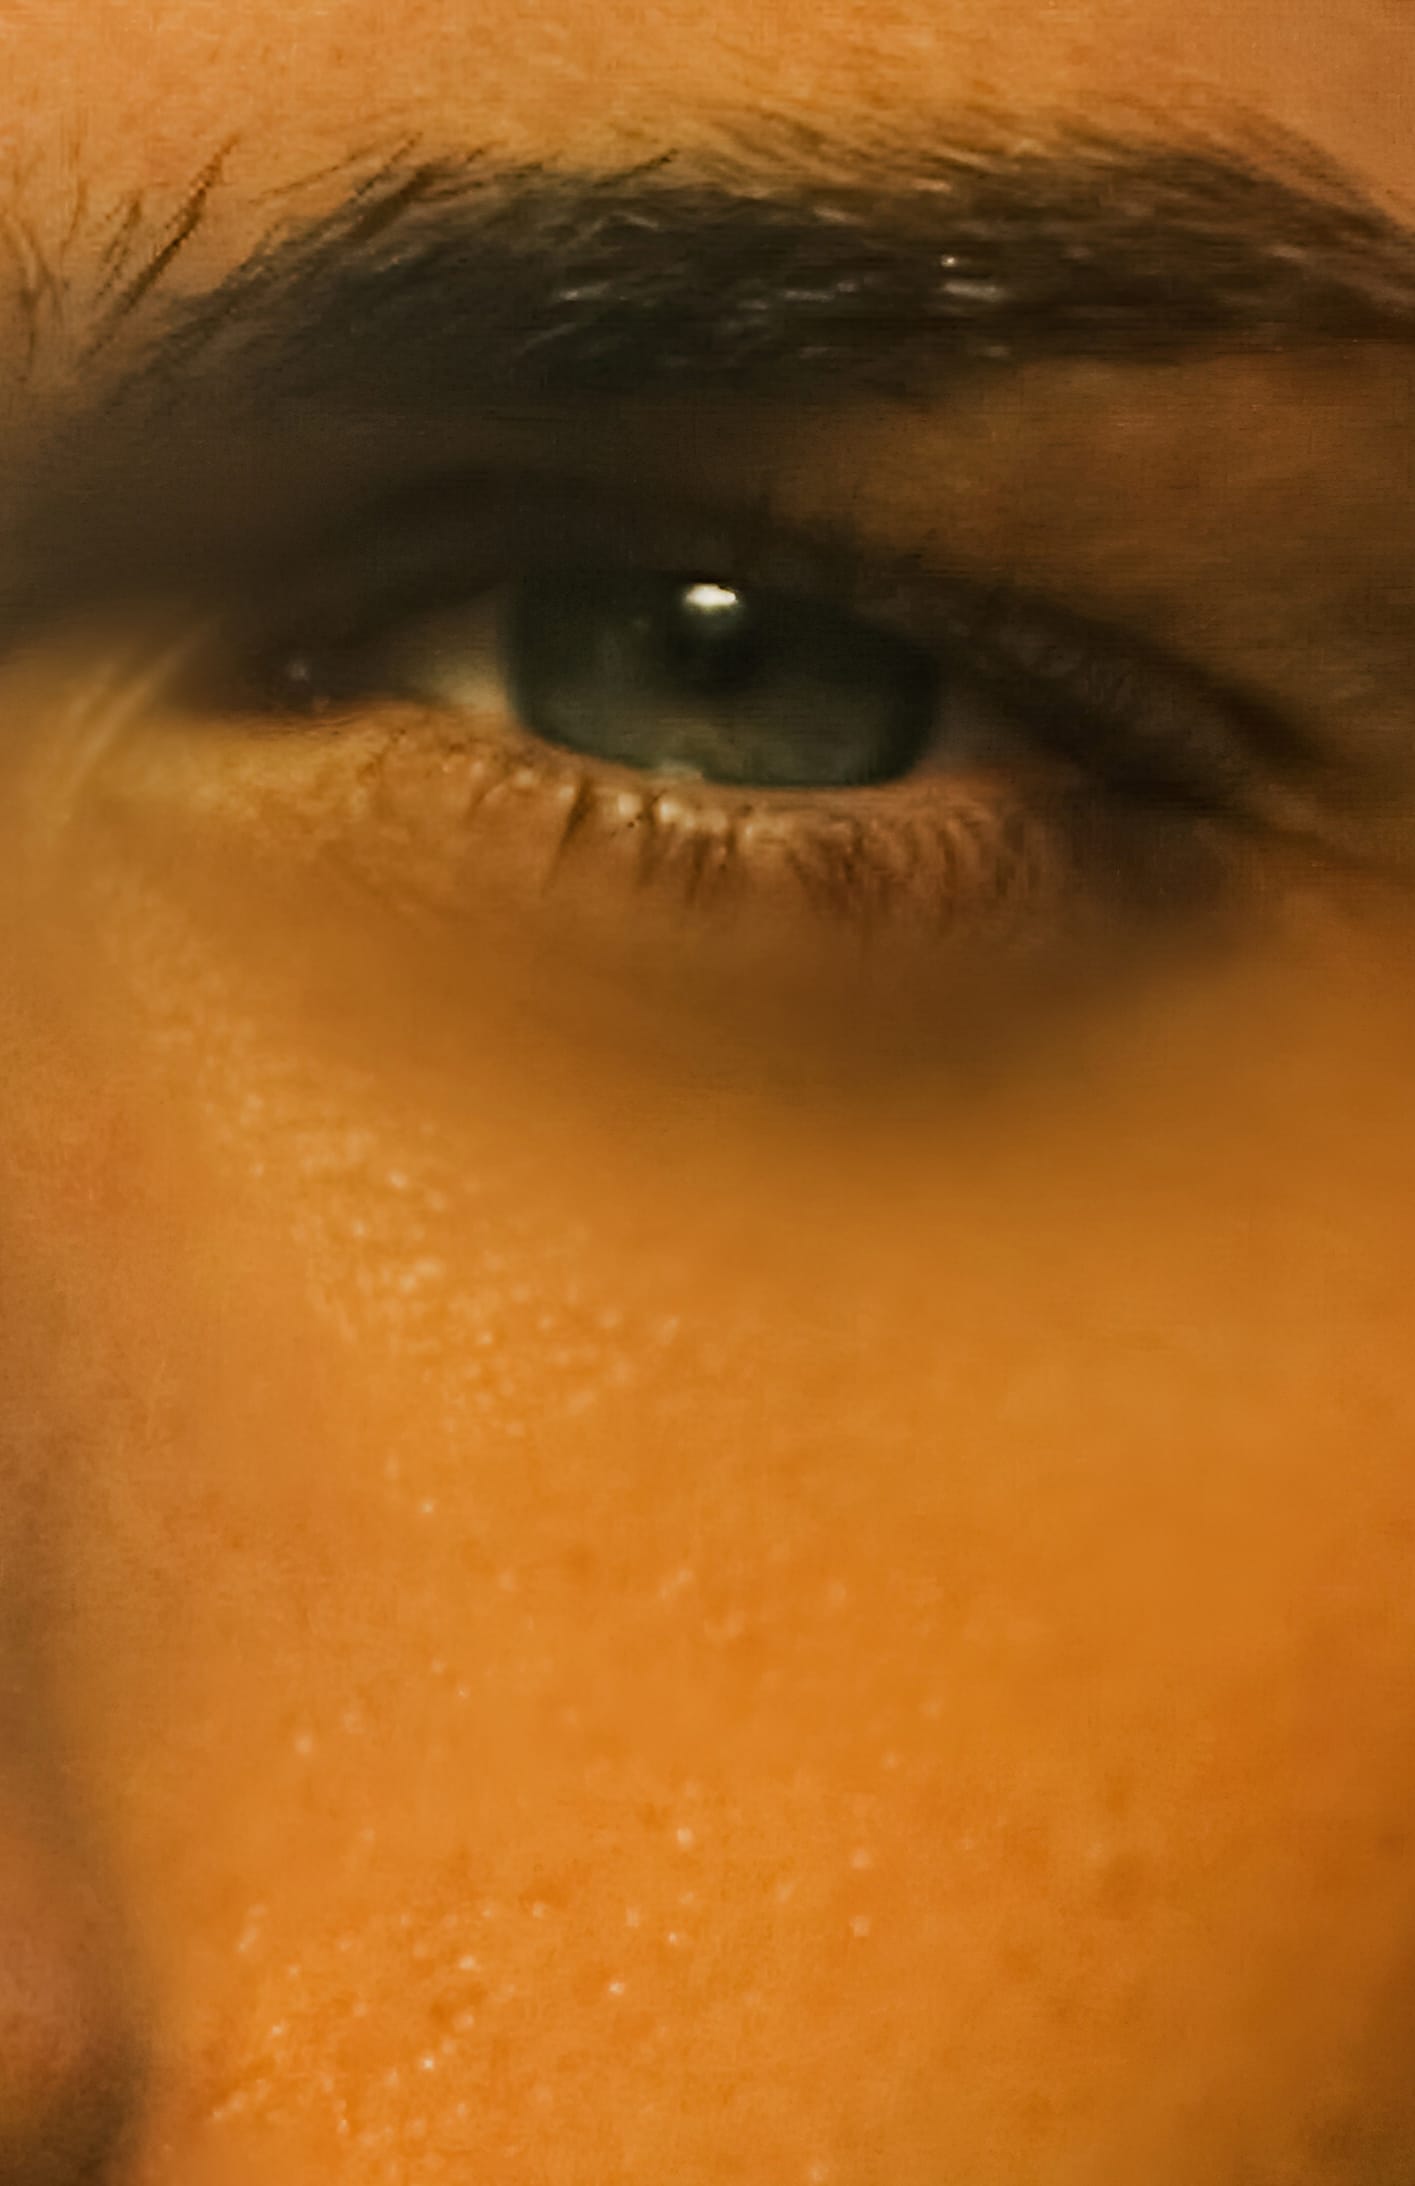
The second feature that I quickly became reliant on is called Accent AI, and it's an excellent one click slider tool to make RAW files go from a rough draft to a polished finished work in an instant. I'll be honest and say that I initially assumed this would be a total gimmick, but came away impressed with every image I applied this to. Here's a portrait I took 11 years ago with a Canon EOS 5D Classic from 2005 using the Speedway Preset and Accent AI.
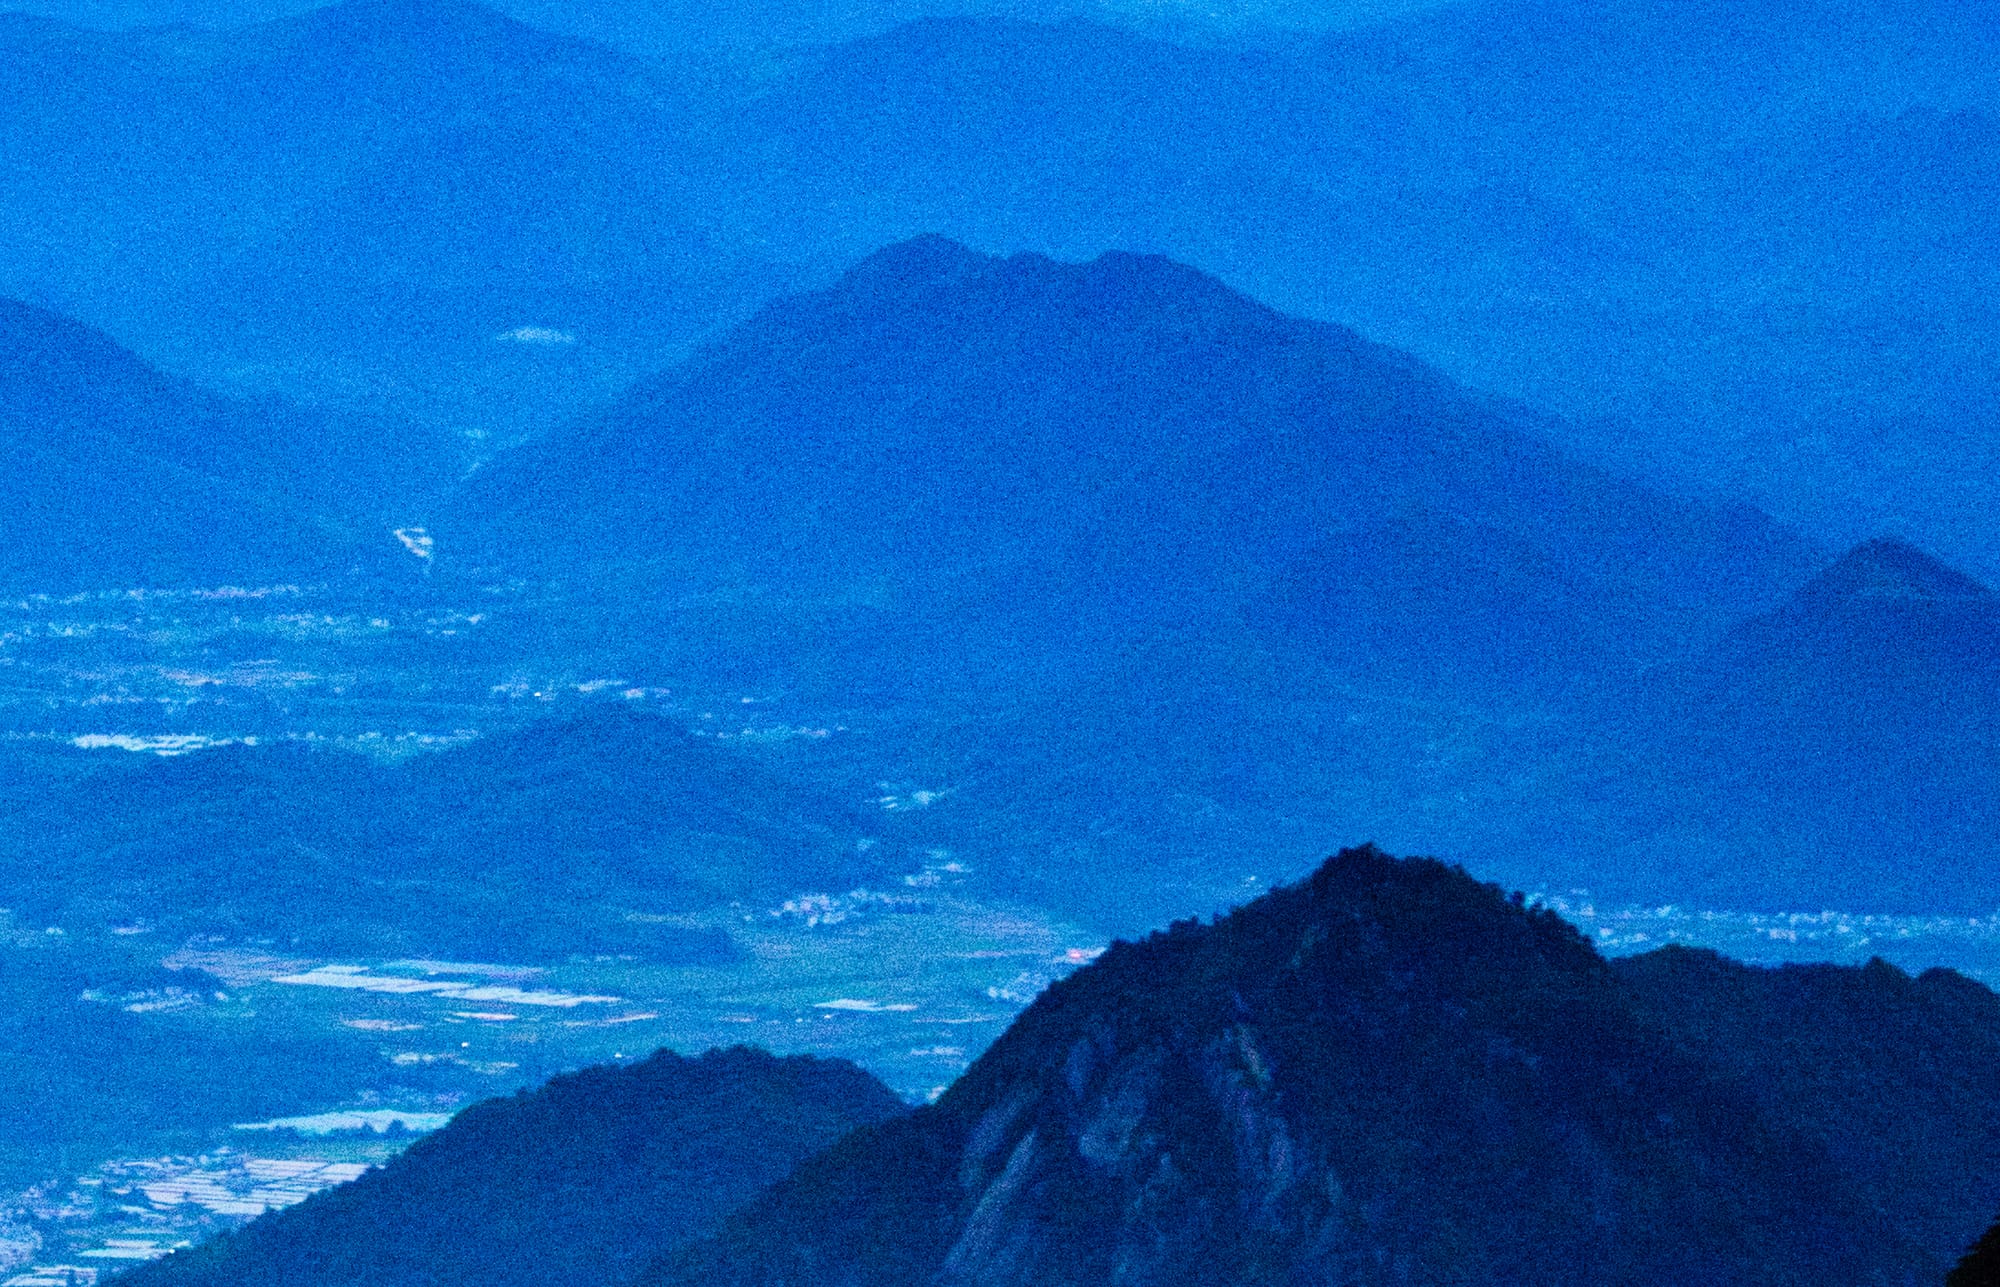
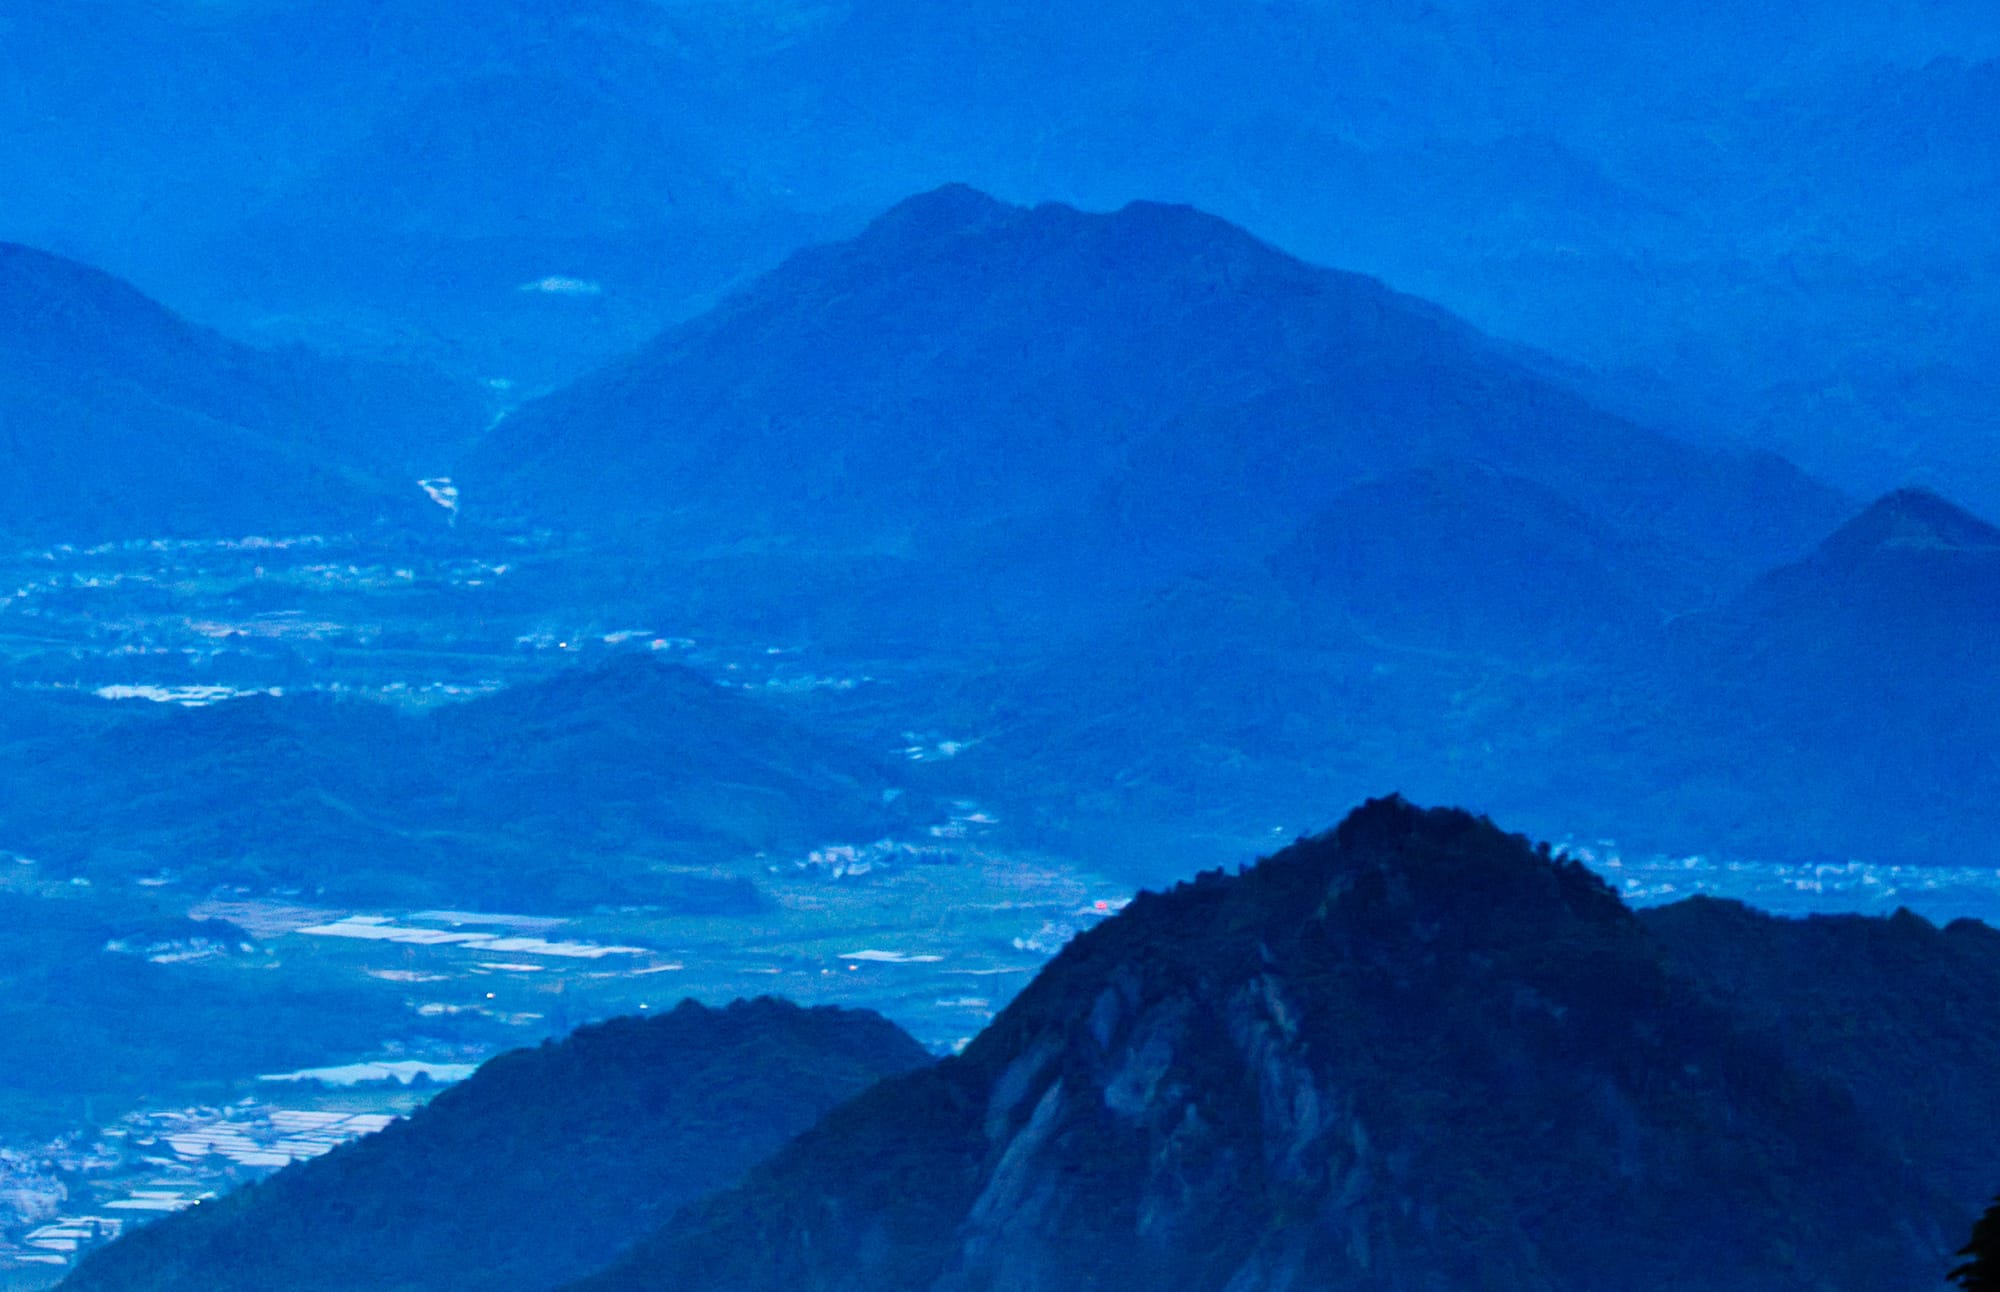
I also found that the AI sliders do a surprisingly good job of improving the color, contrast, and dynamic range in specific targeted sections of images. For example, the AI Sky Enhancer slider did exactly what I was aiming for without me having to manually make any selections. Just push the slider to the full amount and it does a great job of bringing out the details of the sky in any photo. This is the kind of automation I want to see more of in image editors; intelligent automatic selection of individual picture elements such as mountains, sky, flora, architecture, etc without having to waste time by manually masking out certain areas.
GenErase
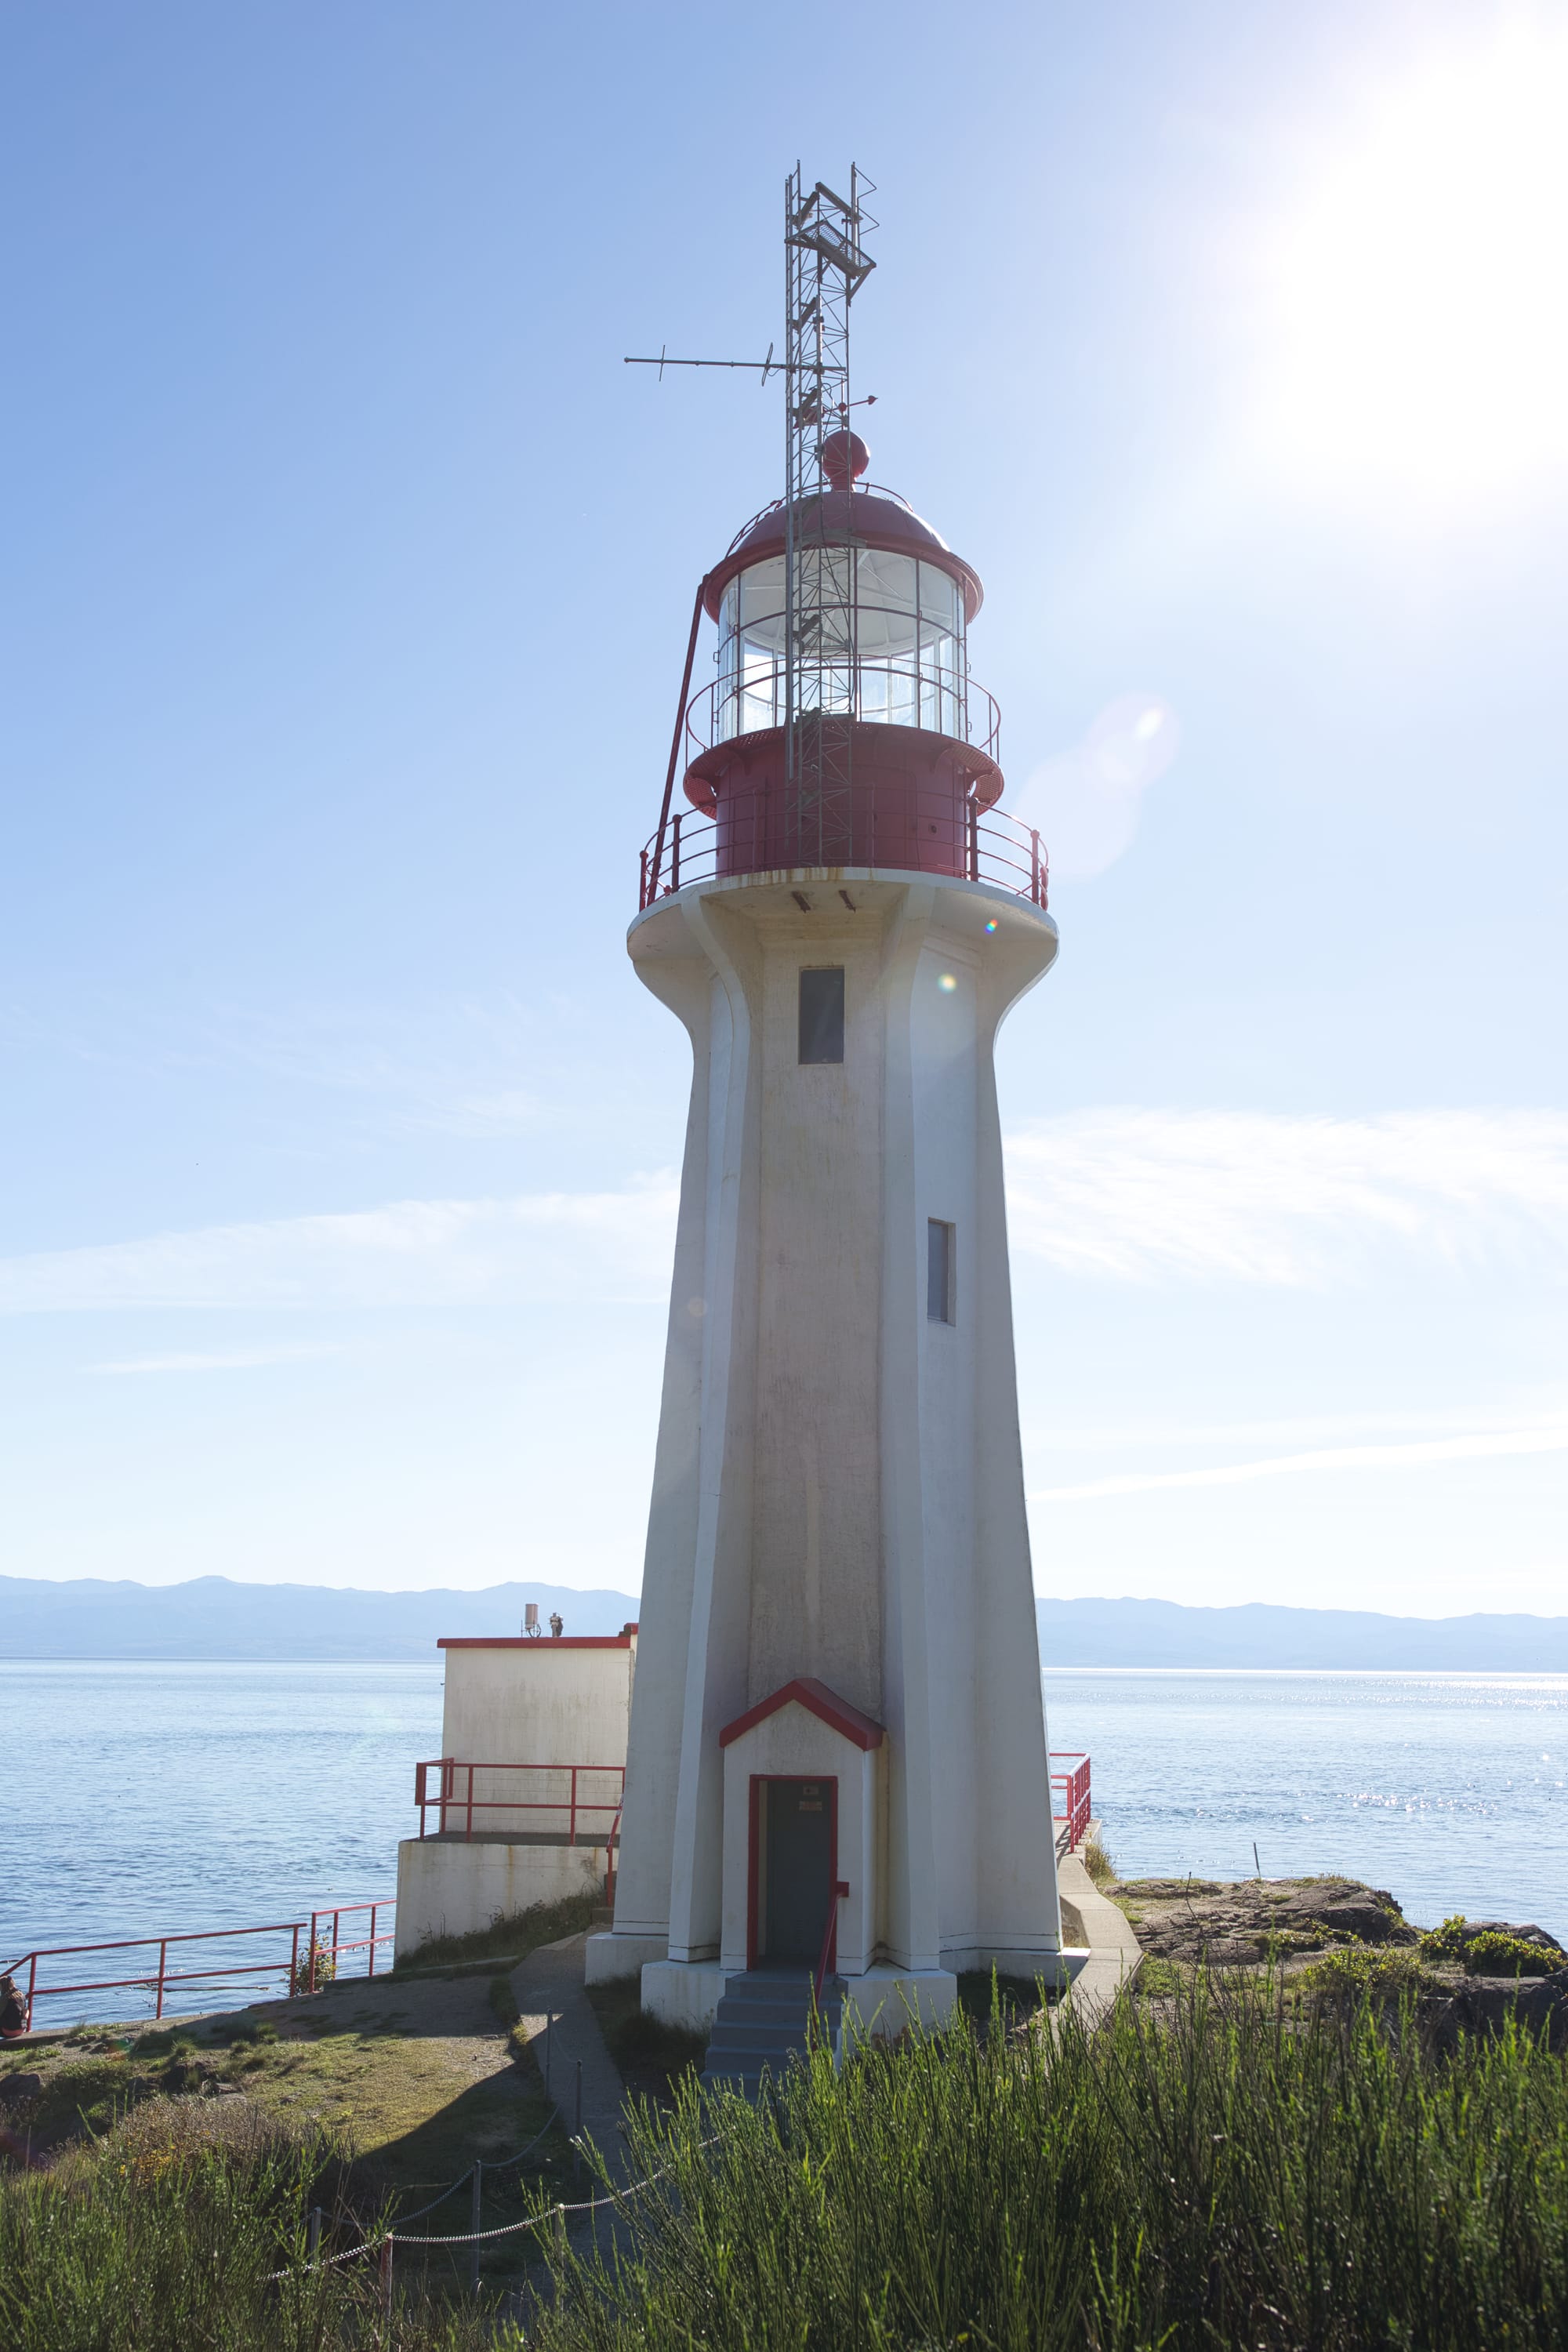
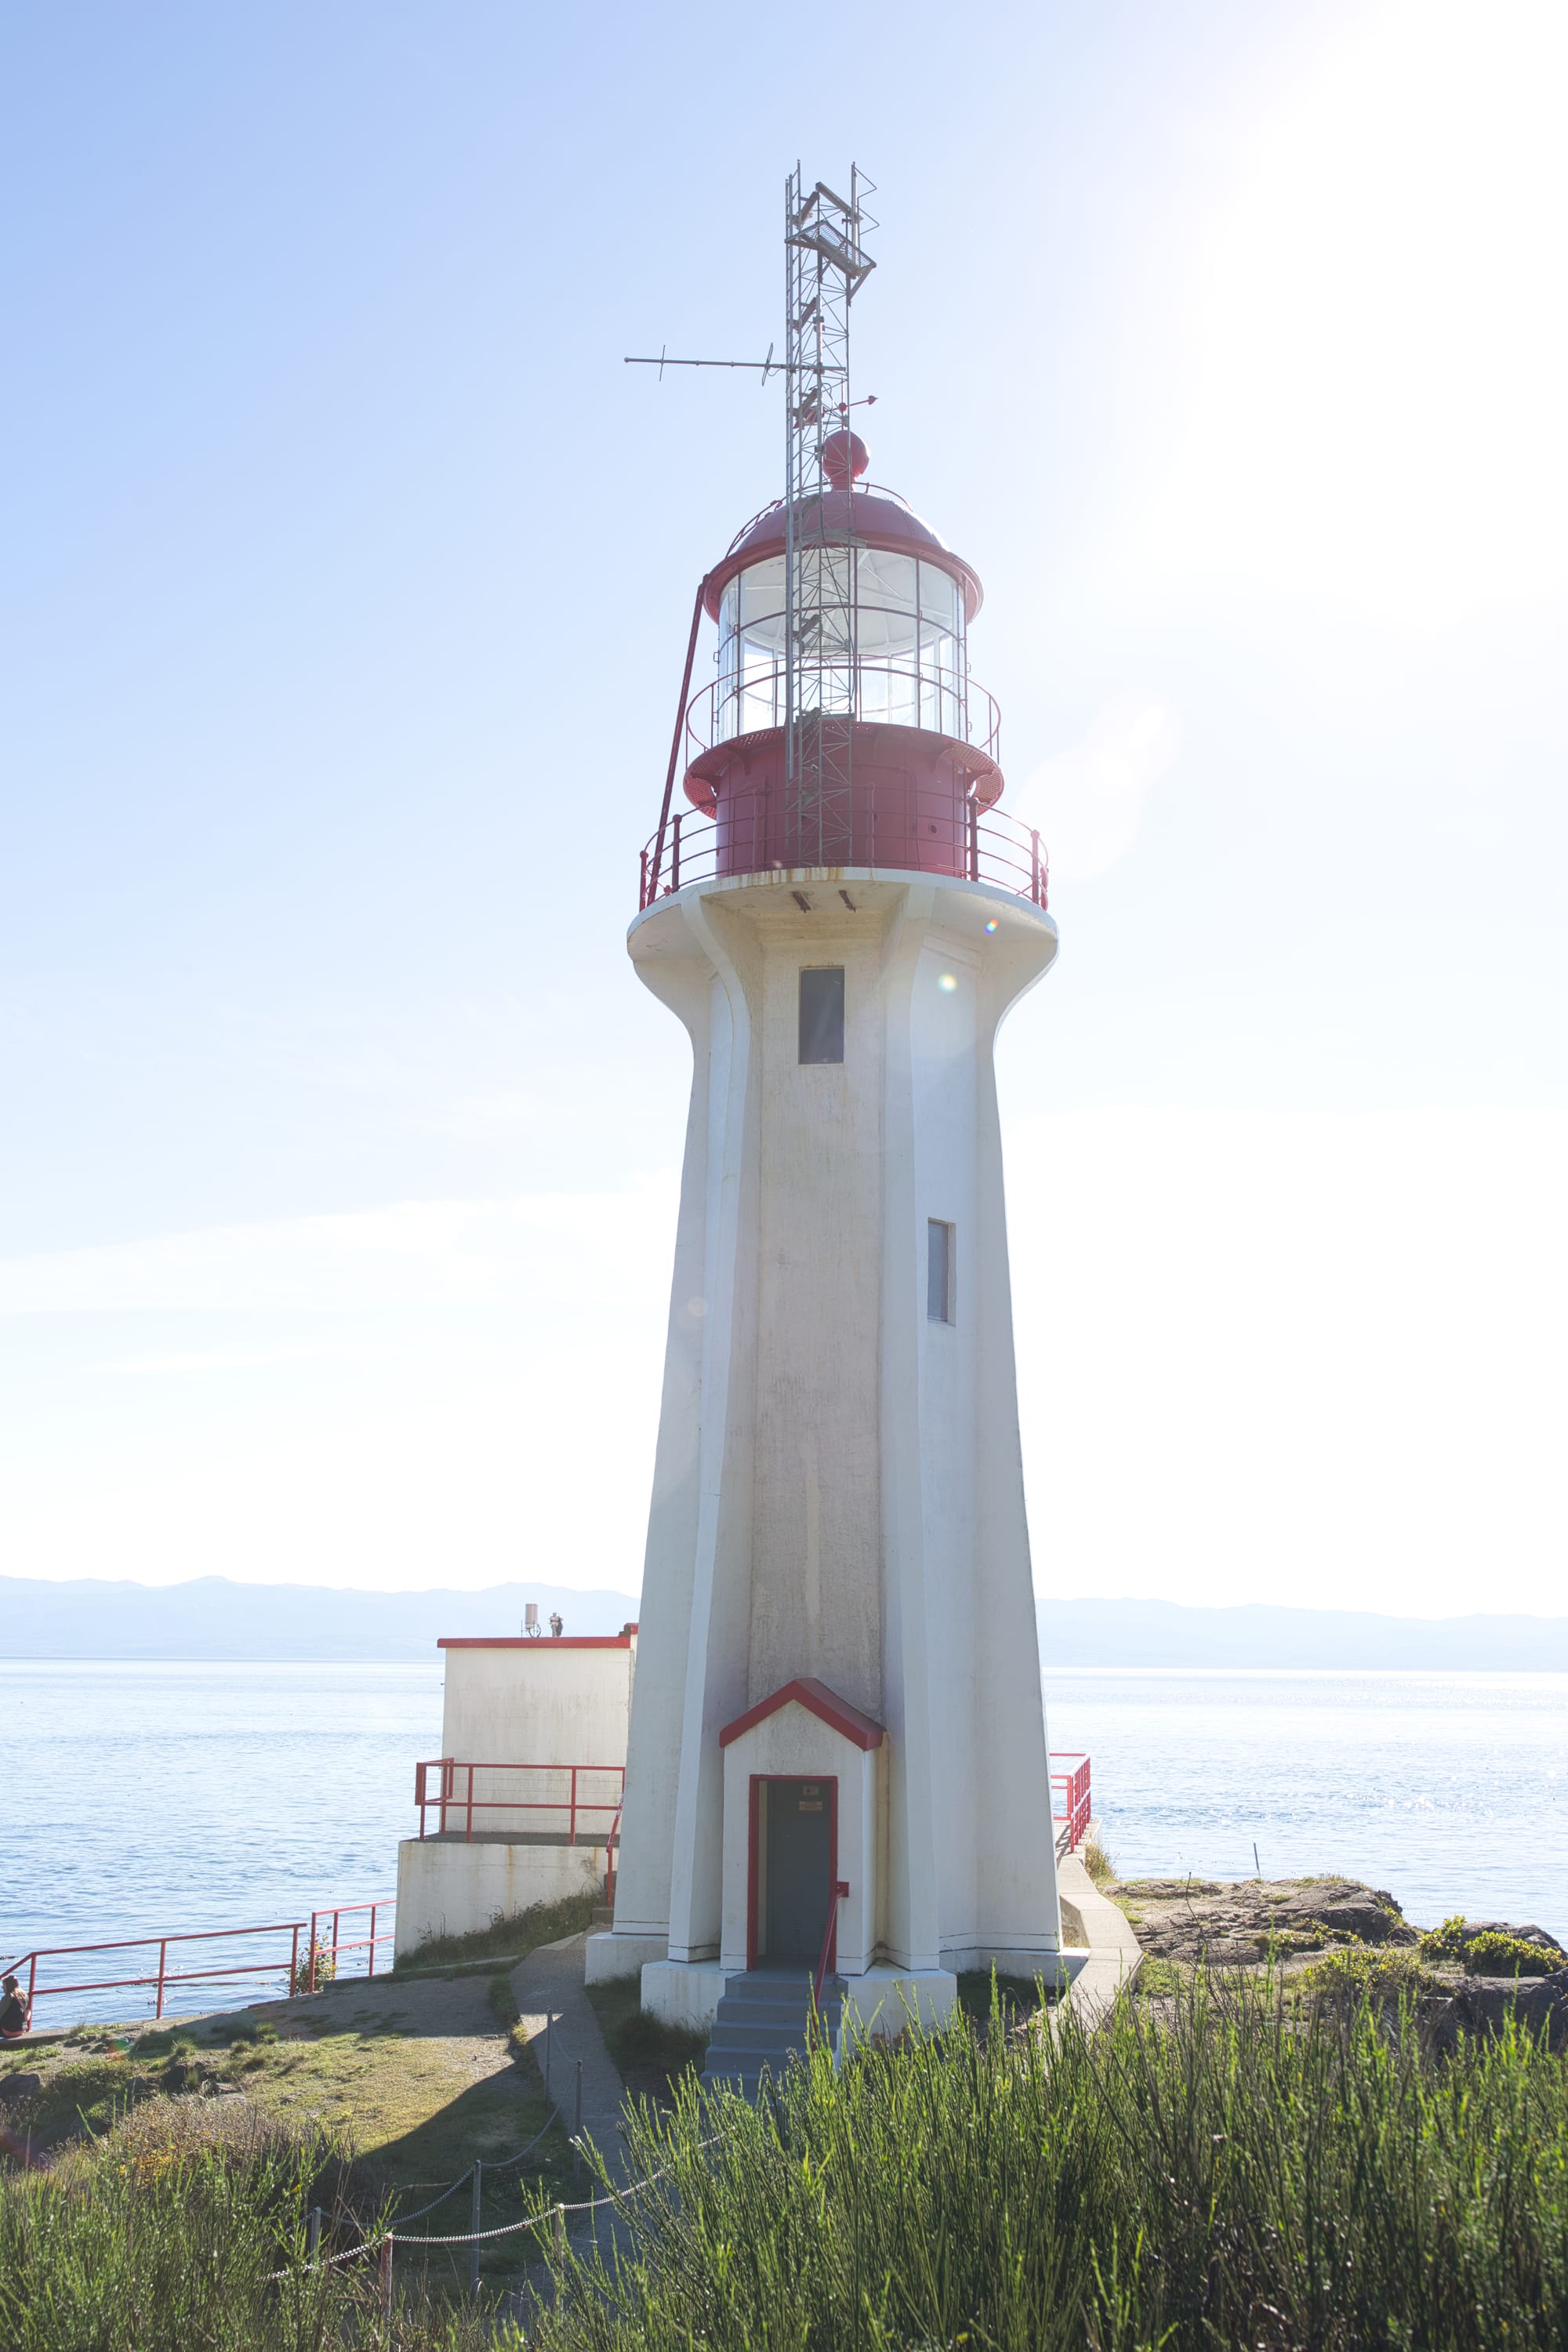
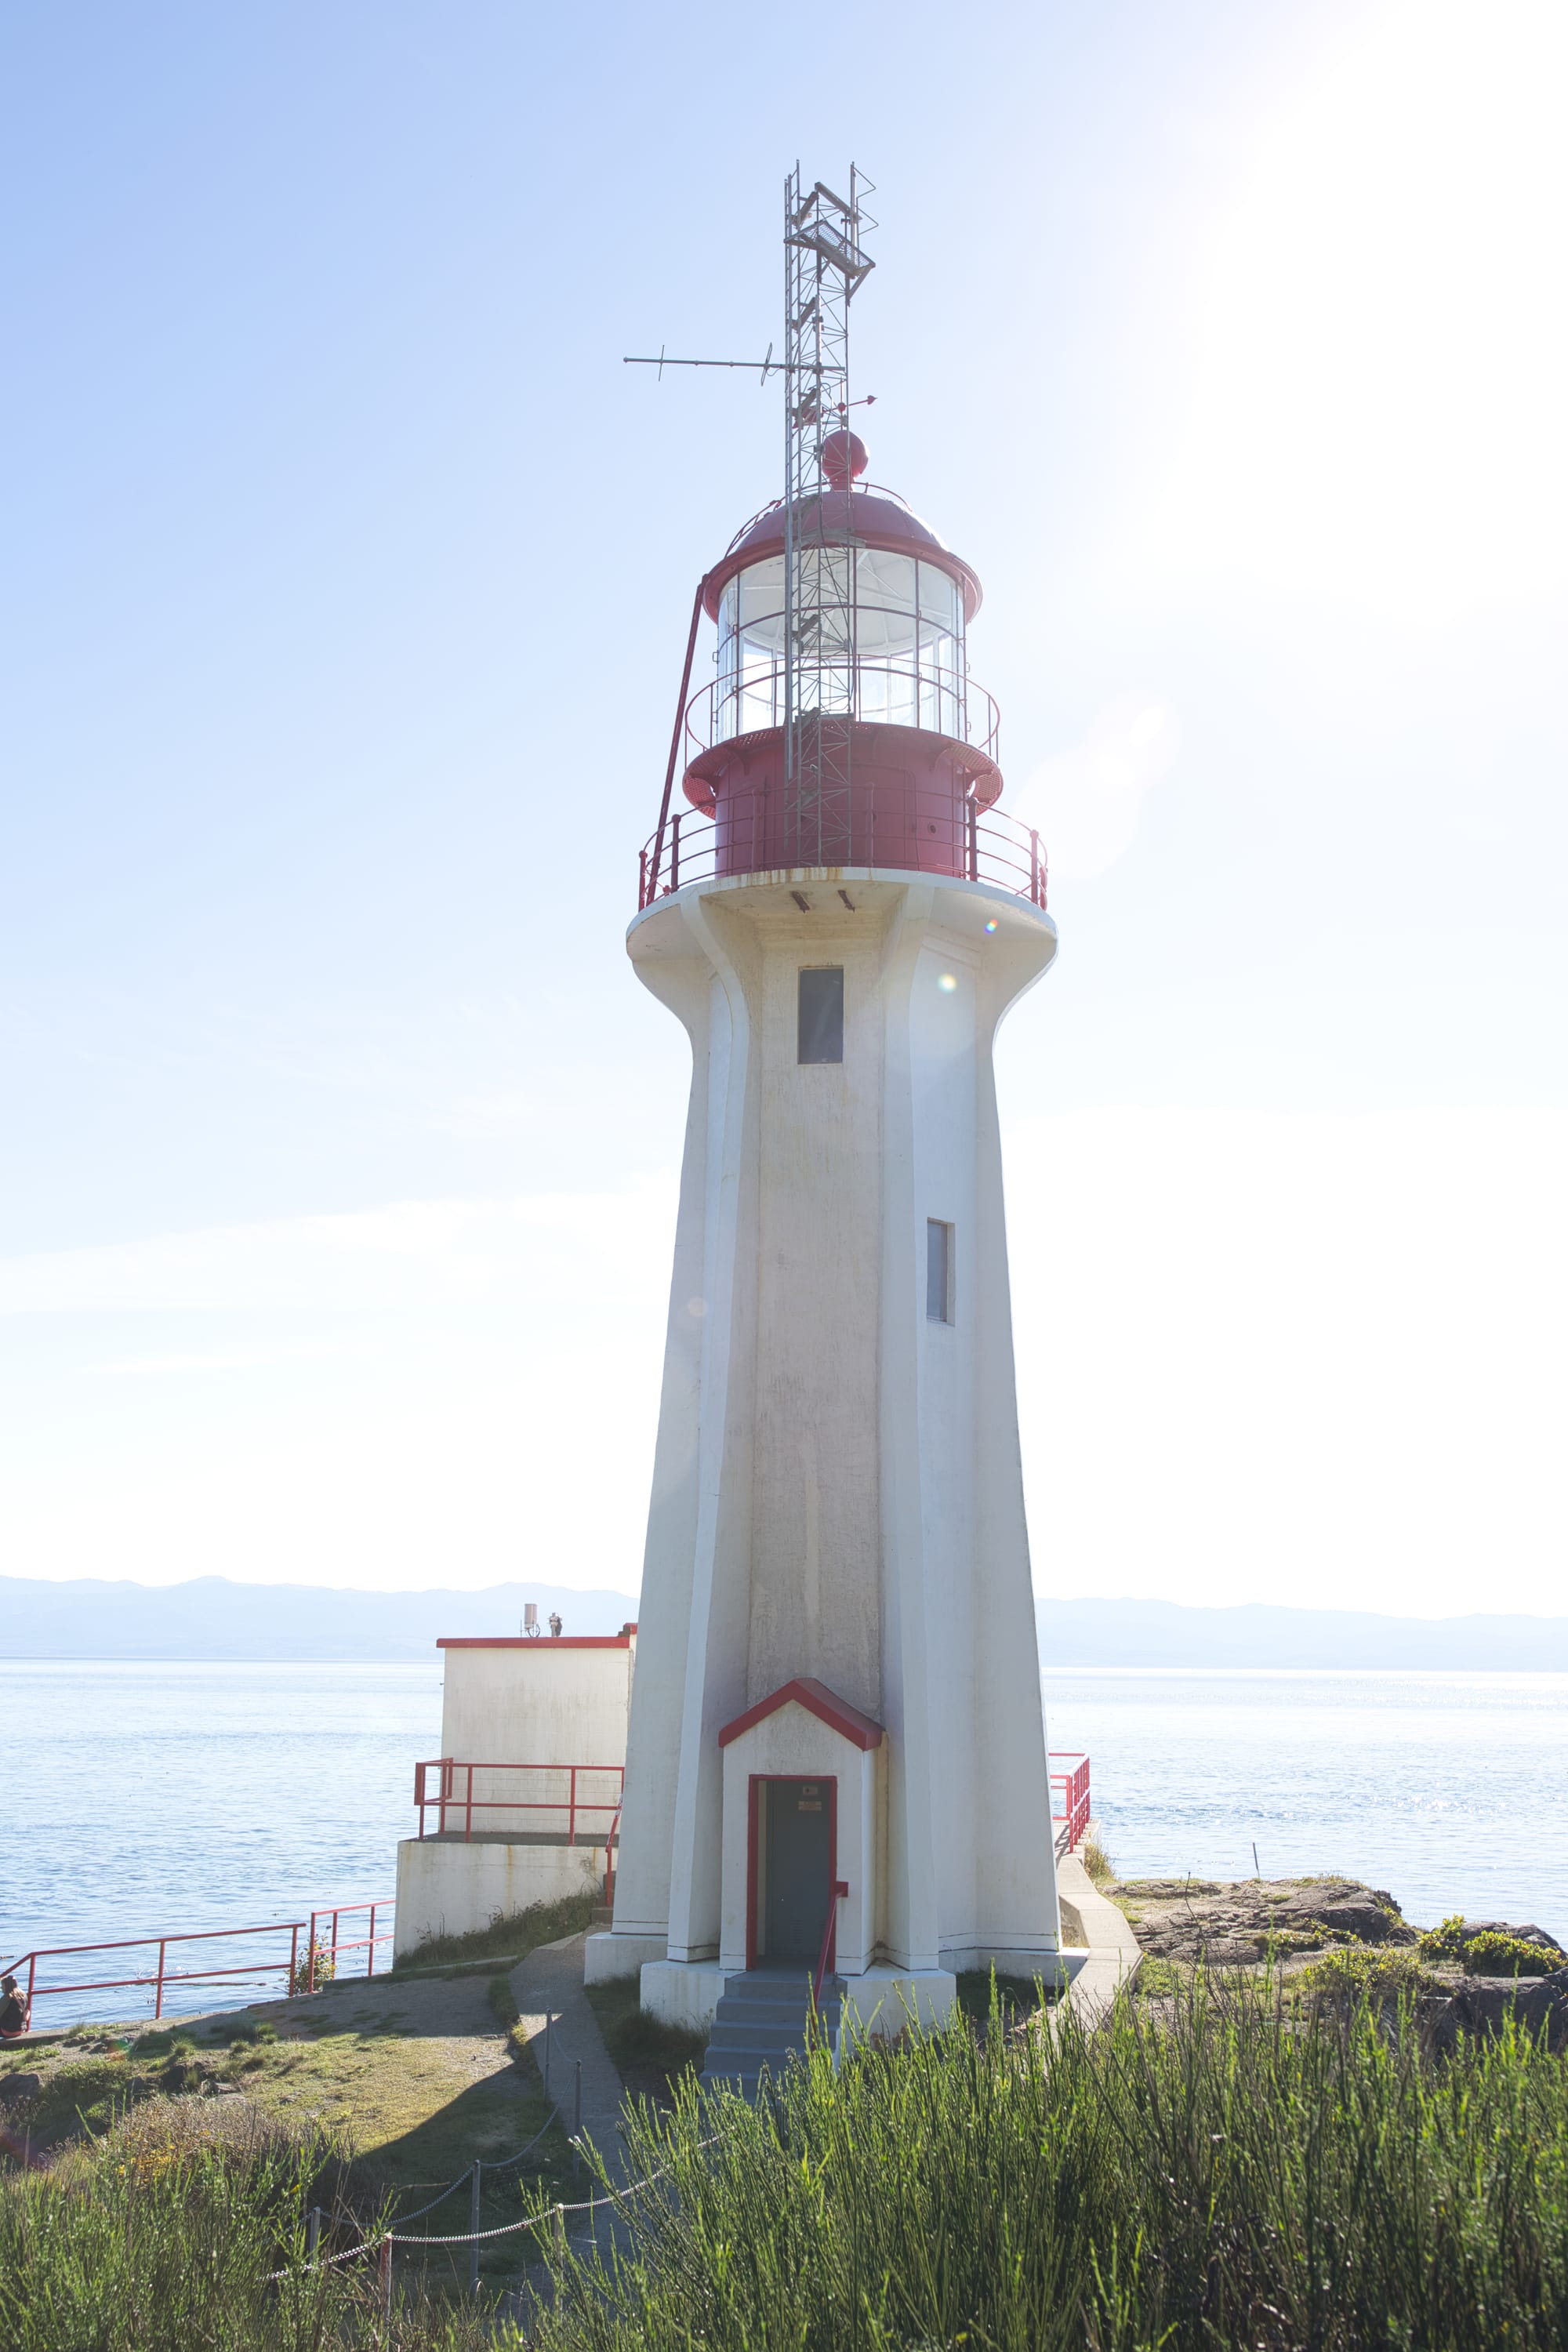
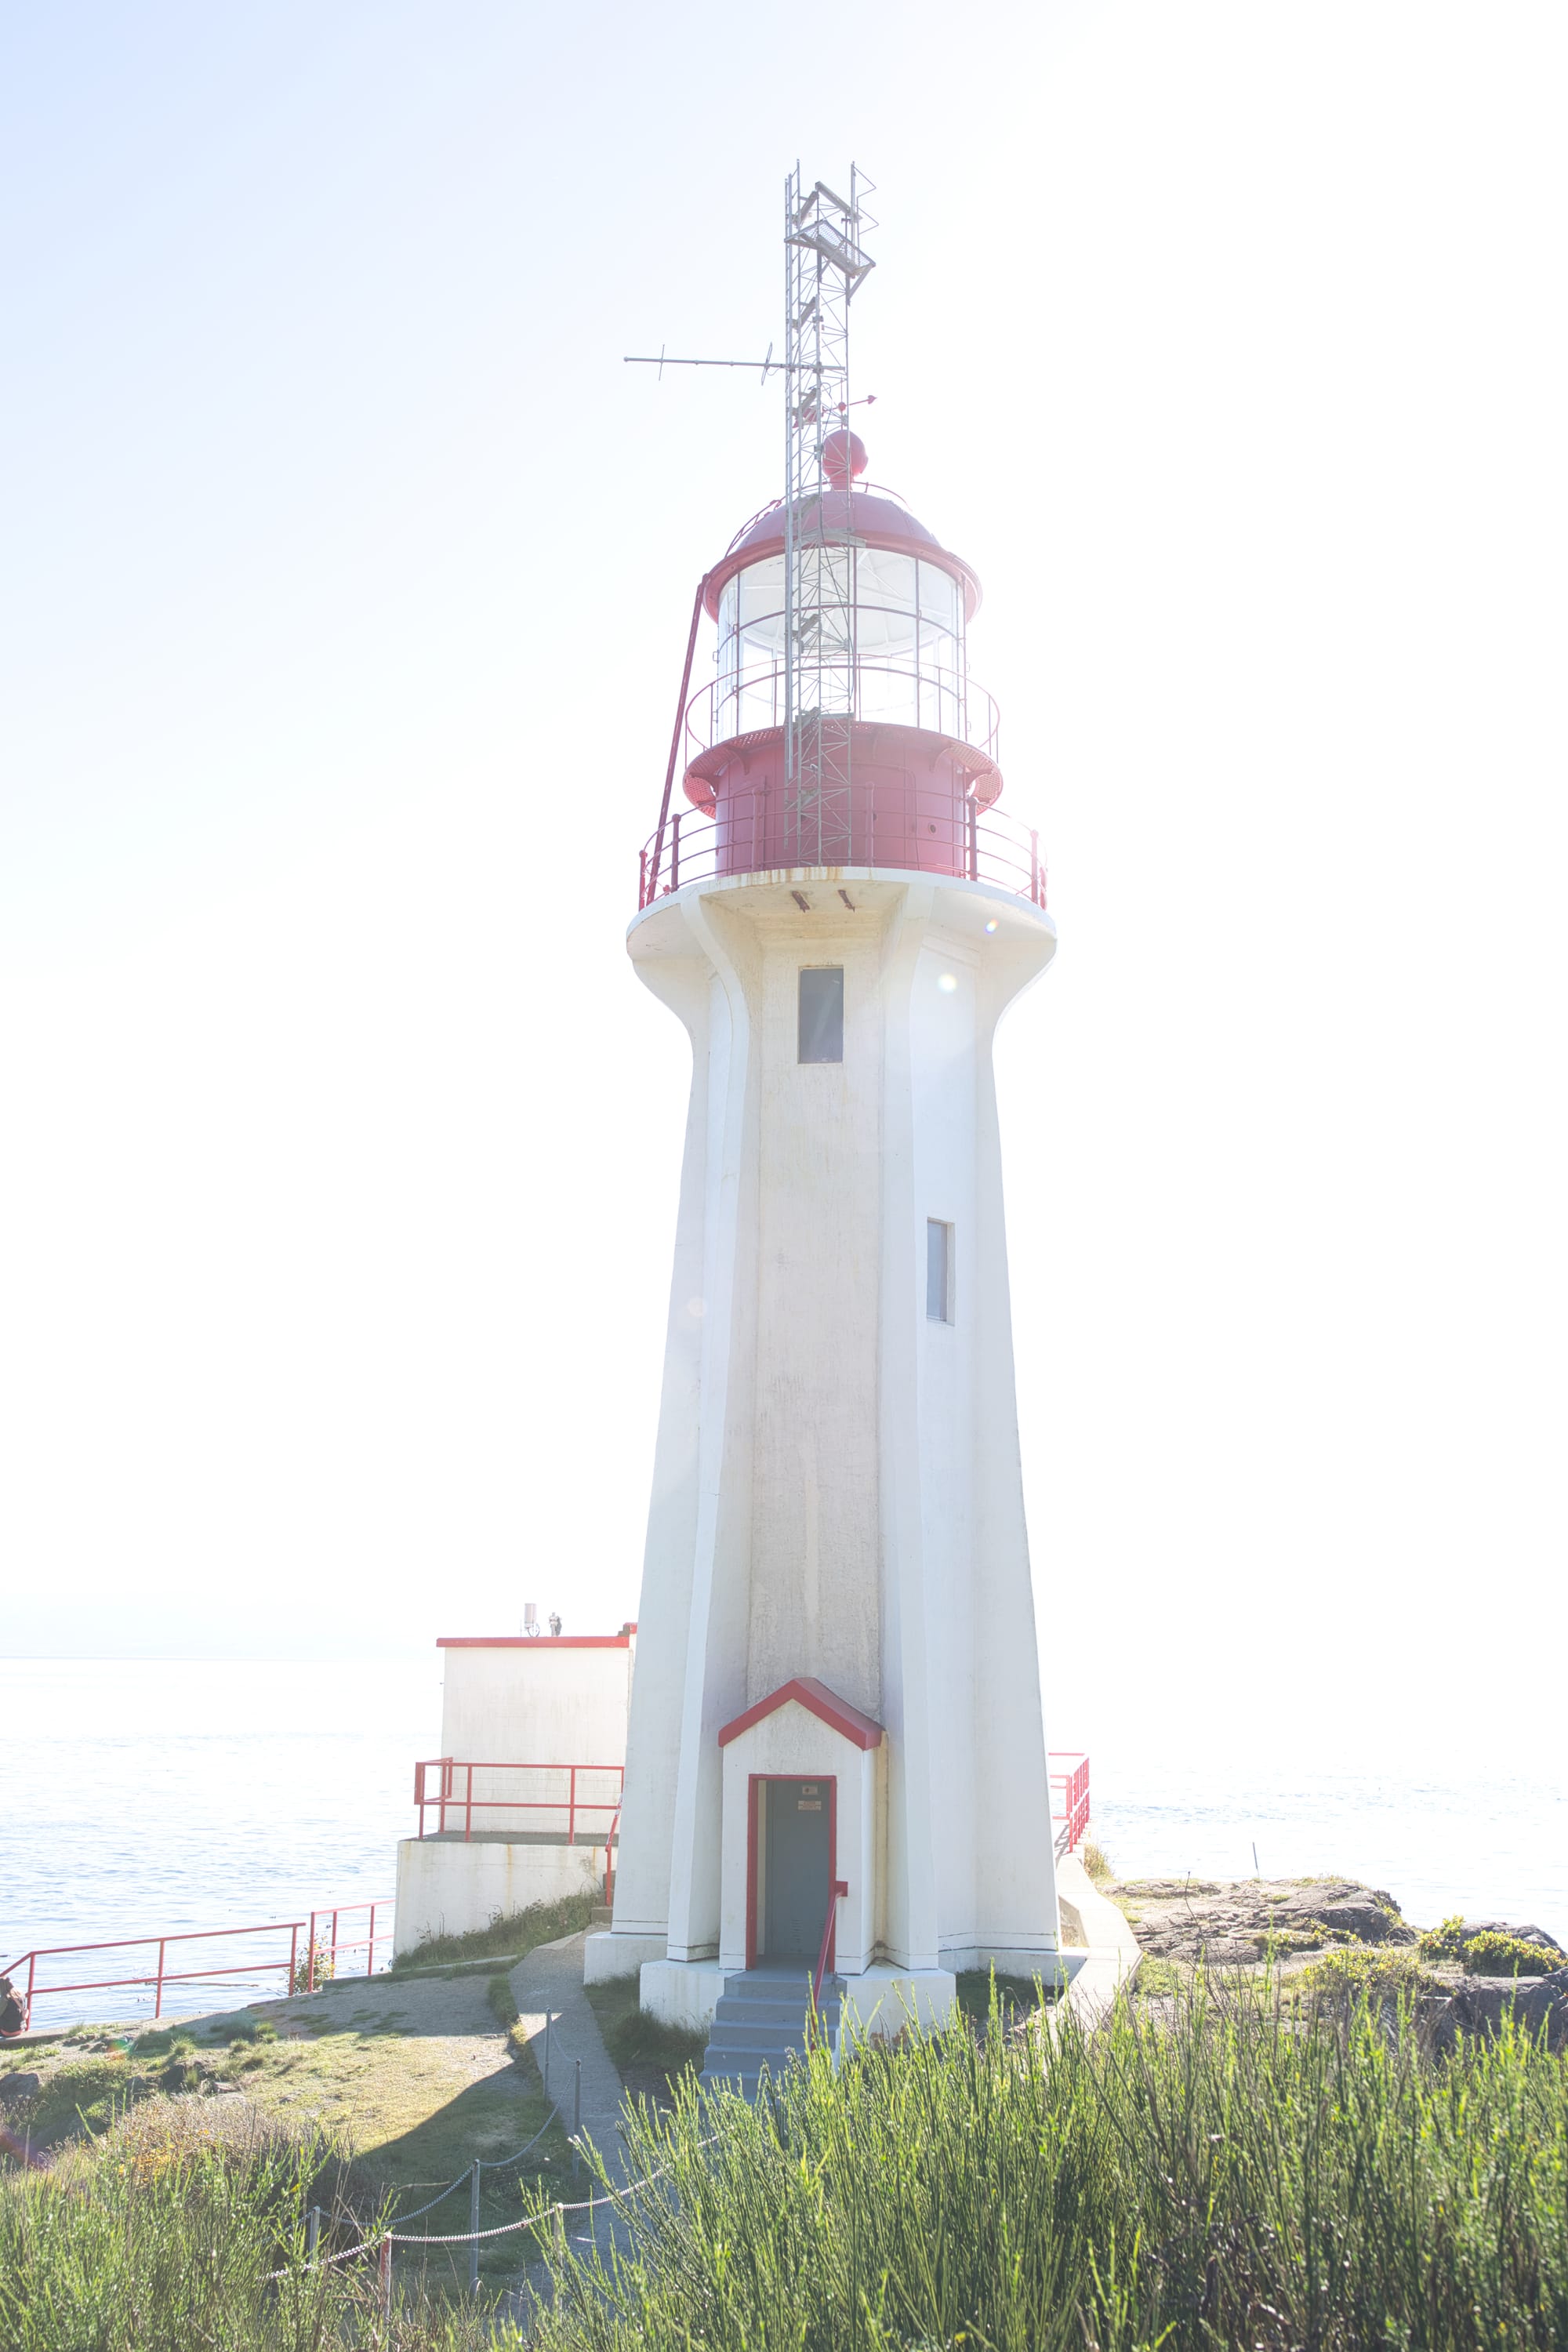
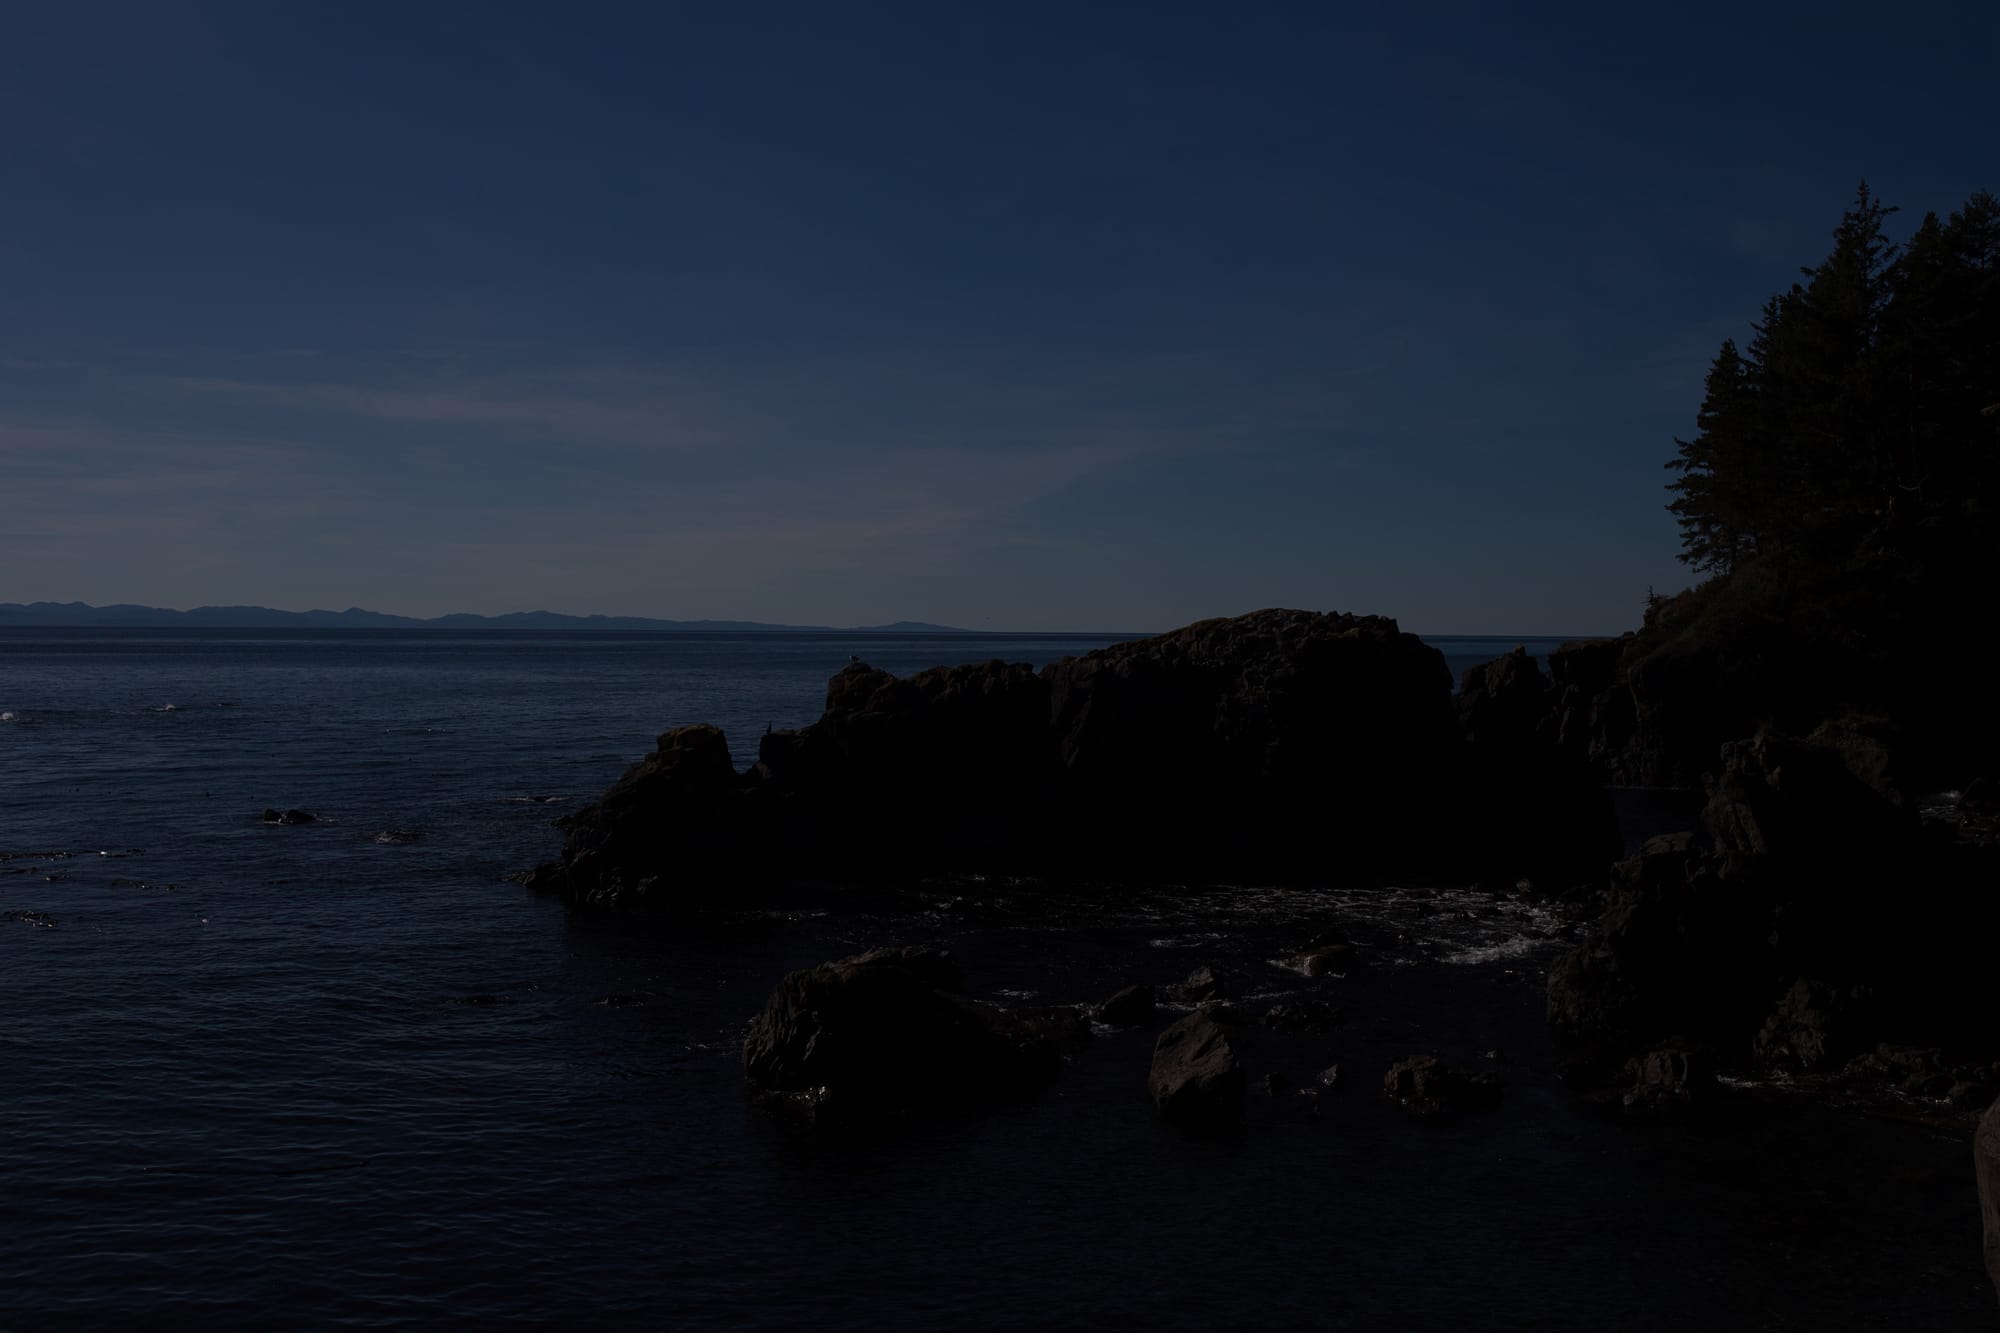
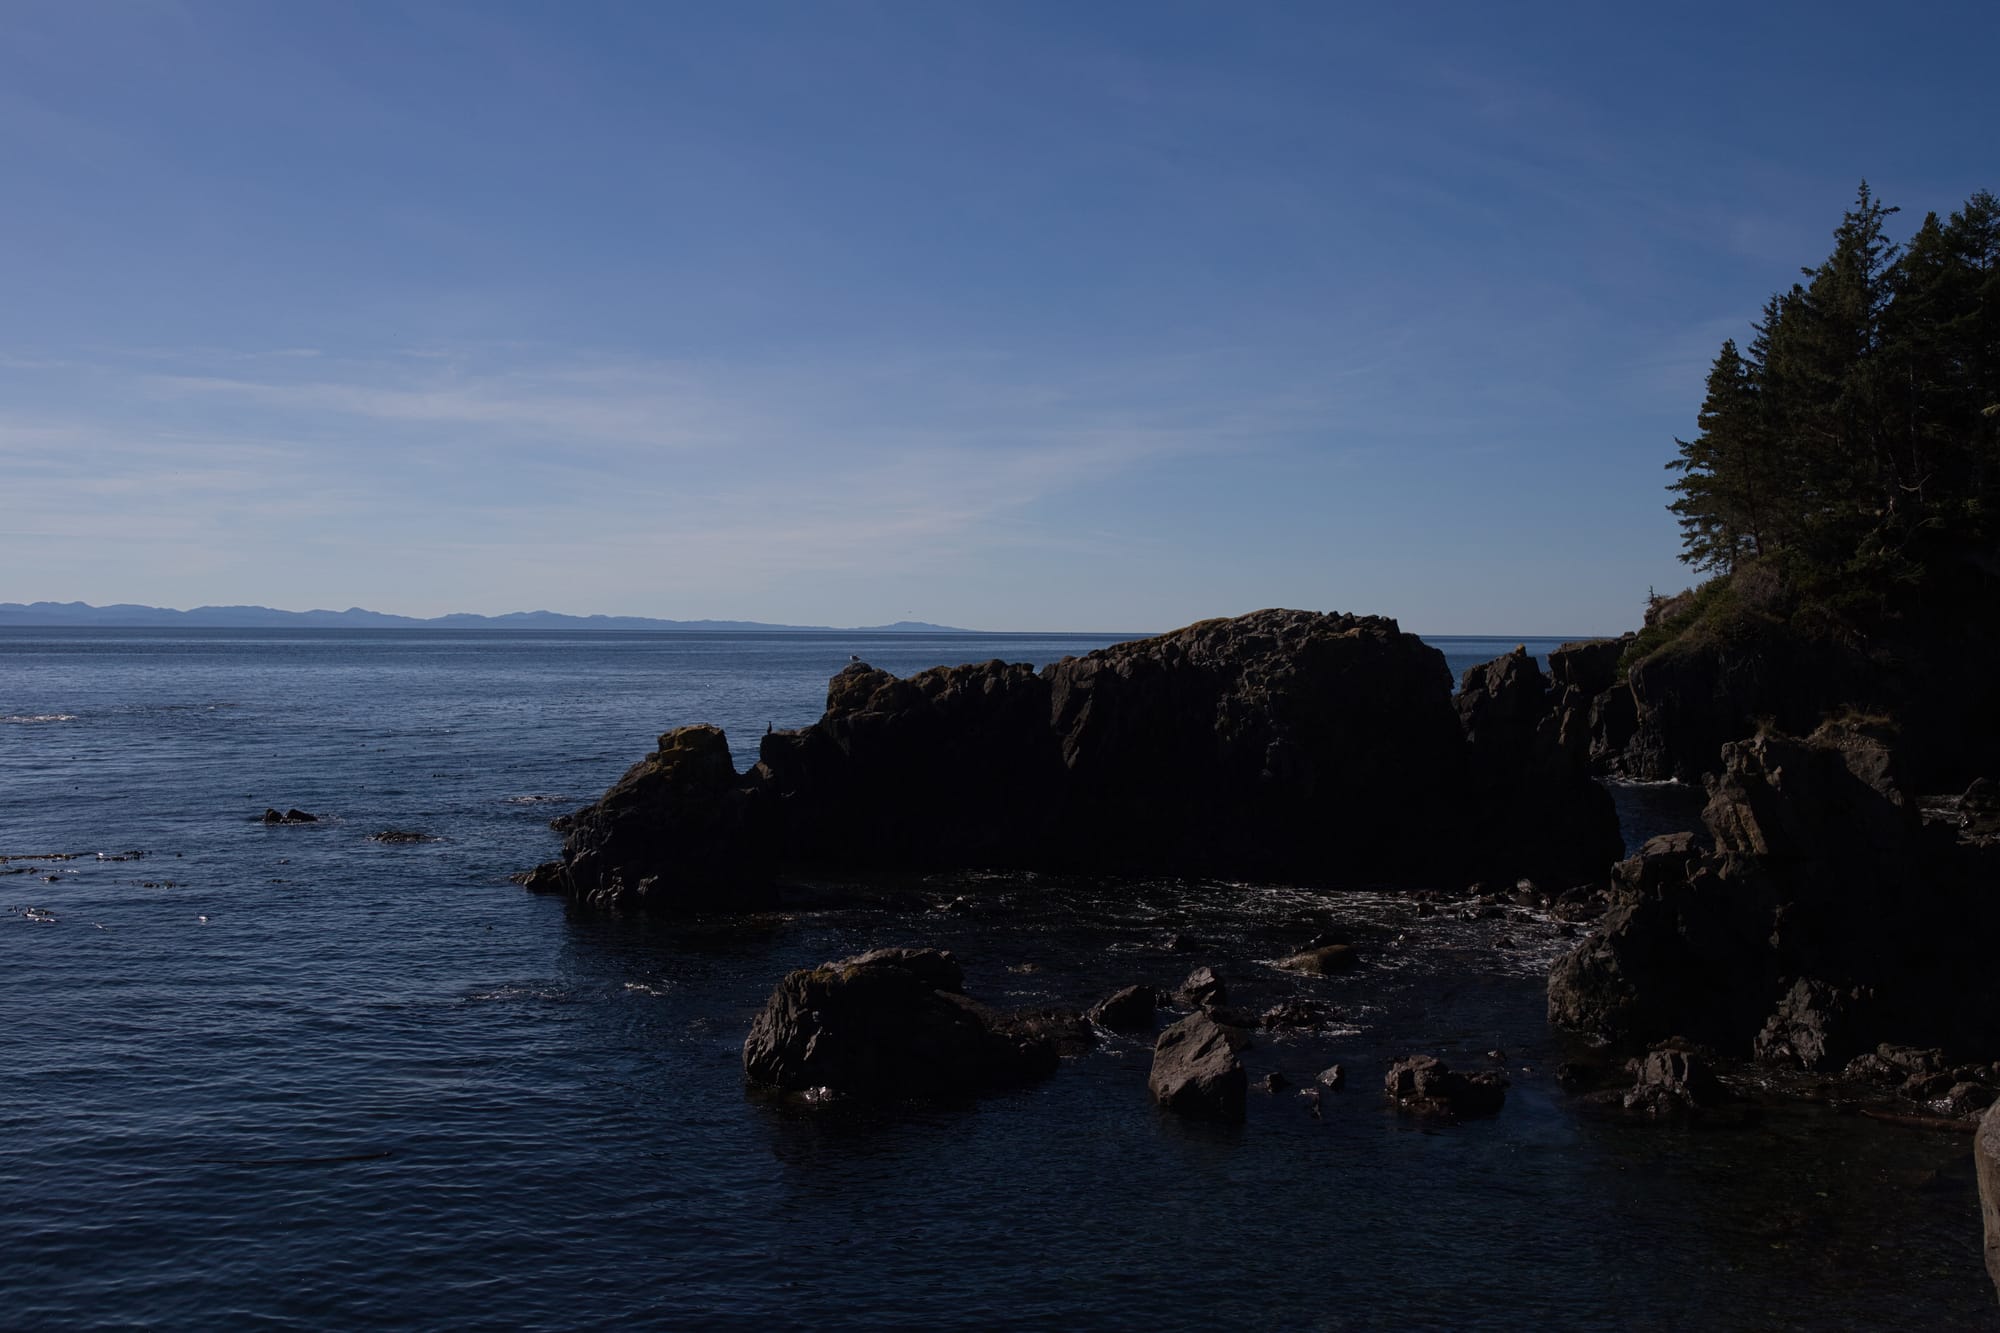
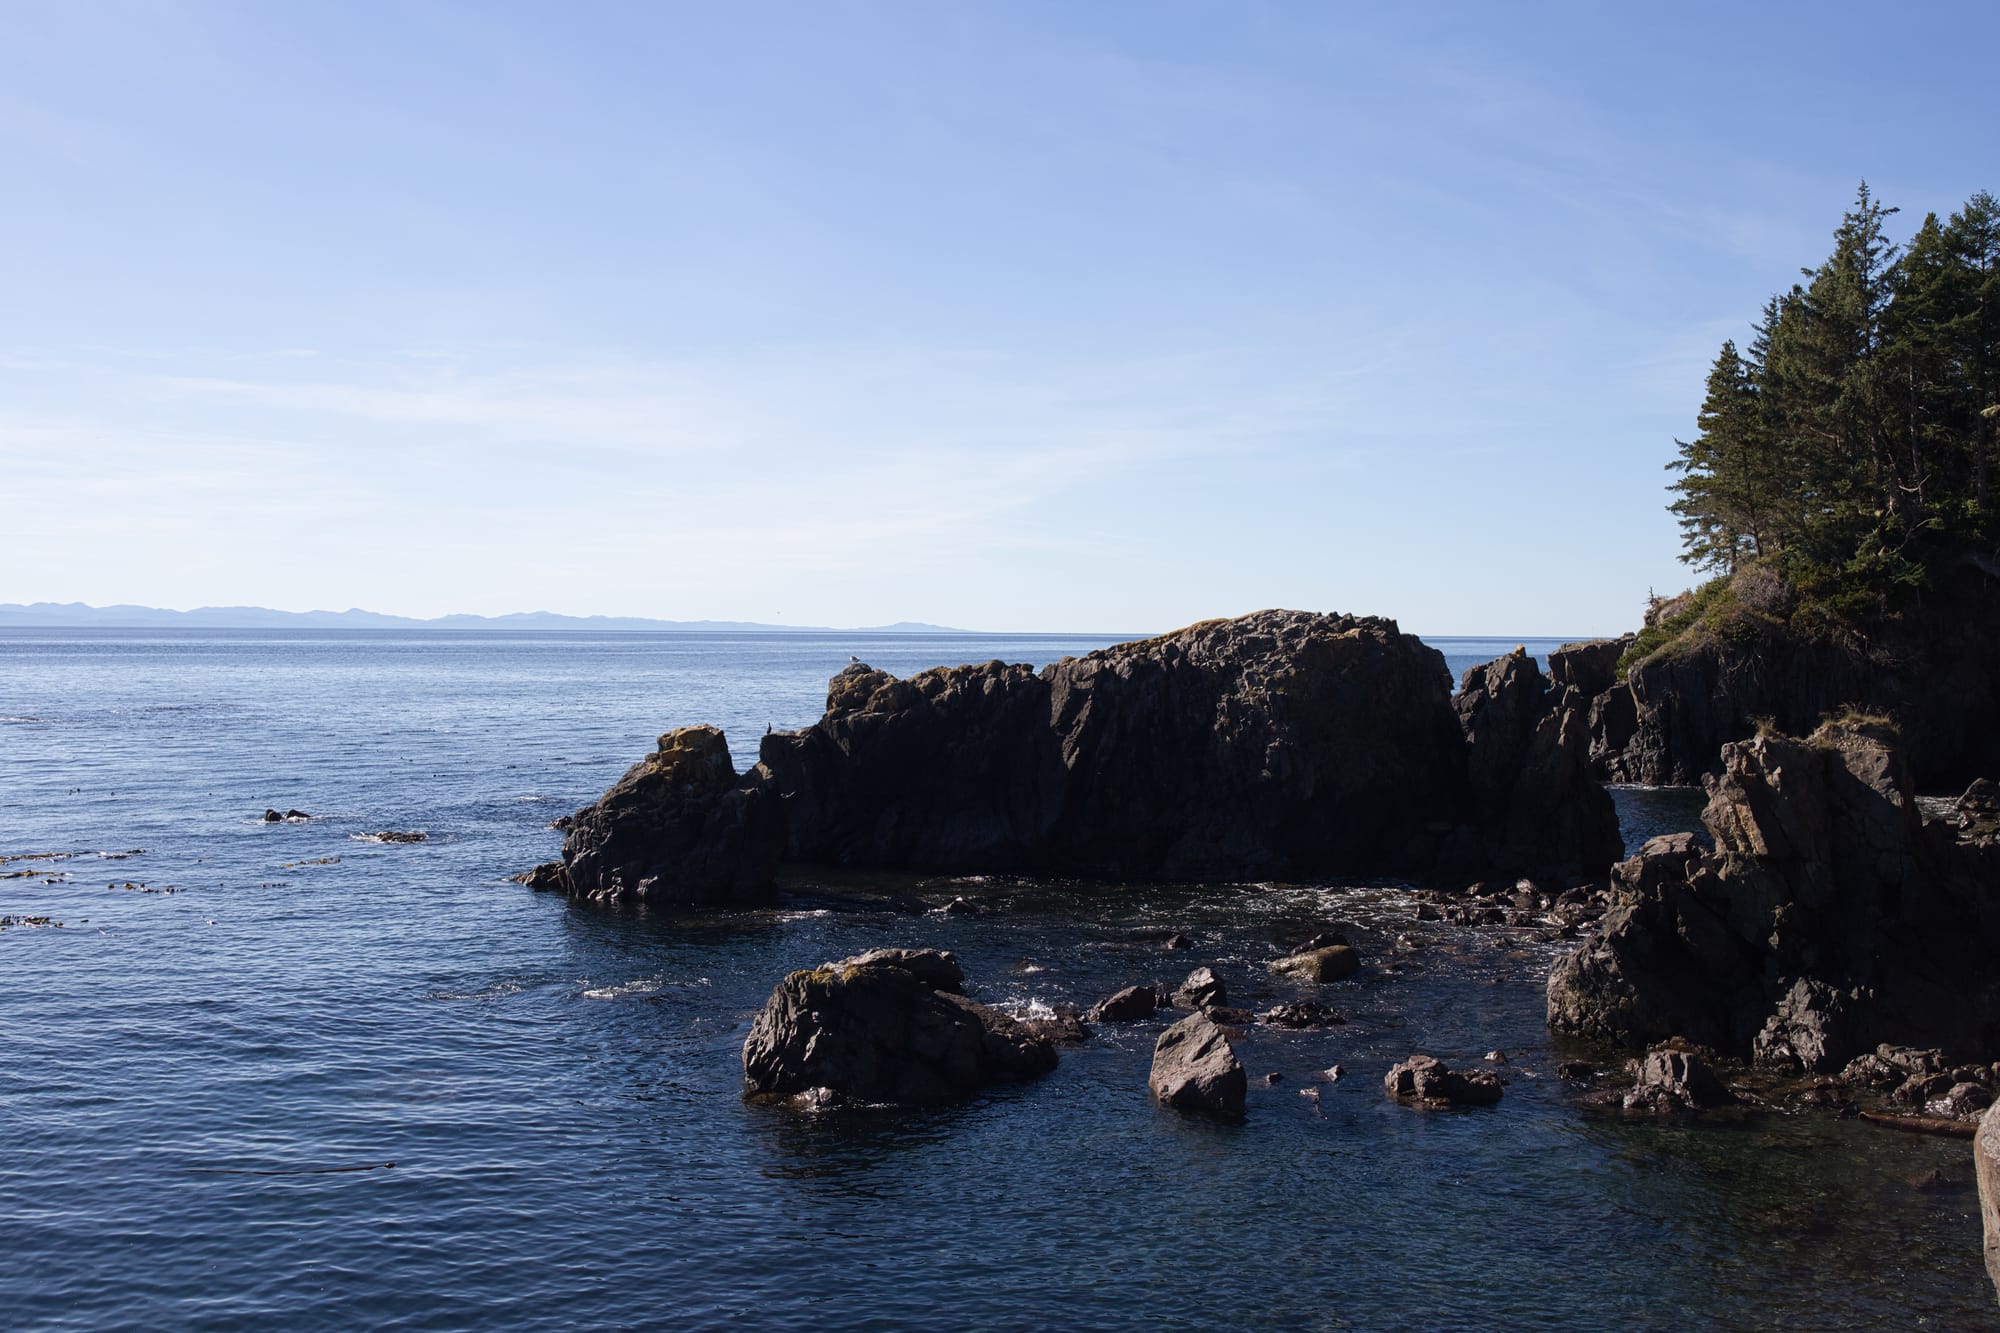
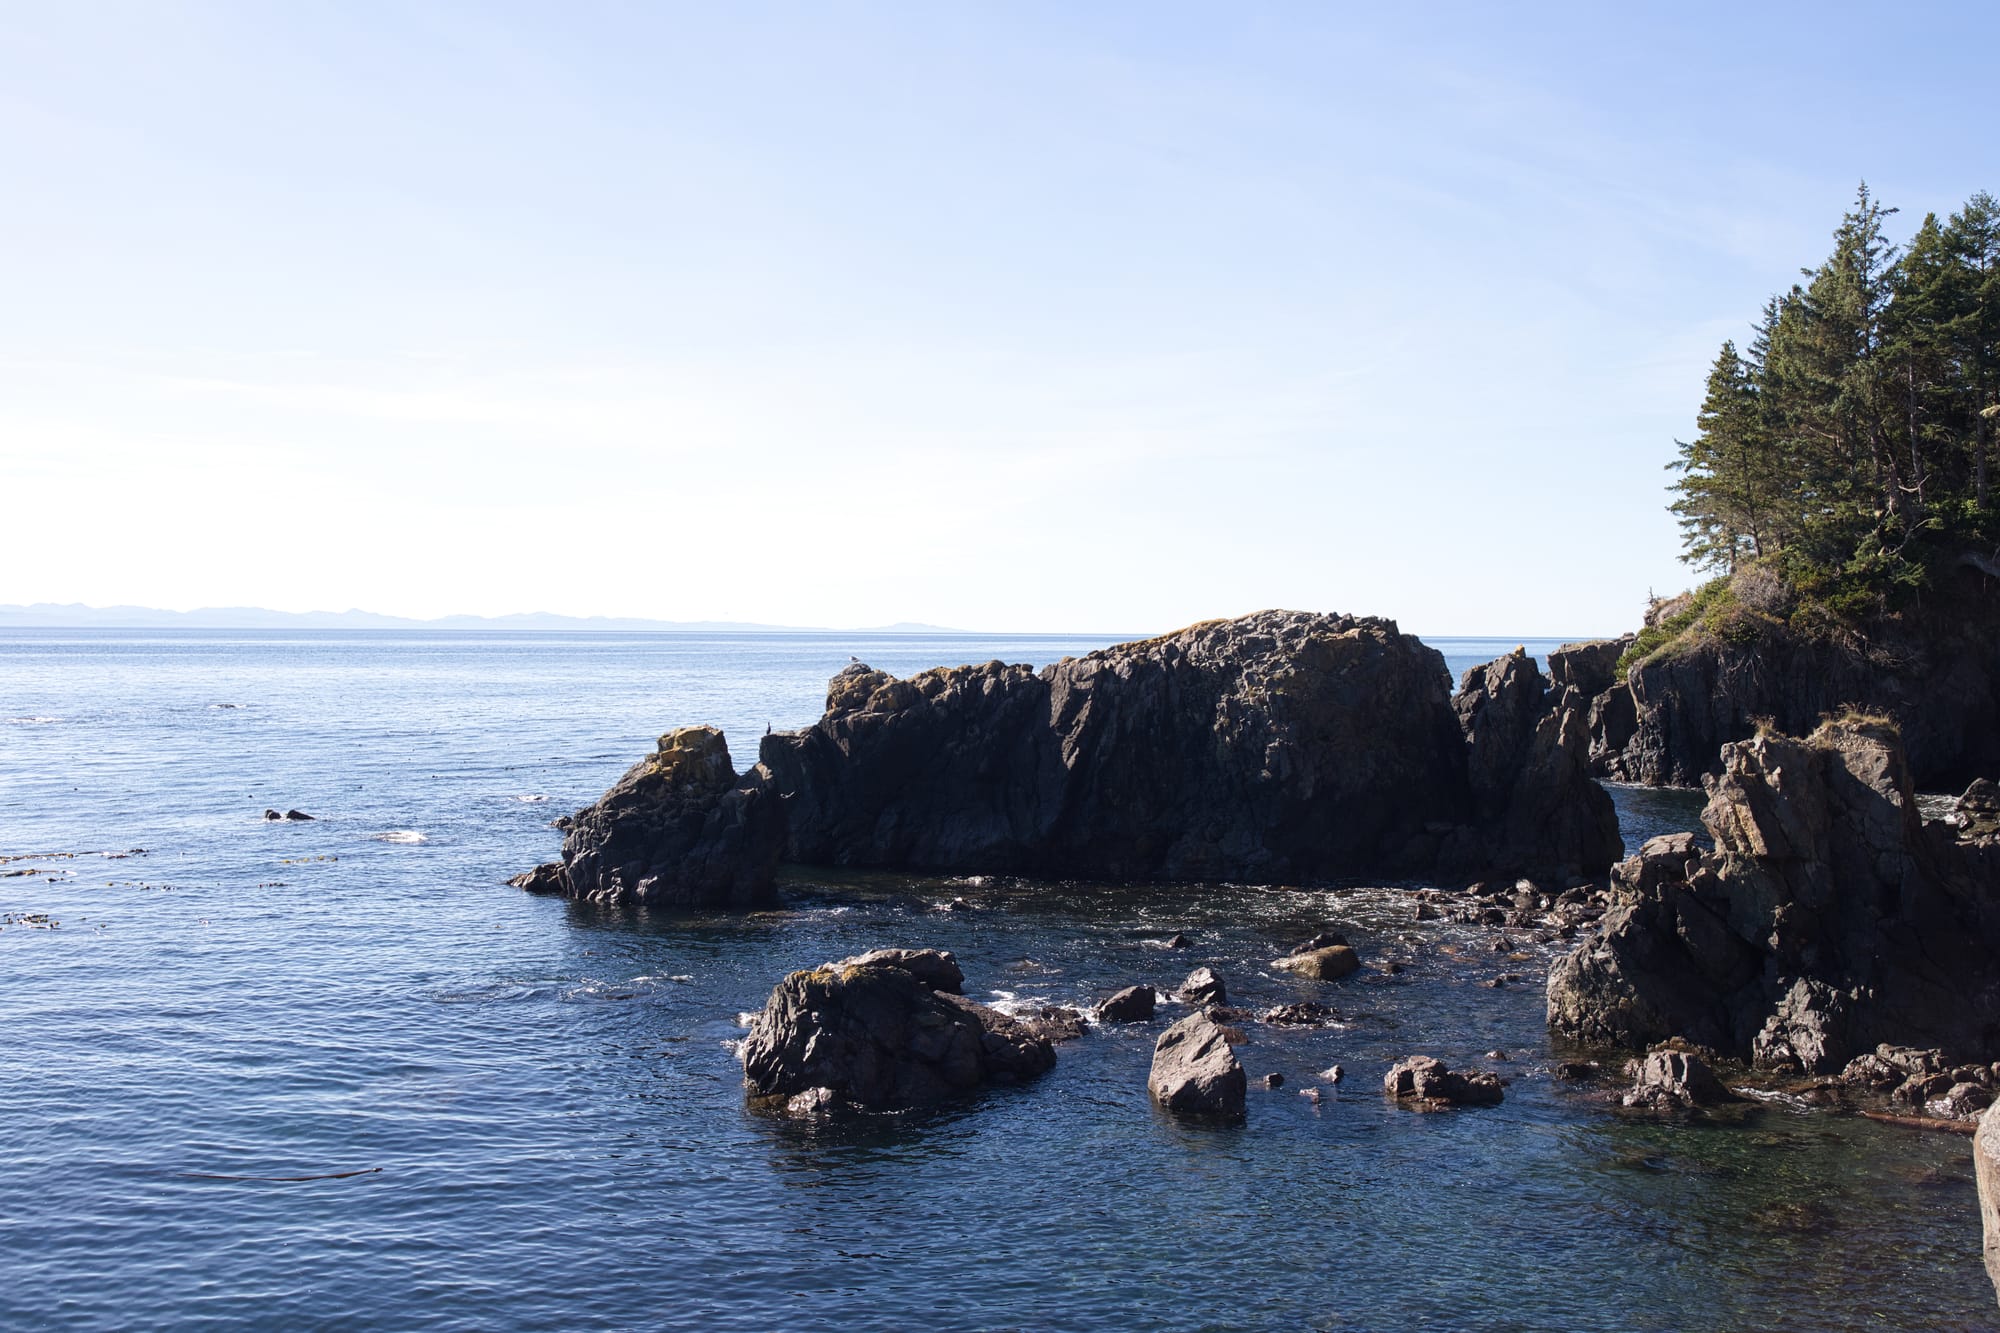
The next feature that I was keen to test was the GenErase tool, which removes unwanted objects from an image by highlighting them with a brush. For most of the images I used GenErase with, the result was flawless as long as I made my selections one at a time. You can see how effective it is with the removal of three surfers from this image below:
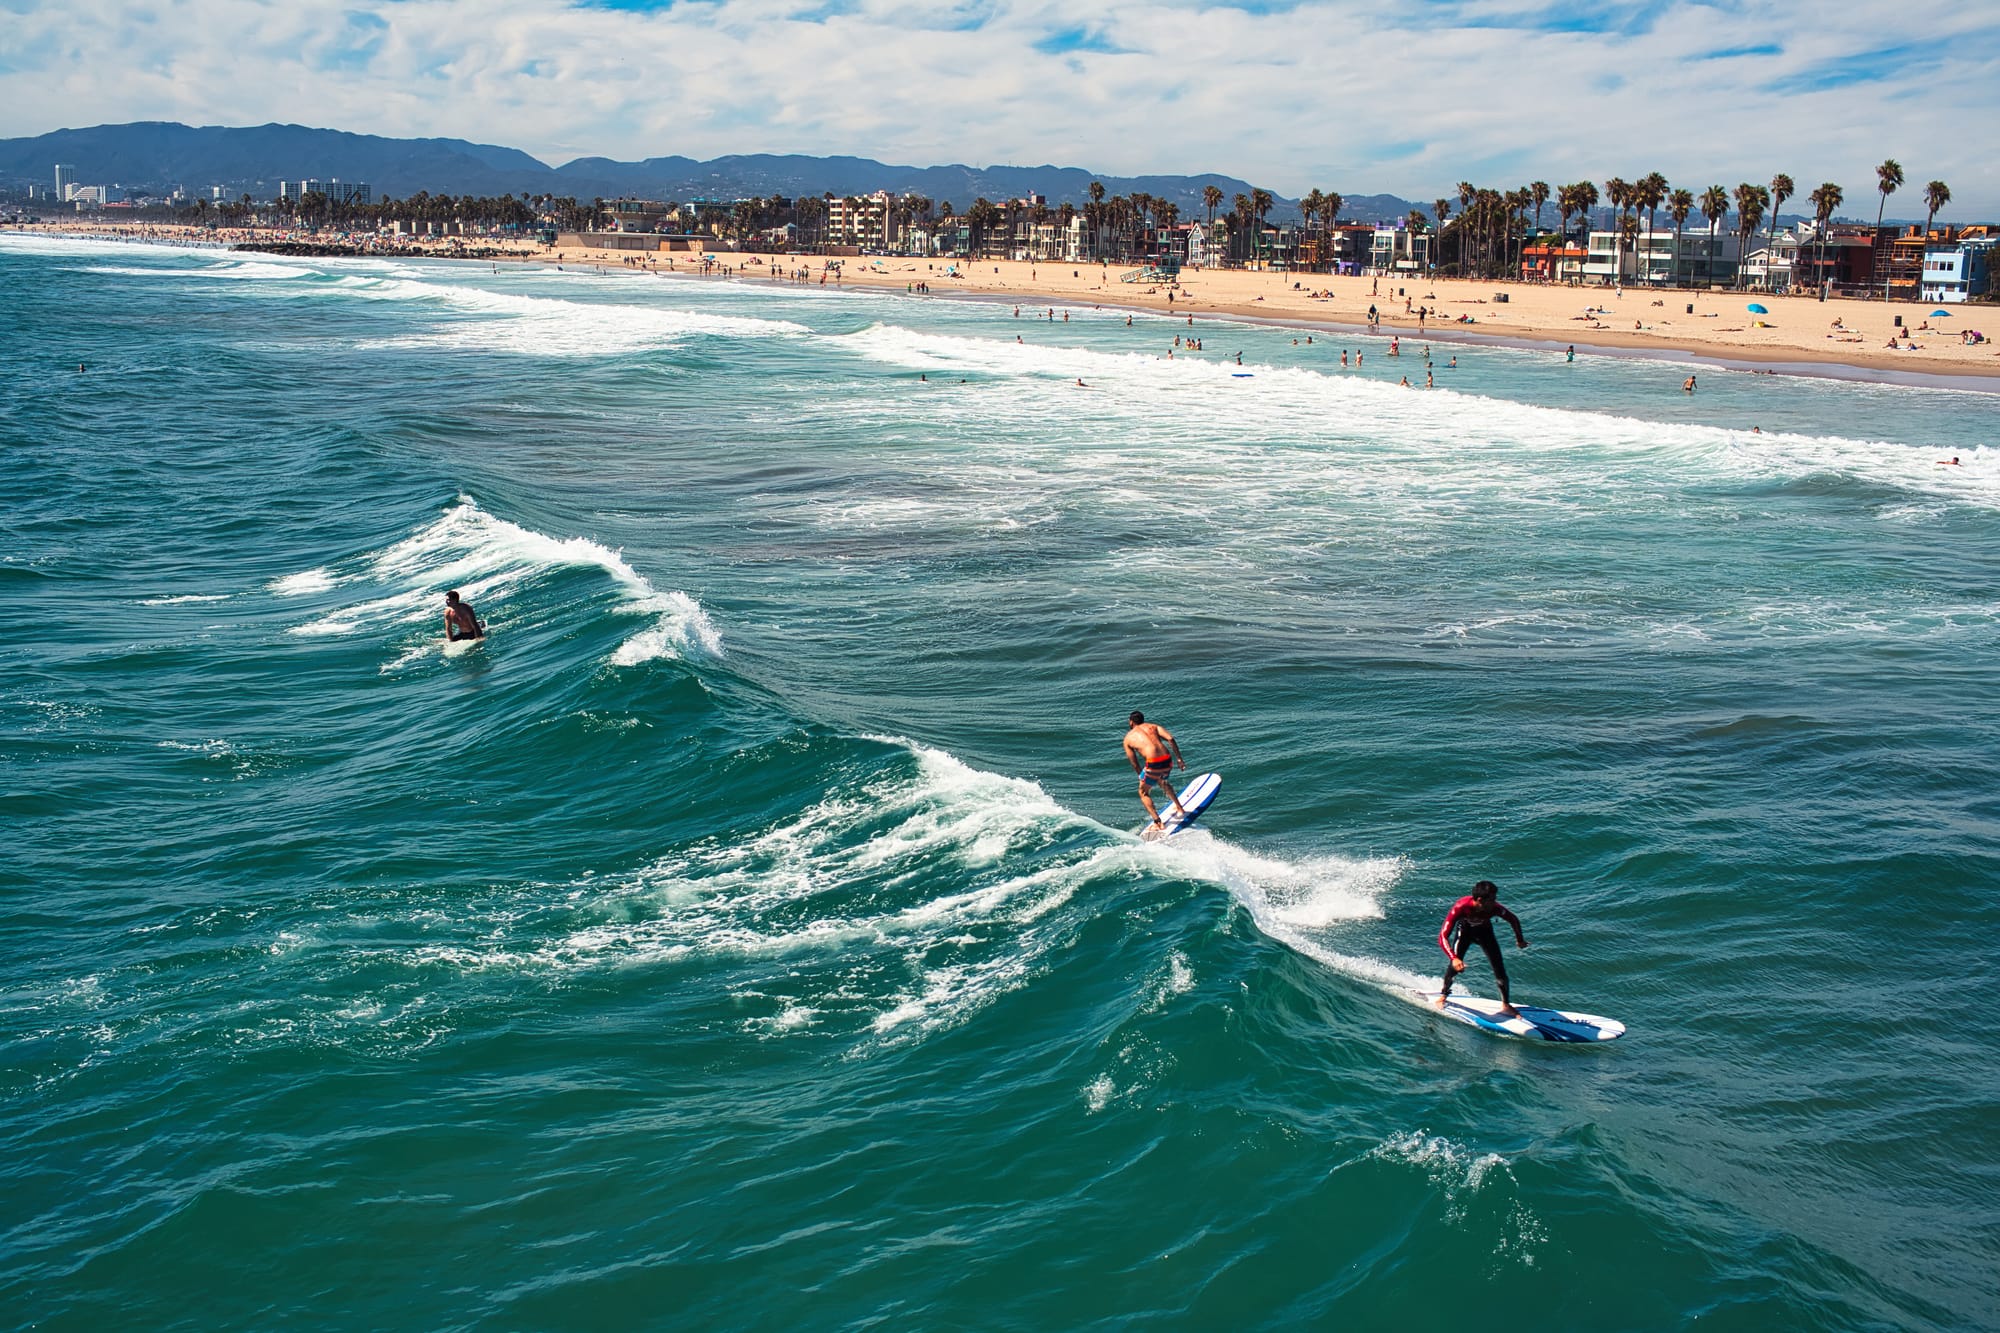
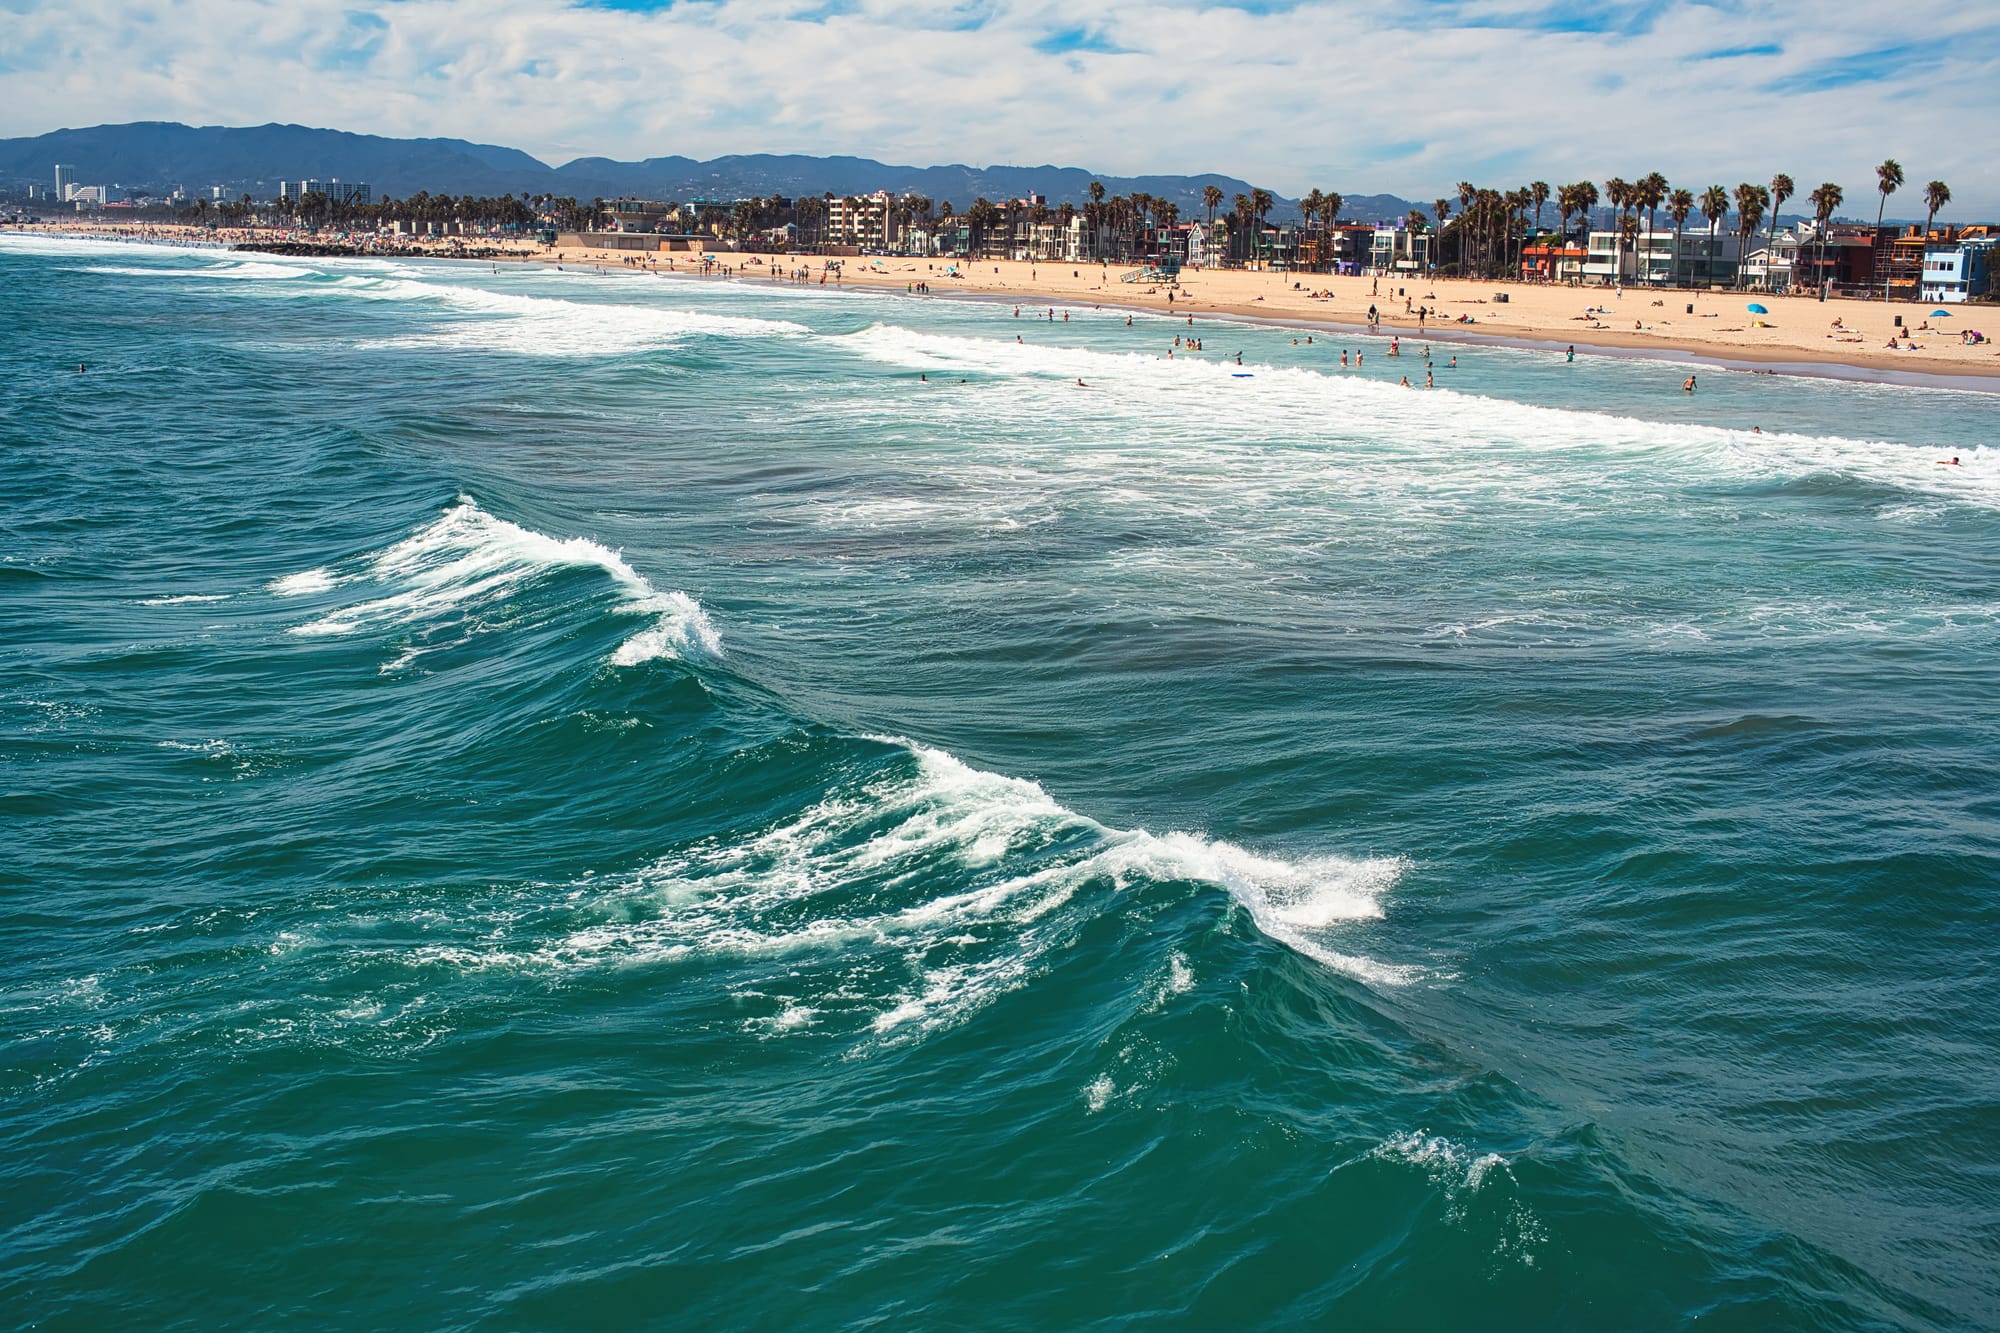
Even upon close inspection, the GenErase tool did an outstanding job of keeping the image looking clean and without any unwanted artifacts after the objects have been removed. Color me impressed.
Panorama Stitching
While most photographers use panorama stitching to combine several landscape images into one, I decided to process a series of images I'd taken well over a decade ago using the Brenizer Method. This technique used to be popular in the early 2010s as a means to create a medium format image from a batch of smaller format images (a Canon 5D in this case). Here you can see the individual frames that I shot in studio:


© Nicklaus Walter | Source RAW Files
I then took these six photos and ran them through Luminar Neo's Panorama Stitching tool, with this being the end result:
Again, I have to give credit where it's due because the final image was stitched together perfectly, and without any flaws.
Upscale Resolution
With the Upscale Resolution tool, I thought it would be fun to stress test this feature with 10 megapixel APS-C images that I'd taken back in 2008-2009 with the humble Canon Digital Rebel XTi. Upscale Resolution allows for three different size outputs: X2, X4, and X6.
Left: Original file at 100% magnification | Right: Luminar Upscale X2 at 100% magnification. Enlarged file is 5184 x 7776 pixels
Left: Original file at 100% magnification | Right: Luminar Upscale X4 at 100% magnification. Enlarged file is 10924 x 14264 pixels
In practice, I found that you can easily get away with softer focus files on X2 upsizing, but the images need to already be critically sharp at 100% magnification for X4 to be effective. I found up to X4 to be a good option most of the time. Unfortunately, I didn't see satisfactory results from any of the X6 enlargements that I tested. The takeaway from running these experiments is that it produces excellent results as long as you keep your expectations reasonable, as the X4 setting is already a big leap in image resolution.
Noiseless RAW
While organic grain is usually appreciated when shooting film, noise from digital sensors generally degrades image quality in an unflattering manner and is usually best avoided. For this test, I used an image that I took at F4, 1/100th of a second, and a very high ISO of 12,800 in the early morning hours before sunrise. Look at the original 100% crop below to see just how noisy the image is.


In this case, again Luminar Neo passes with flying colors for removing the unwanted noise without further deteriorating the image. Noisy images are inevitable in less than ideal working conditions, so this is an incredibly useful to tool to have at your disposal when those occasions arise.
Focus Stacking
When shooting at closeup distances with a macro lens, depth of field becomes incredibly shallow even when shooting at narrow apertures such as F11 or F16. However, if you're shooting a watch in a studio environment for example, you're likely going to want the entire watch to be in focus from front to back. This is where focus stacking tools are needed.
I tested this tool on a long piece of rope using a tripod and 100mm macro lens to create a series of images with different points of focus. I then combined them together in Luminar Neo using the Focus Stacking tool.
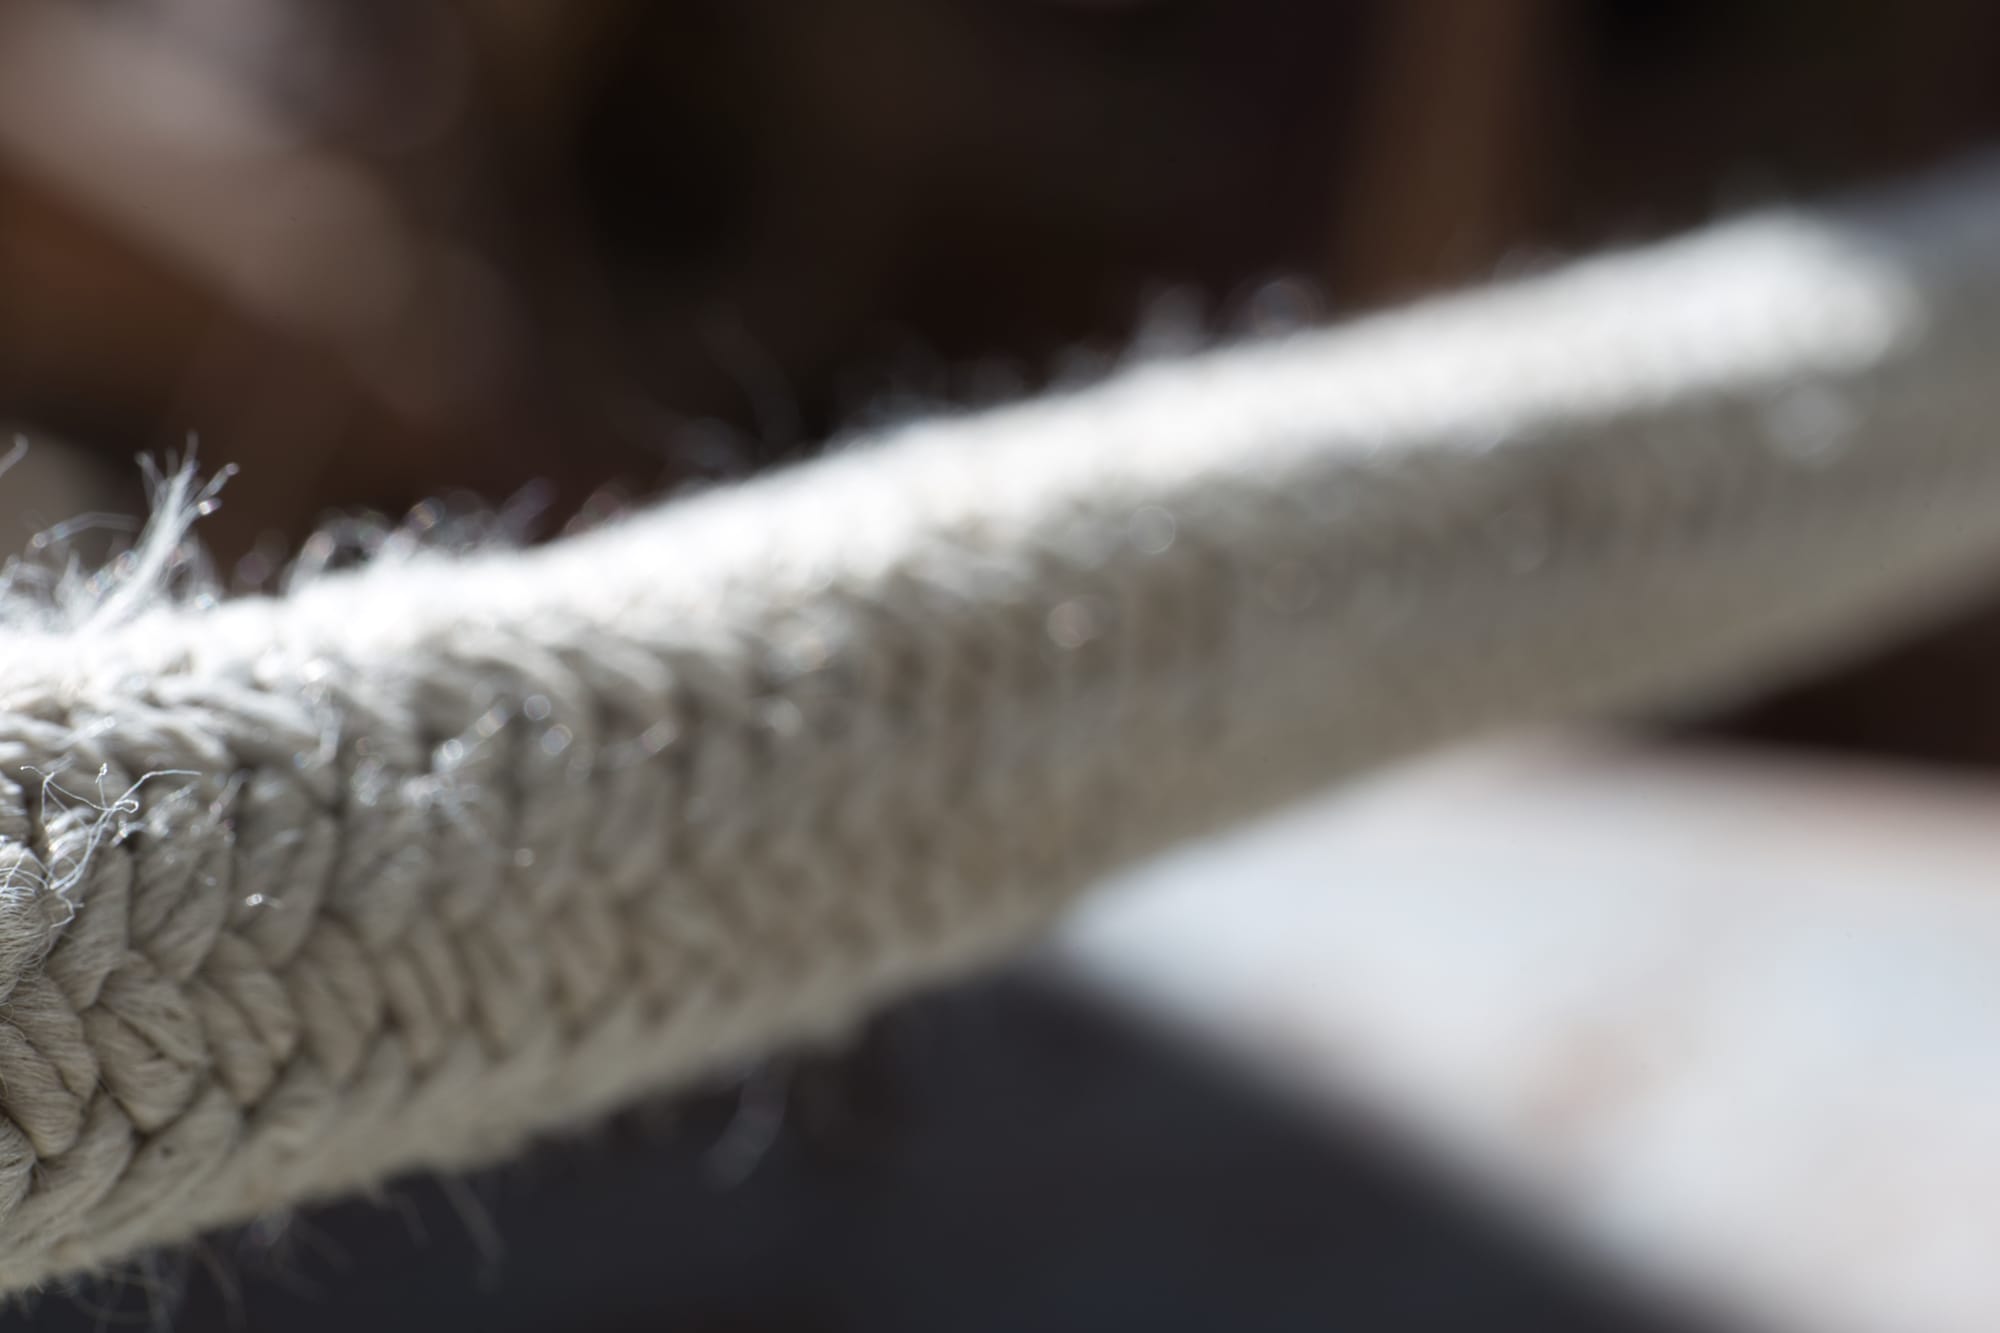

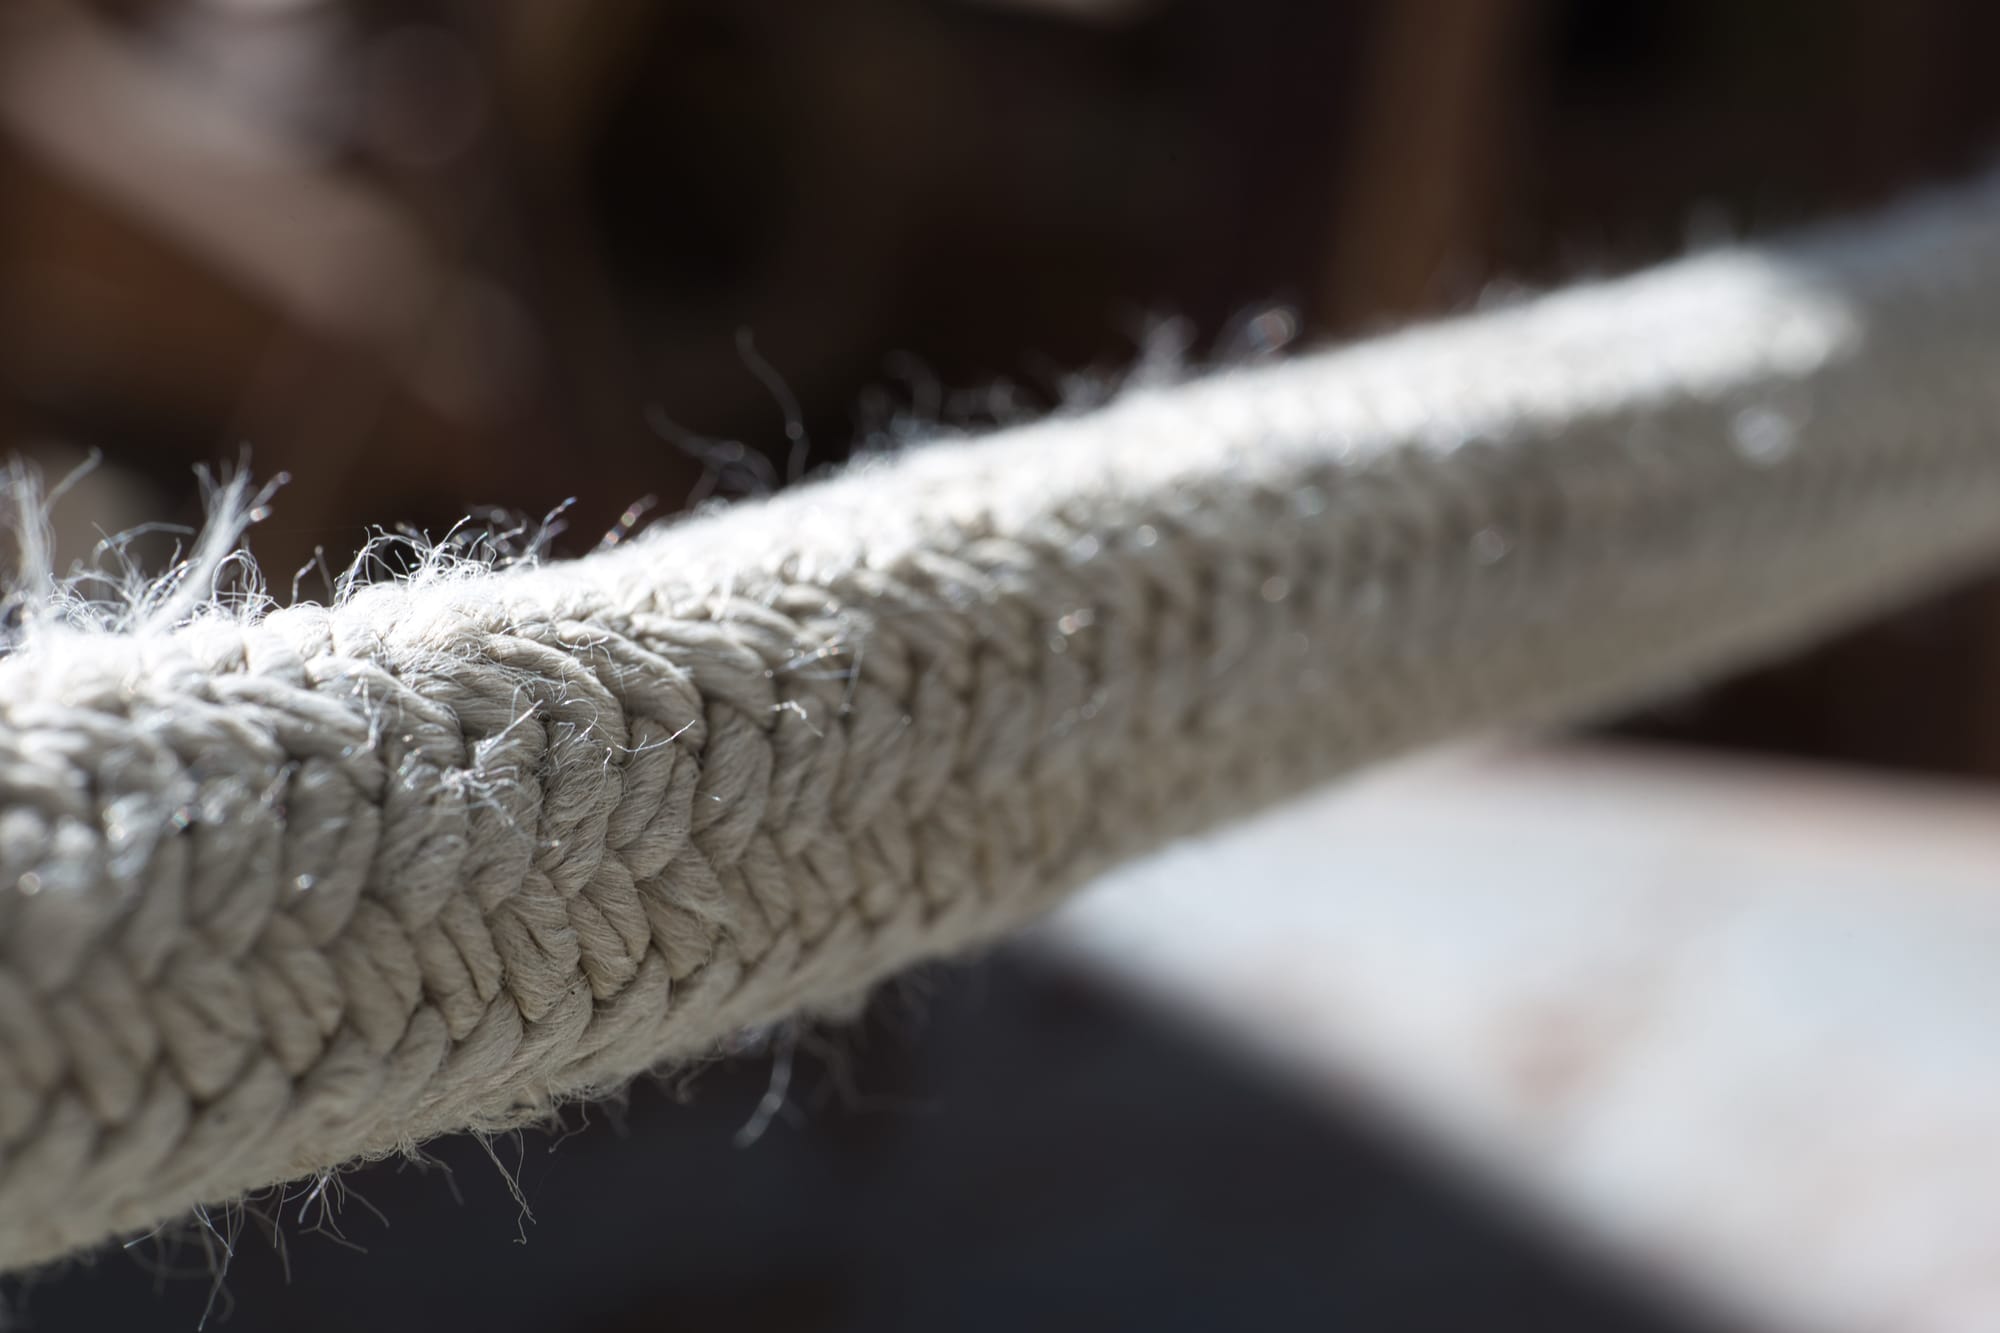

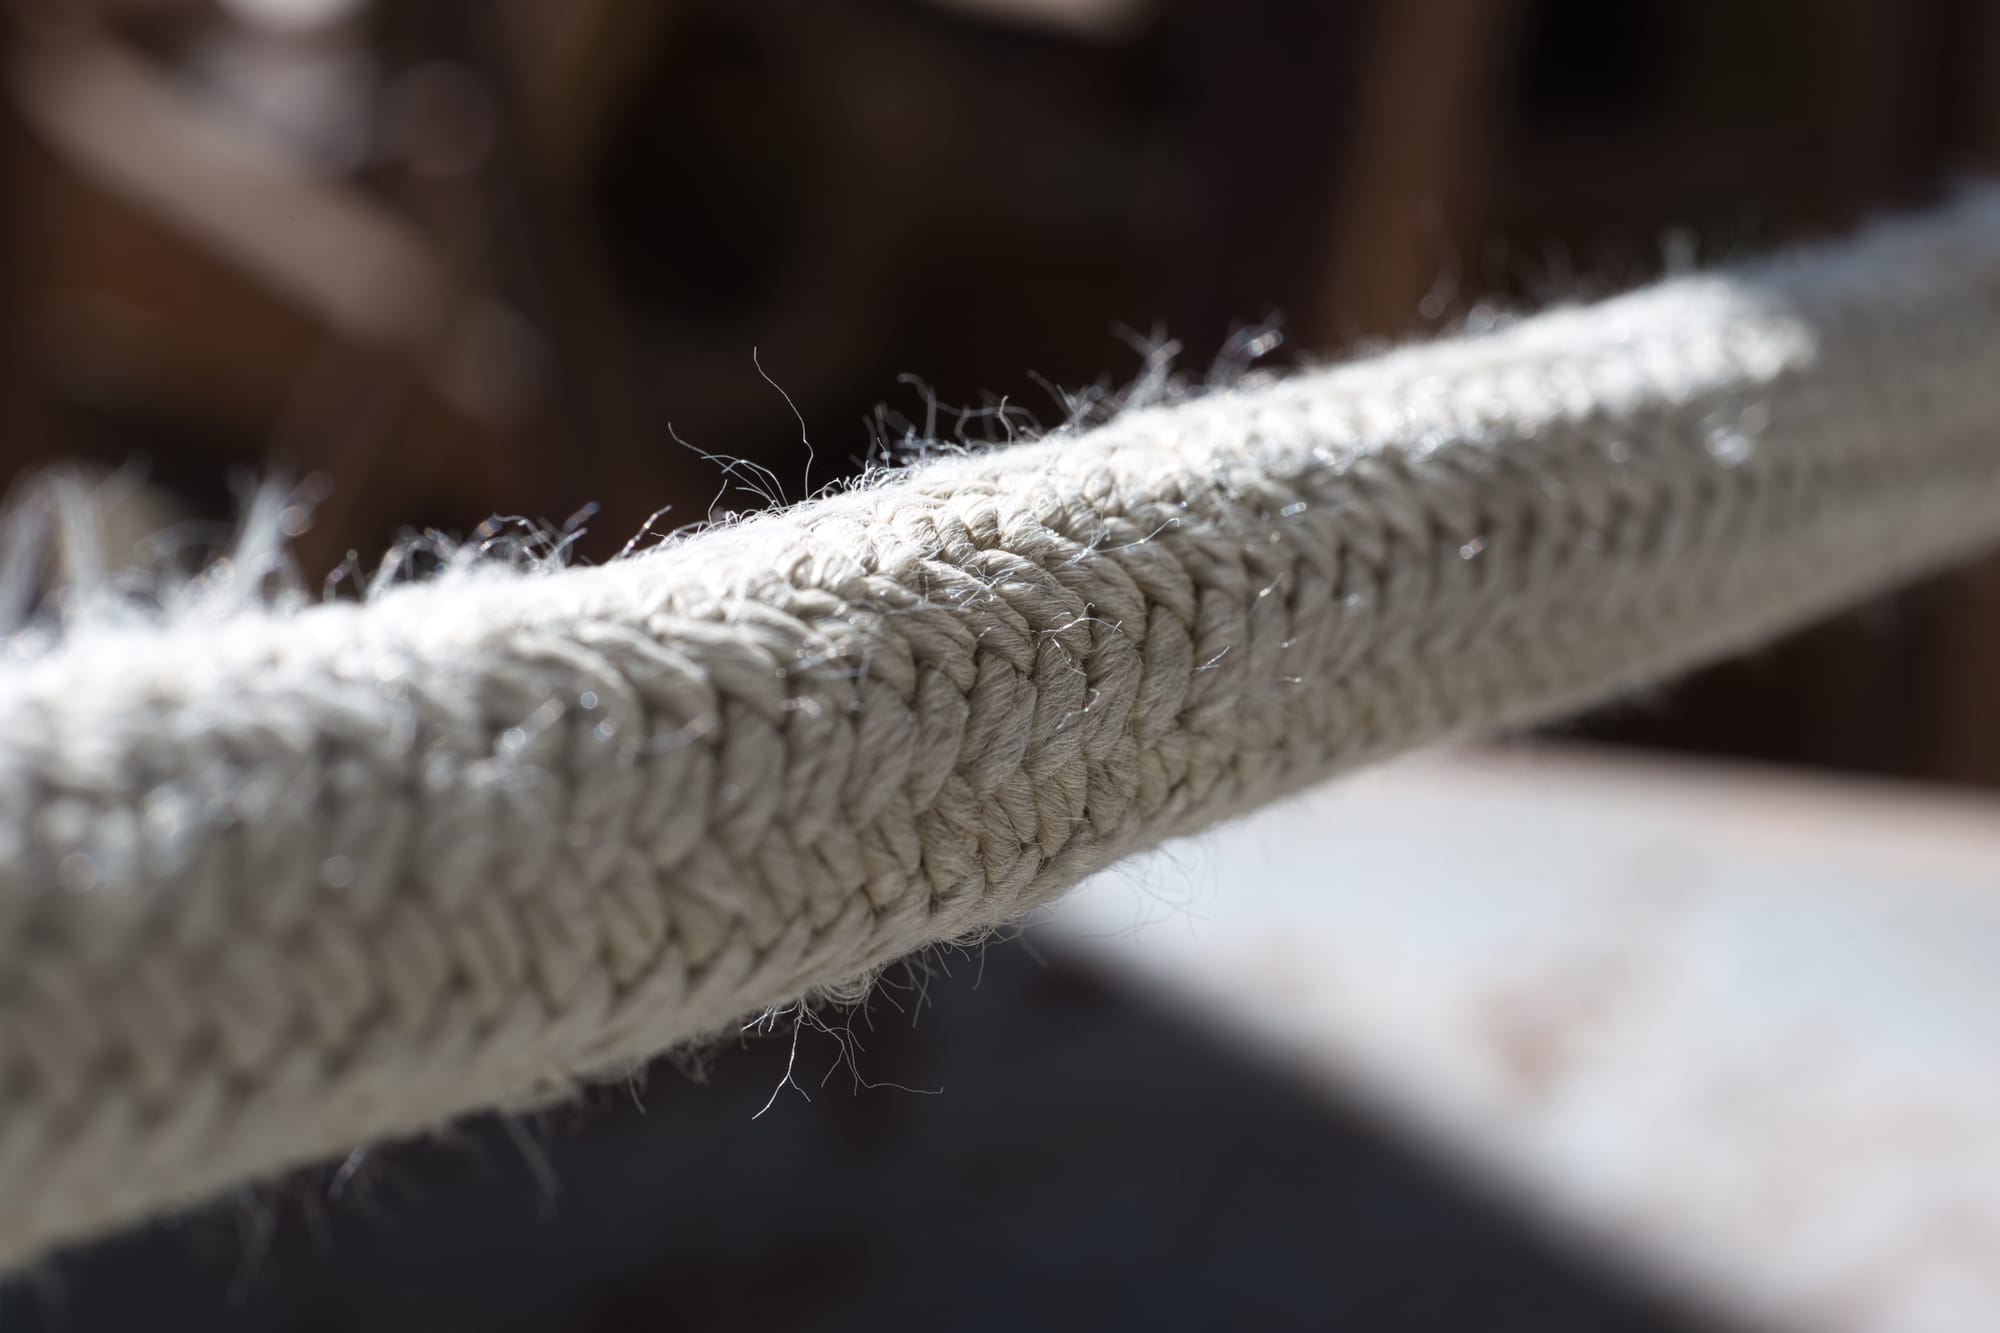
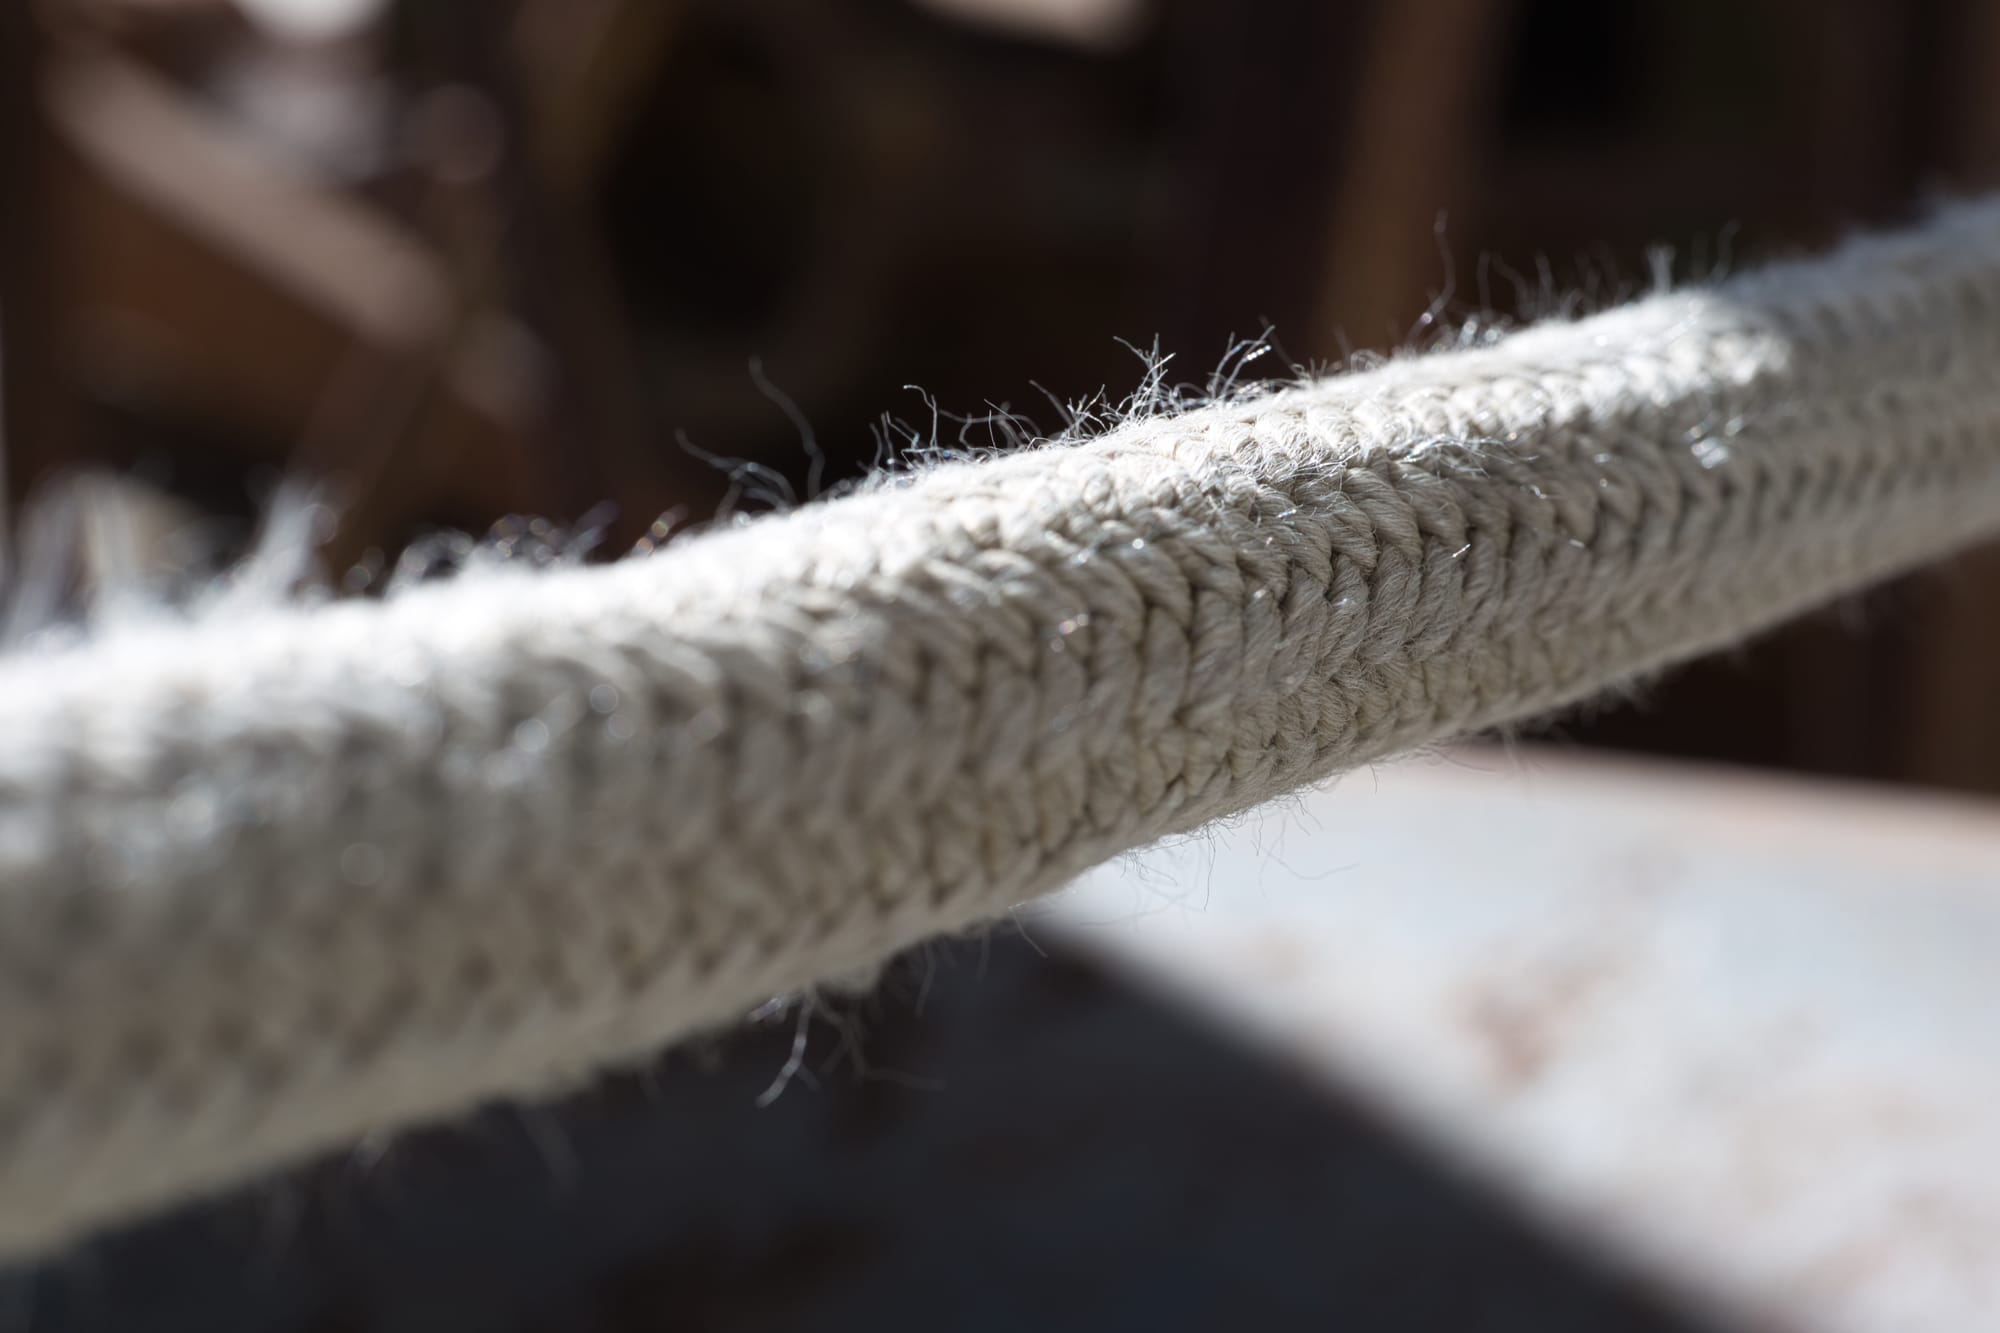
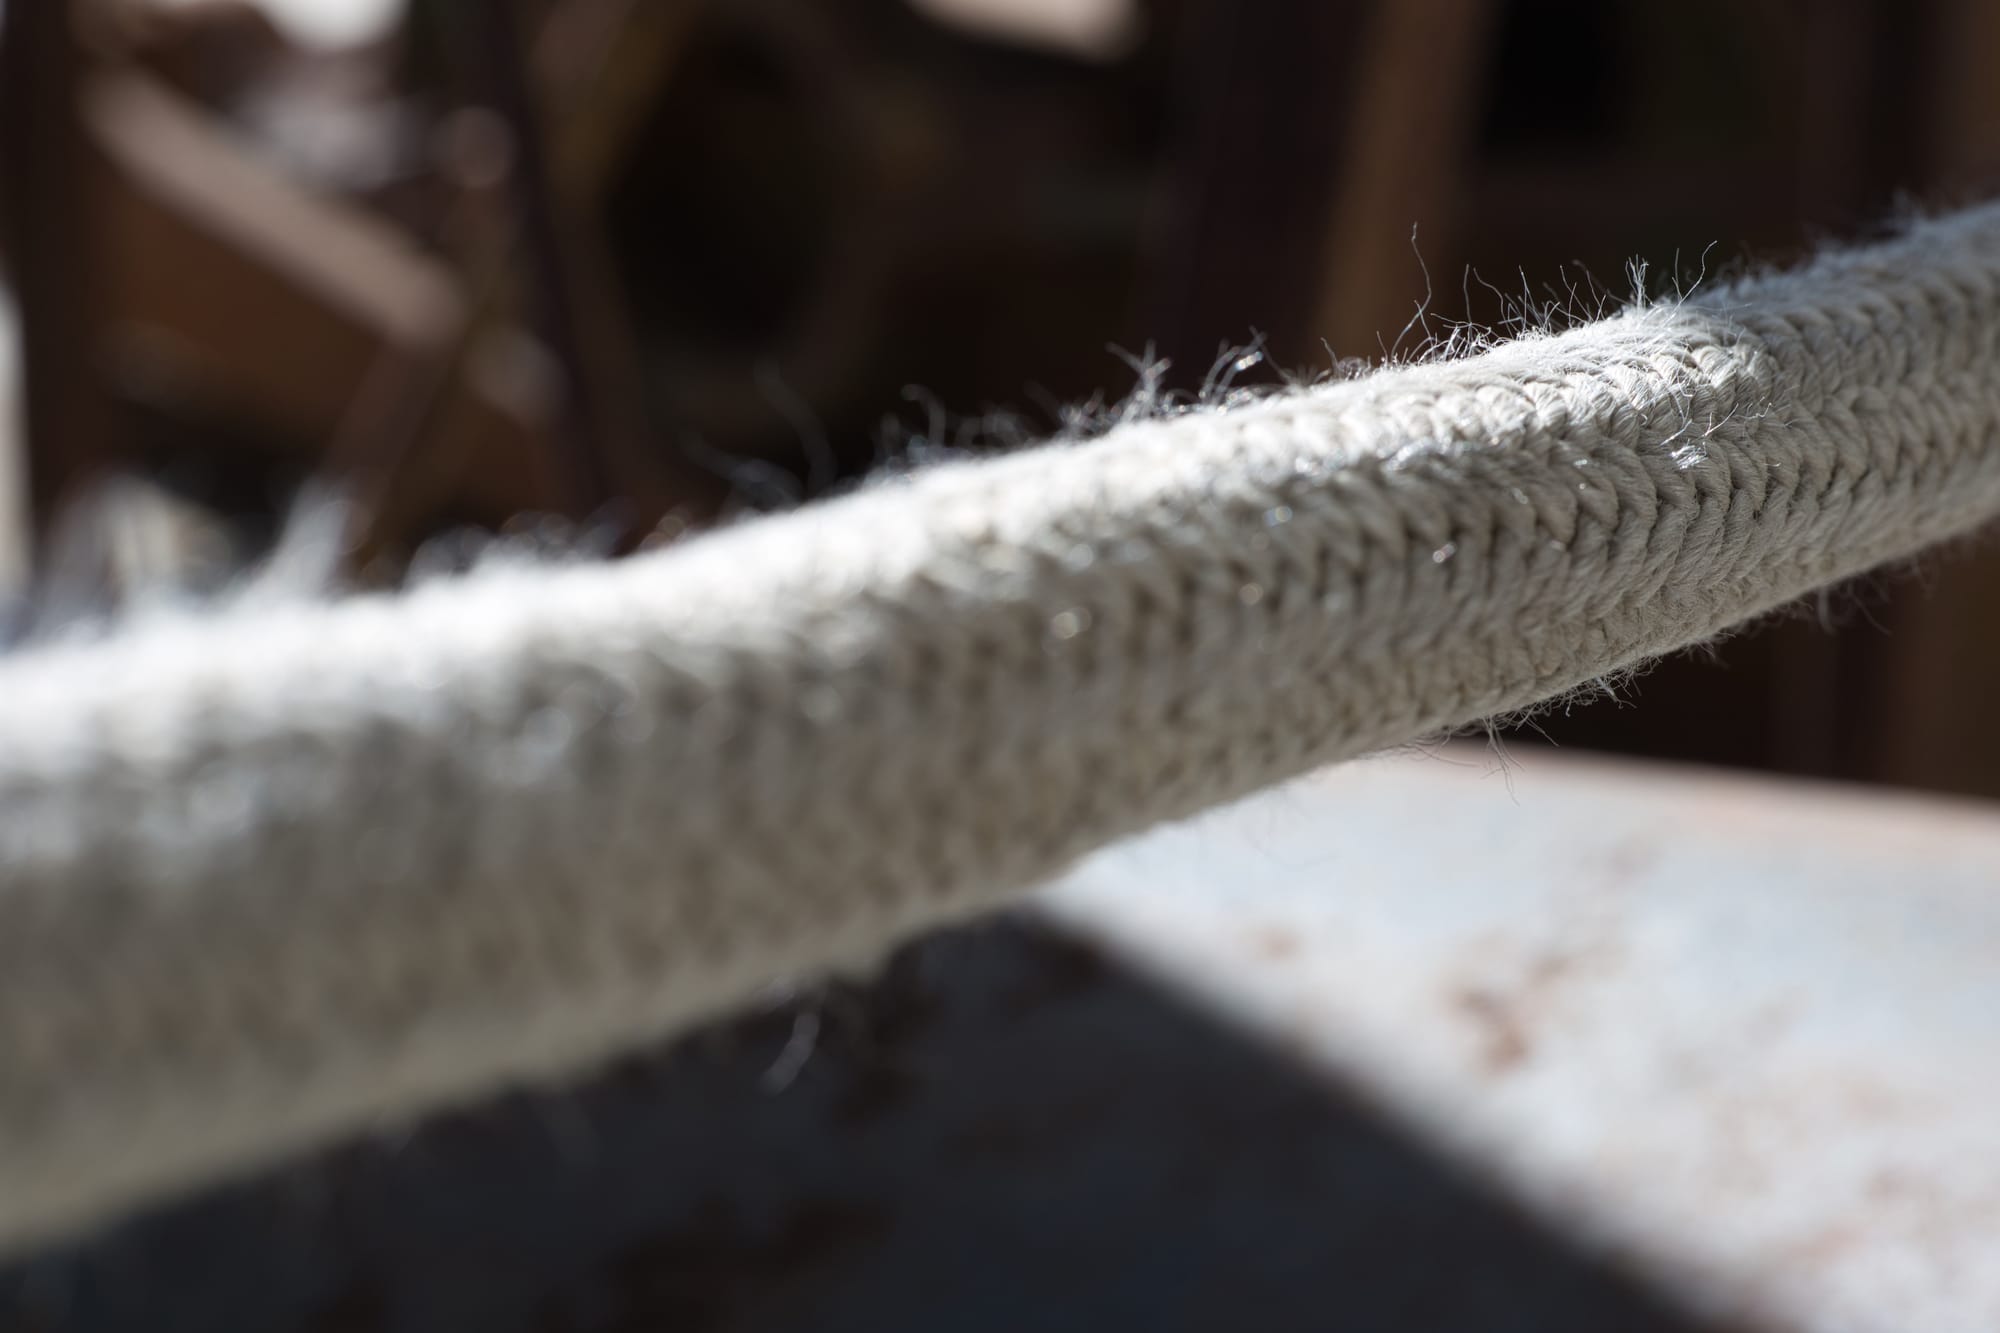
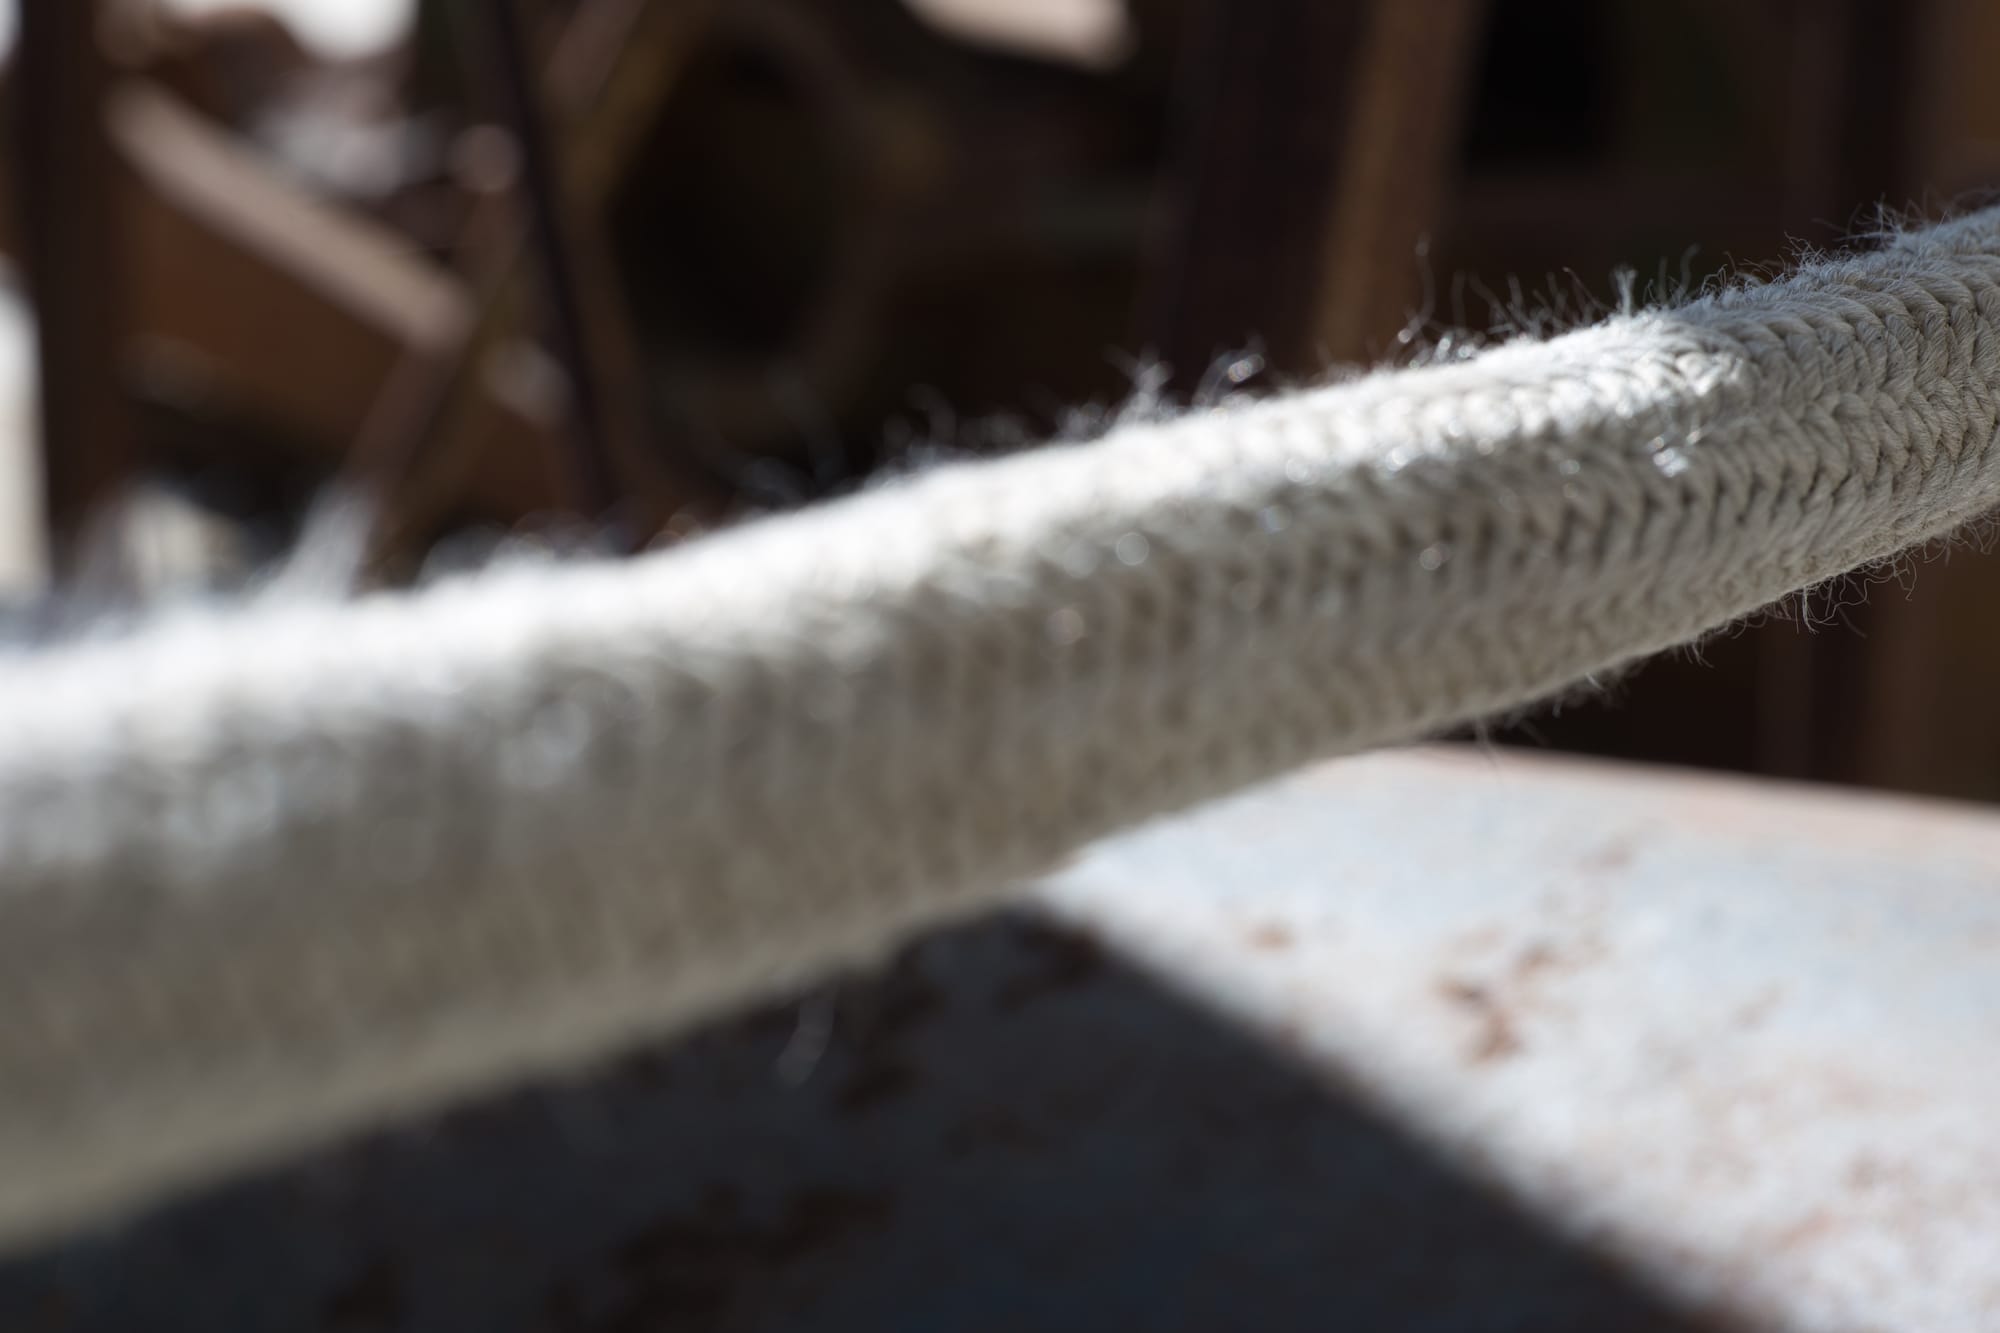
© Nicklaus Walter | Source RAW Files
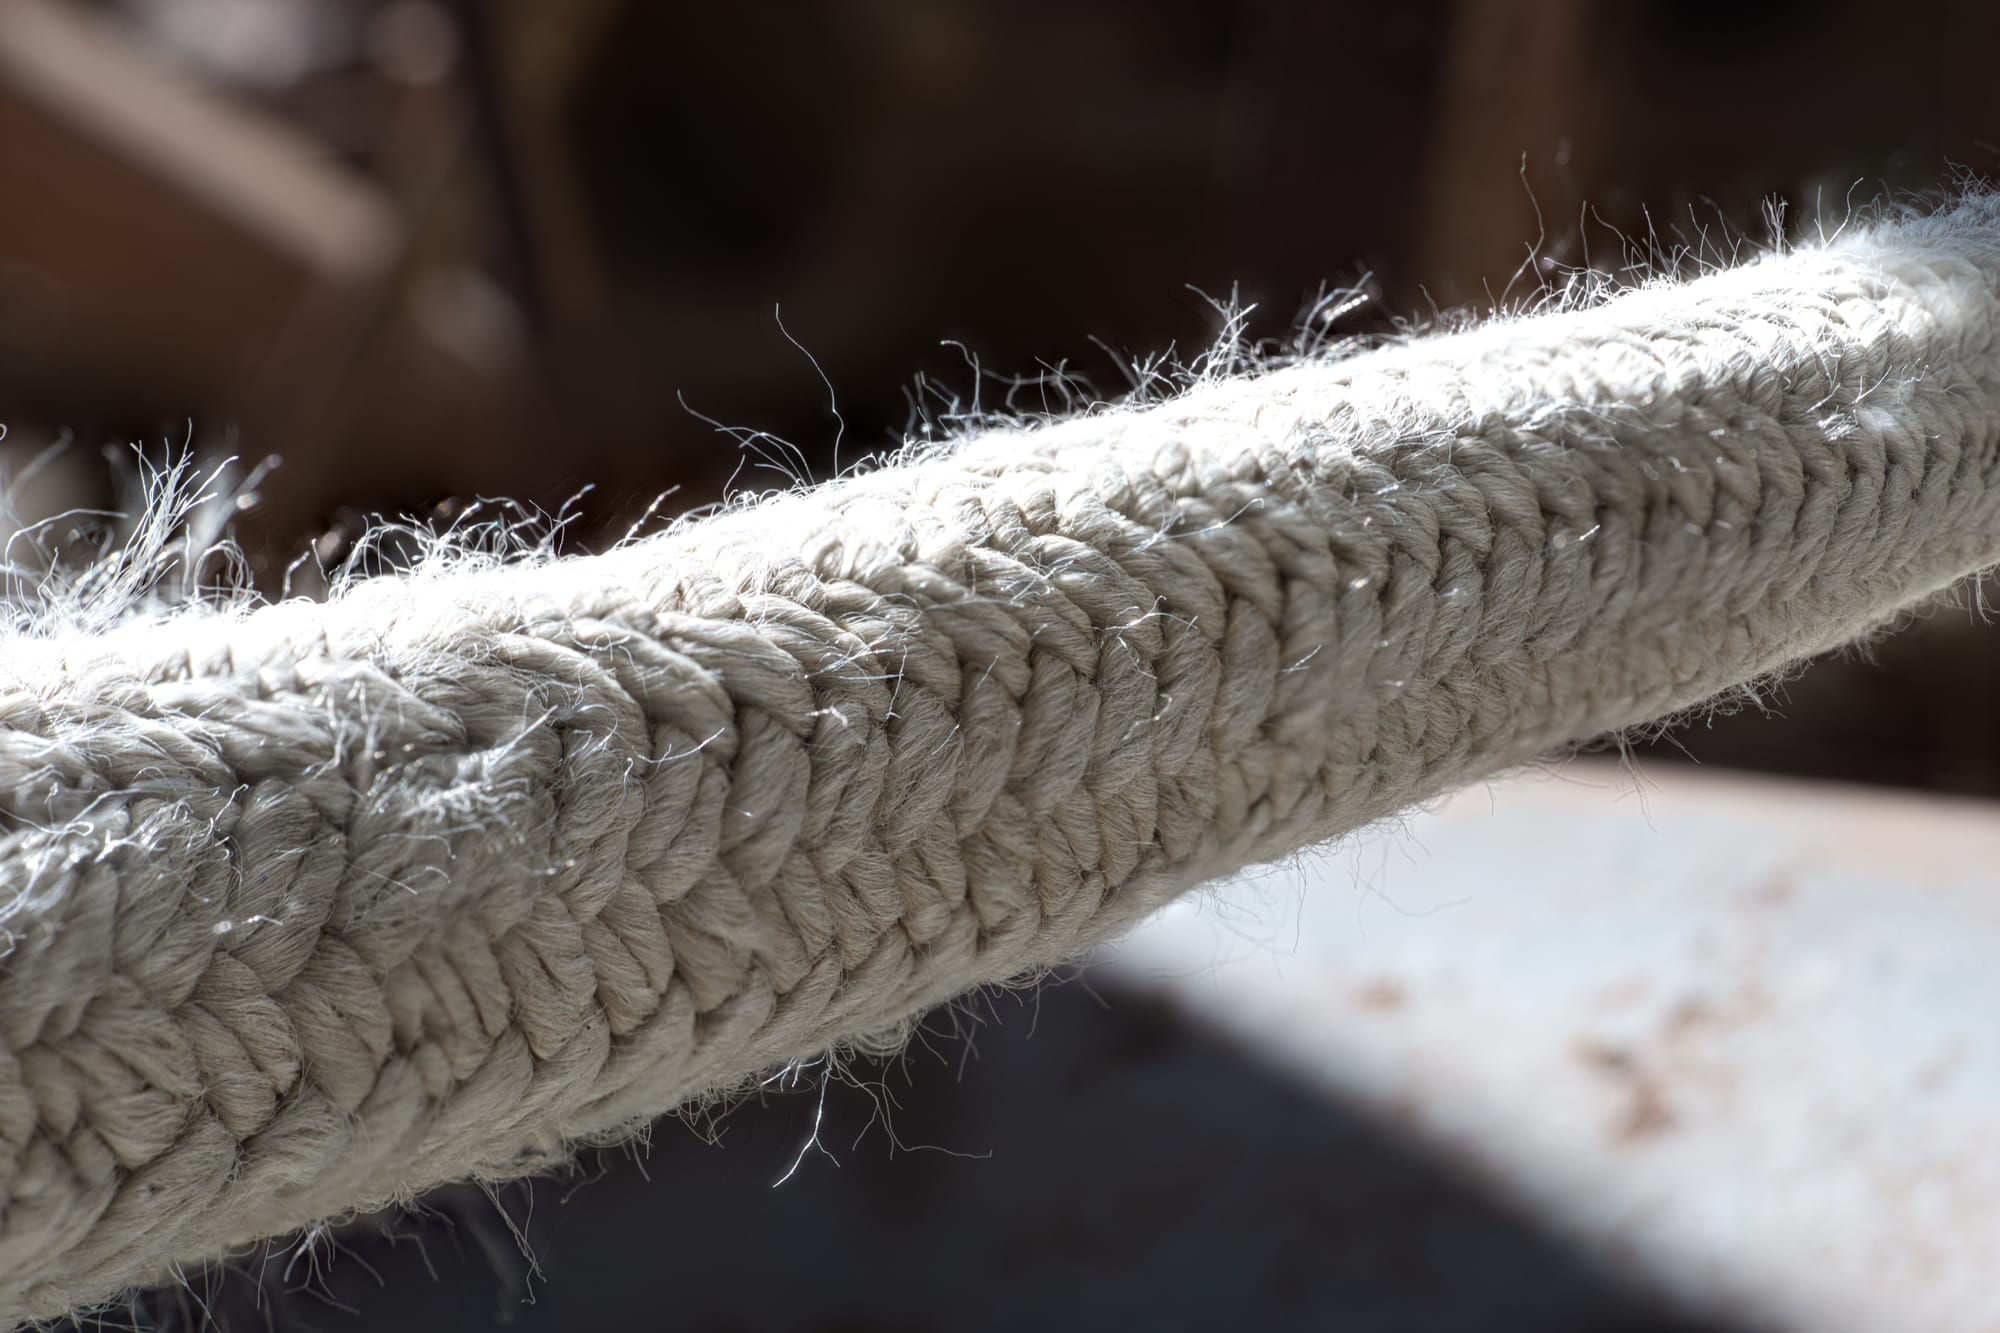
As you can see, it automatically did a remarkable job of seamlessly combining the images together for an image that showcases a deep depth of field. I found that it works well if your shooting technique is solid, and you'll need to watch out for focus breathing as some lenses are better at compensating for this than others.
The one issue you may have noticed in the final image is that the highlights are blown out, even though I recovered the highlights in the individual RAW files prior to combining the files in the Focus Stacking tool. This is an annoying bug, but can be mitigated by using processed Jpeg files instead of RAWs.
HDR Merge
This was the feature that I was worried about the most, because high dynamic range tools are notorious for producing cartoonish results that I despise. Let's see how HDR Merge fares with these bracketed images that I shot.


© Nicklaus Walter | Source RAW Files
© Nicklaus Walter | Source RAW Files
I certainly didn't expect this feature to work well, but it turned out great with tasteful results that I actually appreciate. In both images, you can see full detail in highlights (minus the sunstar) and shadows without it actually looking like an HDR mess. And keep in mind that I haven't edited the RAW files whatsoever; all I did was run them through the HDR Merge tool and this was the output. That's yet another point scored in Luminar Neo's favor.
Considerations
As much as I enjoyed using all of the aforementioned tools, there was one instance where I was hoping the software would perform and it simply wasn't up to the task. The Skin Defects Removal function for portraits sadly didn't meet my expectations, as it left obvious clone stamp marks on blemishes that I would have to manually fix myself anyway. It may be of some use as a starting point, but personally I would rather start from scratch using frequency separation techniques in Photoshop.
Pros
- User friendly interface
- Negligible learning curve for beginners
- Lots of one click solutions / sliders that are actually useful
- Automated selection masks of various elements (mountains, sky, etc) is precise and saves a lot of time
- Excellent selection of presets that markedly improve image tonality
- GenErase, Panorama Stitching, Upscale Resolution, Noiseless RAW, Focus Stacking, and HDR Merge are all top-tier professional tools
Cons
- Skin Defects Removal tool doesn't work well enough to replace frequency separation techniques using Photoshop
- Some bugs need to be worked out such as prior RAW file edits not being applied when images are combined using the Focus Stacking tool
Verdict
The Skin Defects Removal tool didn't work well for me, and other features like the sky replacement function are a bit too over the top for my taste when it comes to its use of generative AI. I also don't see it as a complete replacement for Capture One's outstanding color profiles.
But overall, I came away quite impressed with what Skylum has accomplished with Luminar Neo. I see this being a compelling option for beginners and enthusiasts who want to leverage the latest advancements in automation to enhance their images in a tasteful way without the steep learning curve of legacy tools like Adobe Photoshop.
It's also equally valuable for experienced photographers like me who desire the efficiency of more advanced tools like HDR Merge and Focus Stacking, all in one simple to use package. There are of course other photo software offerings out there that offer similar functionality, but it's Luminar Neo's ease of use and enjoyable interface that really make it stand out from the competition.